

Google Smart Home Configuration Guide
The Ubases IoT cloud platform integrates common smart speaker voice-control services. Users can wake a smart speaker with a specific phrase and control devices by speaking specific commands.
This article explains how to integrate Google smart speakers and configure voice control for products on the Ubases IoT platform. Google supports multiple integration approaches; Ubases IoT integrates the smart-home cloud-to-cloud model covered in this guide.
Before diving into details, understand the communication relationship among the App, speaker, voice-control cloud, and Ubases IoT platform. This helps you understand the overall process and the logic behind some configuration items.
The communication diagram is as follows:
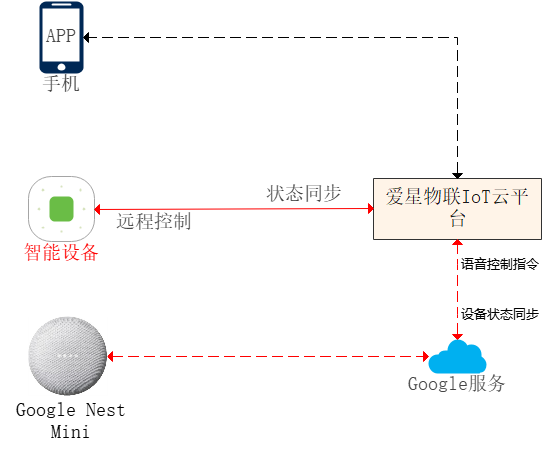
In the diagram, Google Nest Mini is a Google smart speaker; Google services are the Google smart-home services; and smart devices are networked products that support voice control, such as aroma diffusers, air conditioners, smart clothes-drying racks, and smart curtains. Dashed arrows represent short-lived connections; solid arrows represent persistent connections.
After understanding the communication relationship, register a Google developer account and proceed with the following steps.
Google Smart Home Configuration Flow:1. Create a project
Go to the Action creation page: https://console.actions.google.com/
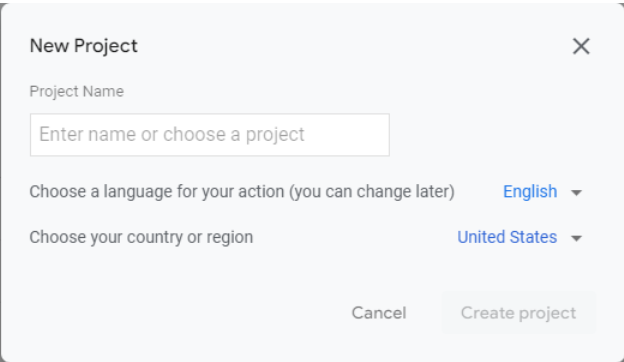
Enter the project name, and select language and region. The platform currently supports English only; language must be set to English.
2. Configuration overview
Open the project configuration overview page to see the full configuration flow.
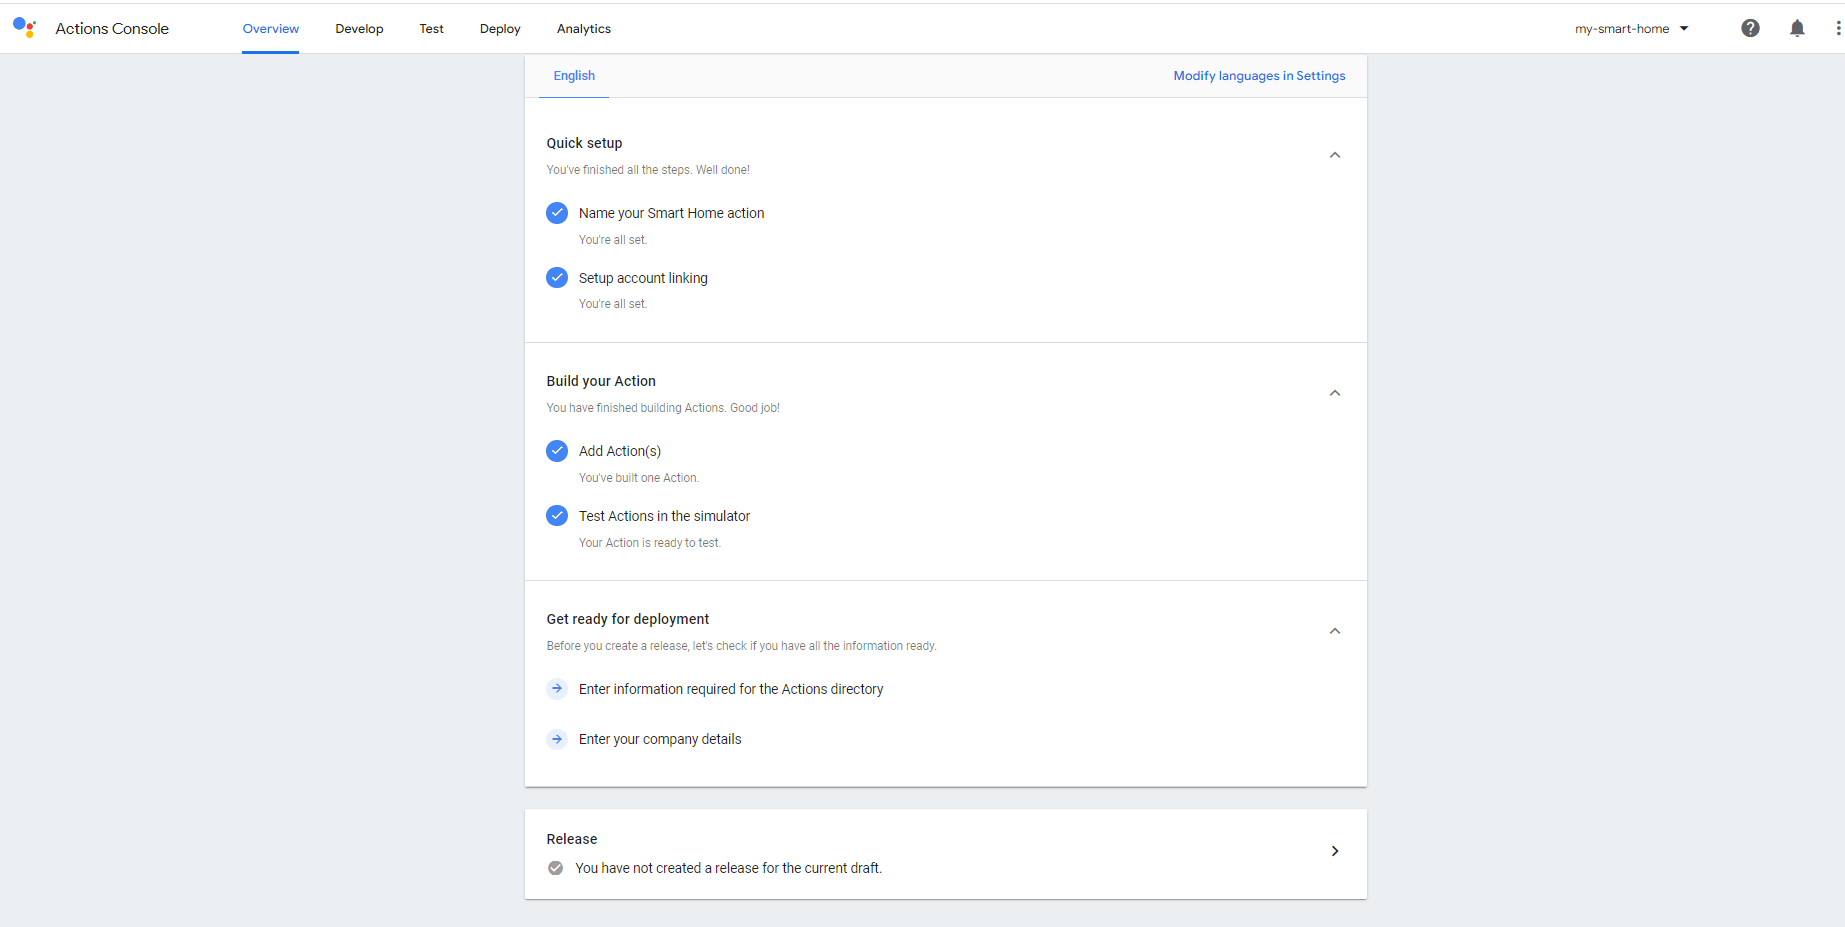
3. Invocation configuration
Expand Quick setup, click Name your Smart Home action, and open the invocation page.
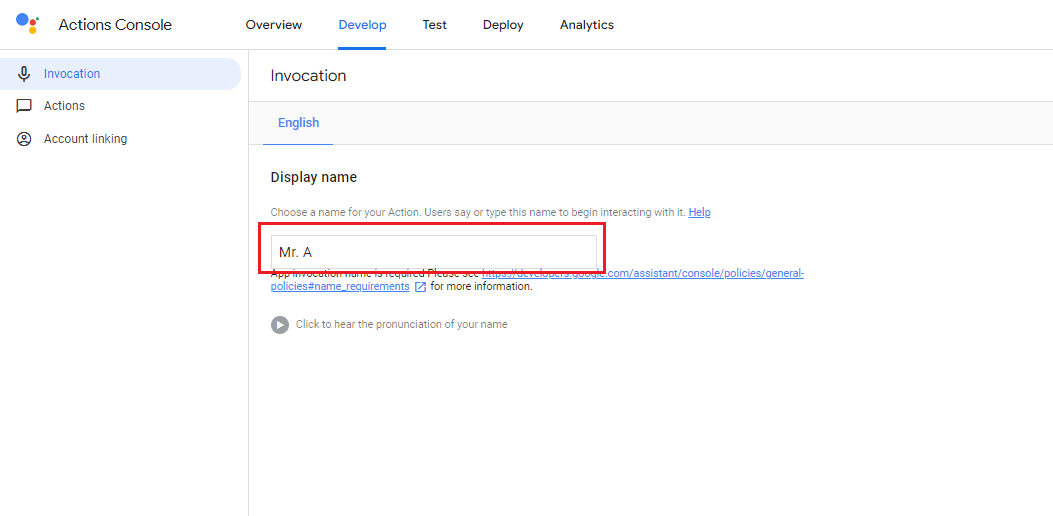
Give the integration a display name. This name appears in the Google Home app.
4. Webhook configuration
In the figure above, click the Actions menu on the left to open the Smart Home intent webhook configuration page.
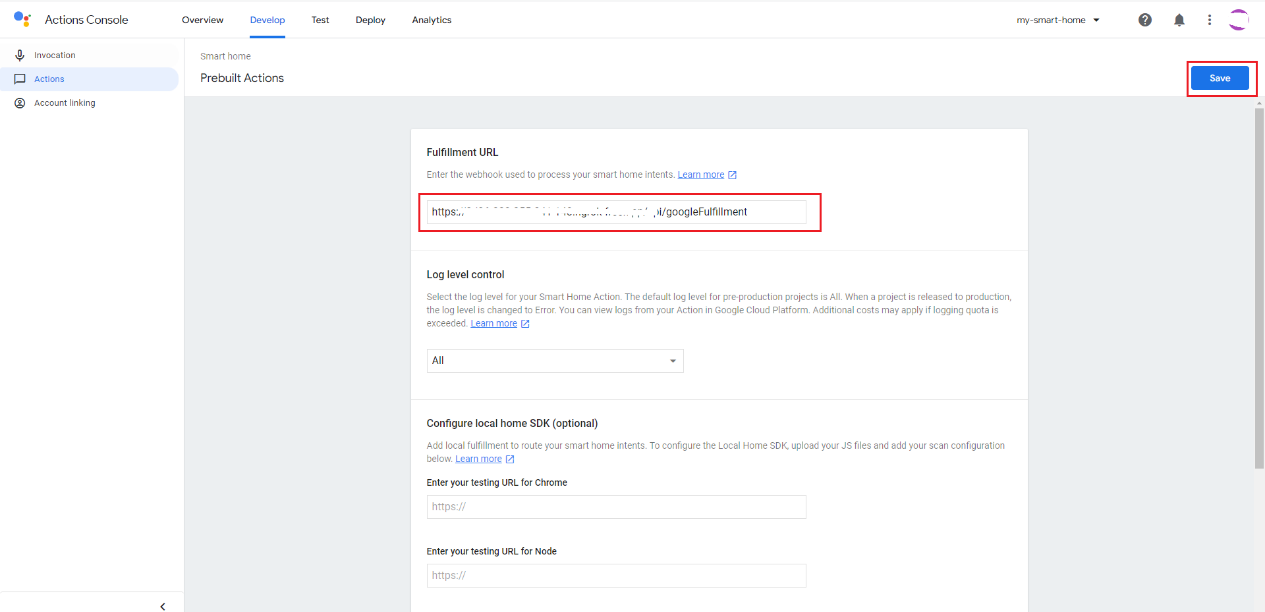
The Fulfillment URL is the Developer Cloud endpoint that handles smart-home intents and must use HTTPS. The interaction among the user, the Google Home app or speaker, Google services, and the Developer Cloud is shown below:
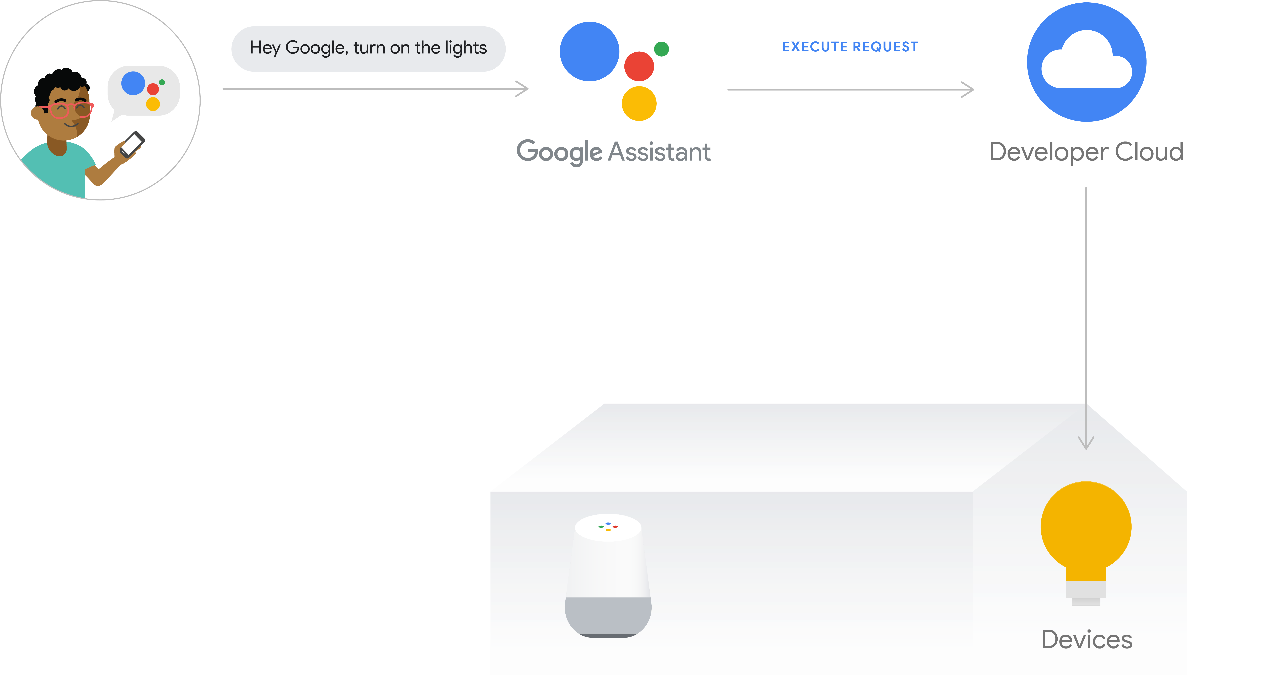
For smart-home features, Google Assistant handles voice interaction, while the Google Home app provides the graphical control interface. Both access devices through the same linked smart-home integration.
5. Account linking configuration
Continue by clicking Account linking in the left menu to open the OAuth authorization configuration page.
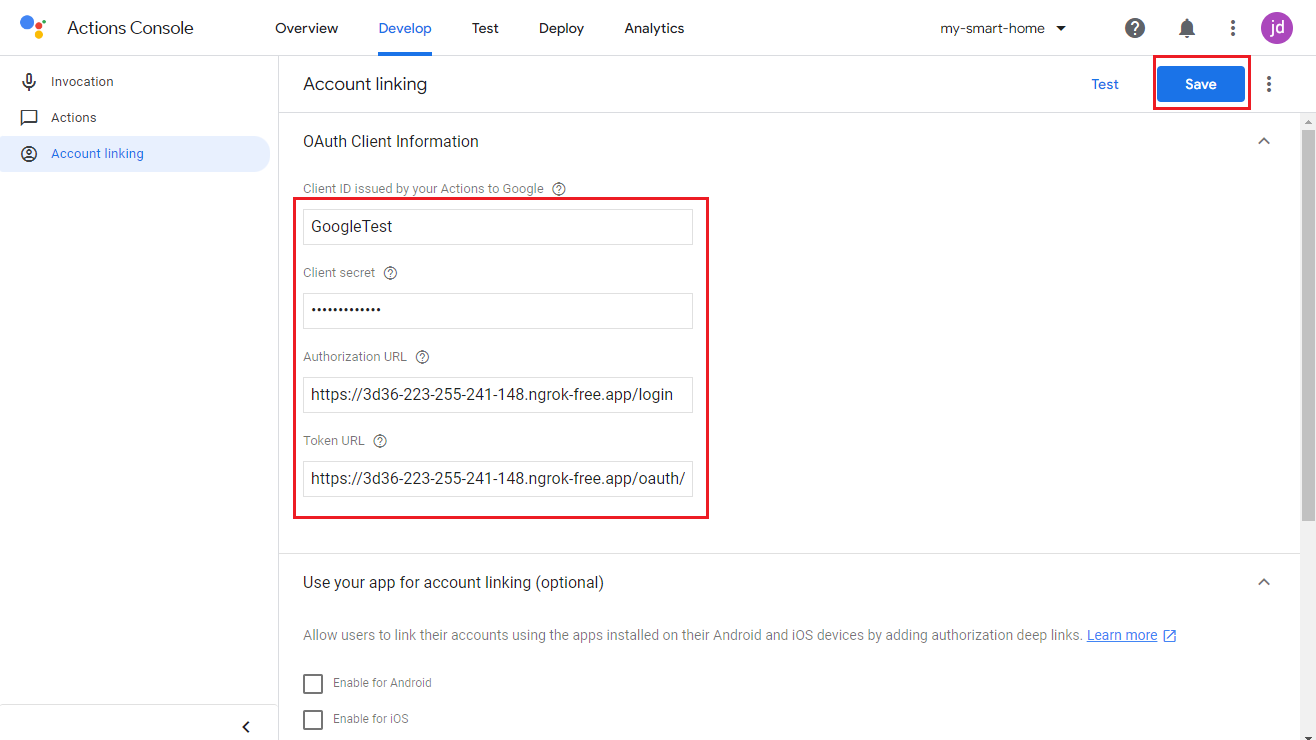
Fields in the red box are required; these are OAuth client credentials.
Enter the Client ID, Client secret, Authorization URL, and Token URL generated for your Ubases IoT deployment. These OAuth values must match the Developer Cloud configuration exactly and must use valid HTTPS endpoints. After filling them in, click Save.
At this point you can enter development and joint debugging.
You still need to enable the HomeGraph API and create a service-account key so that the Developer Cloud can report and synchronize device state.
6. Enable HomeGraph
Go to the APIs & Services page: https://console.cloud.google.com/apis/dashboard.
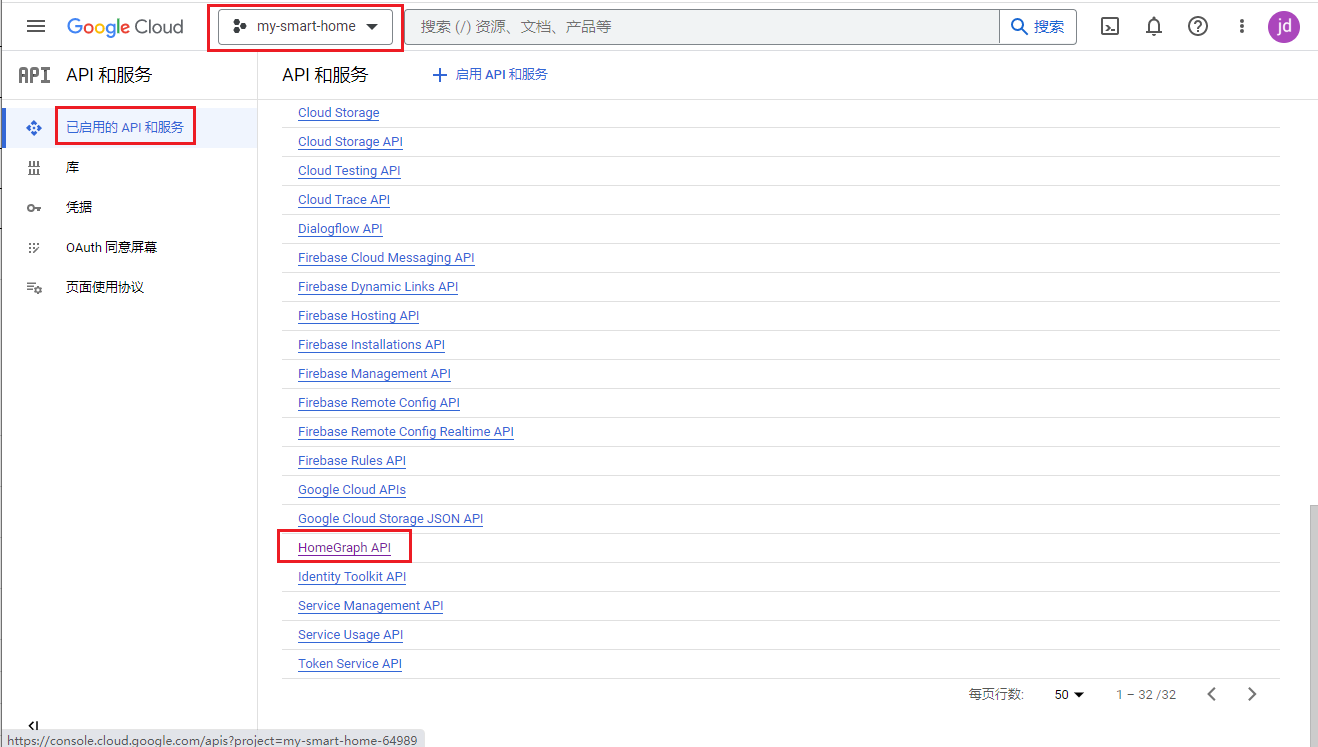
On the page, select the project created in step 1 in the upper left (example: my-smart-home), then select Enabled APIs & services on the left. Search for homegraph, find HomeGraph API, open the details page, and enable the API.
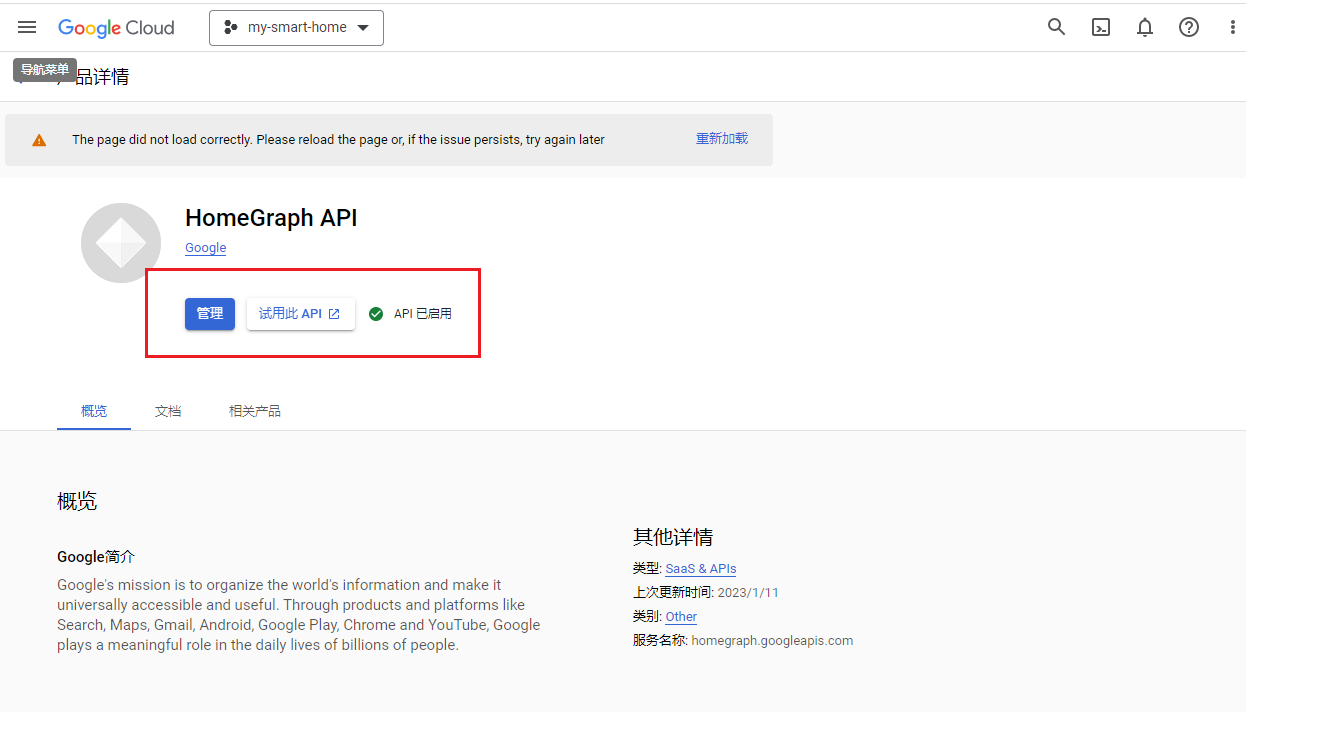
7. Create a service account
Go to the service account configuration page: https://console.cloud.google.com/projectselector2/iam-admin/serviceaccounts?supportedpurview=project
Select the project created in step 1, open the service accounts page, and create a service account.
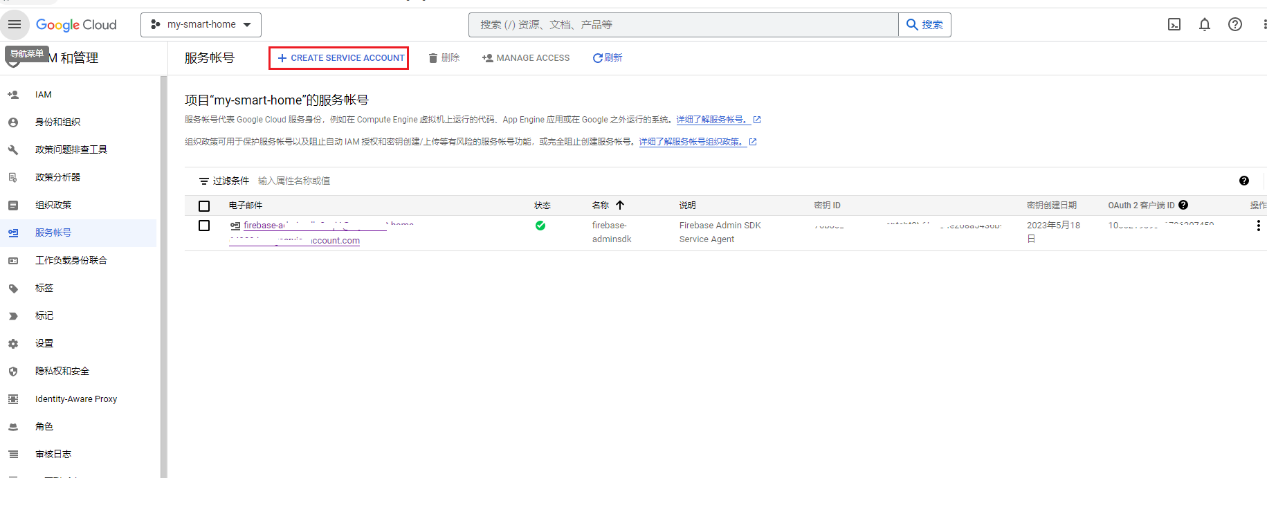 8. Download the service key
After creating the service account, open the Actions column pop-up menu and choose Manage keys.
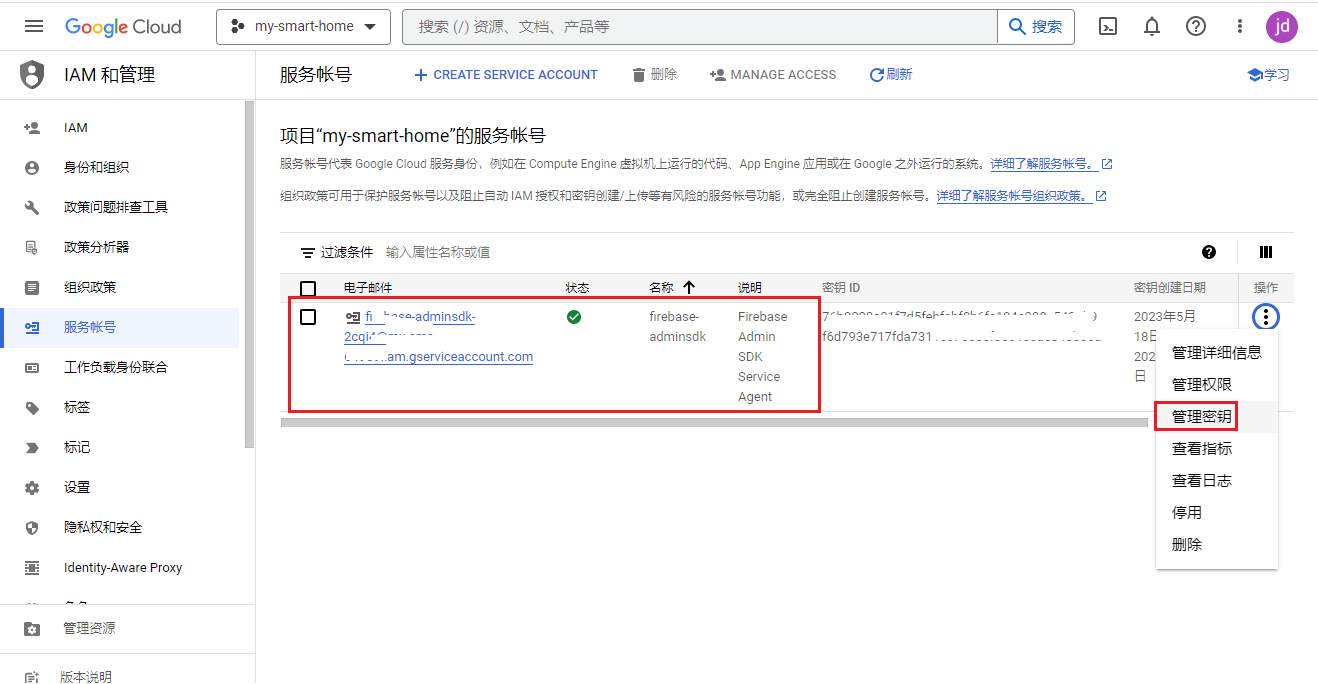
Open the service keys page:
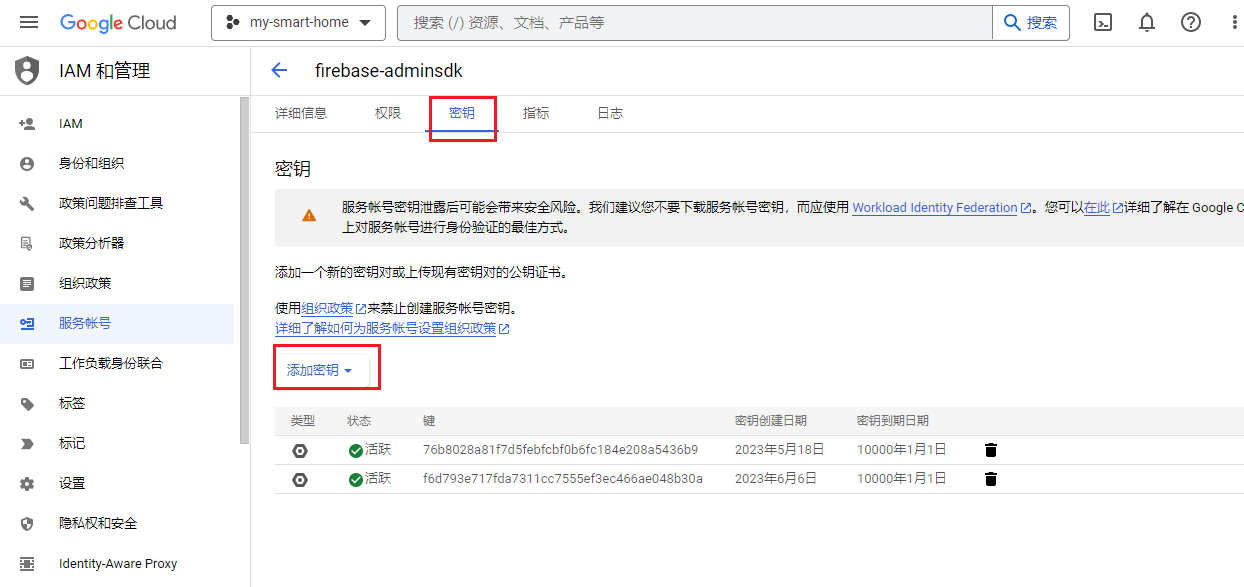
Click Add key, choose Create new key. A key is created automatically and a JSON key file is downloaded. Keep the file safe, then upload it in the Open Platform product management voice configuration.
9. Deploy configuration
Click the top Deploy menu to open the page shown below.
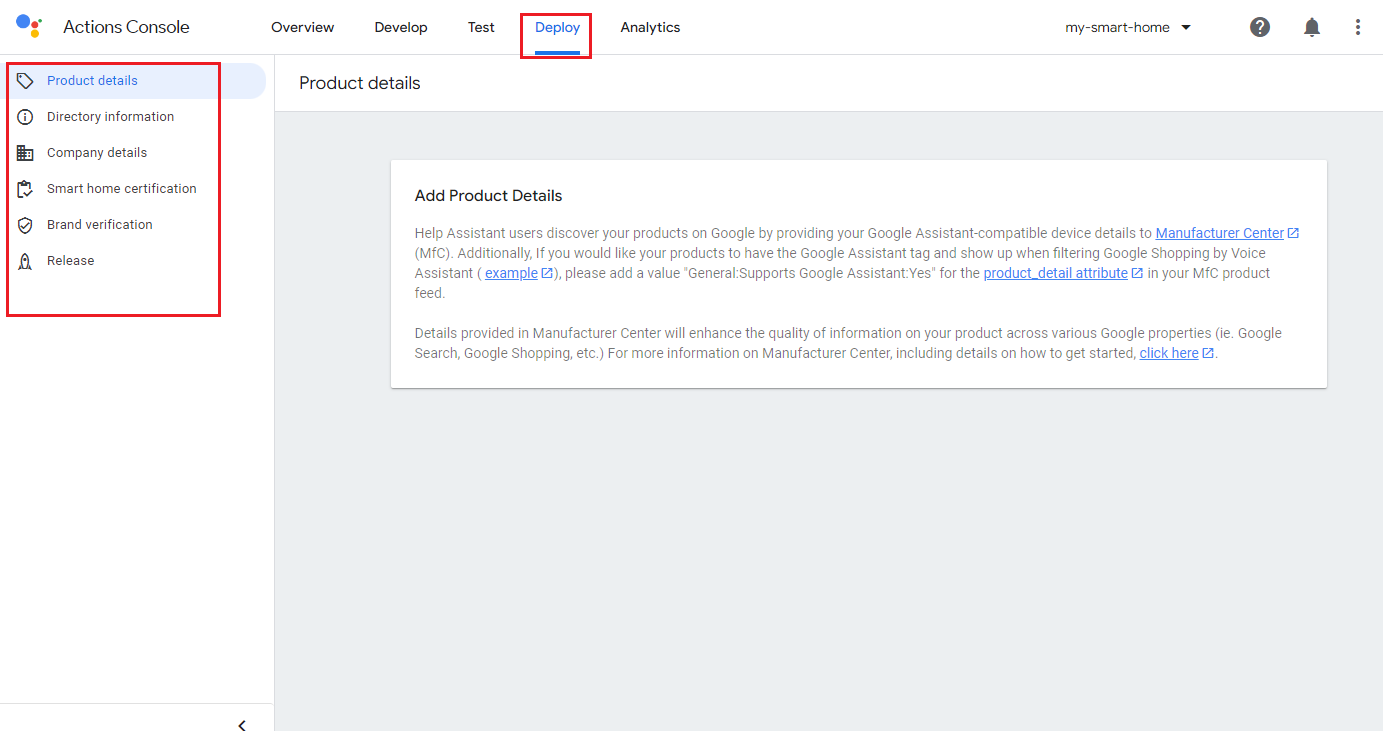
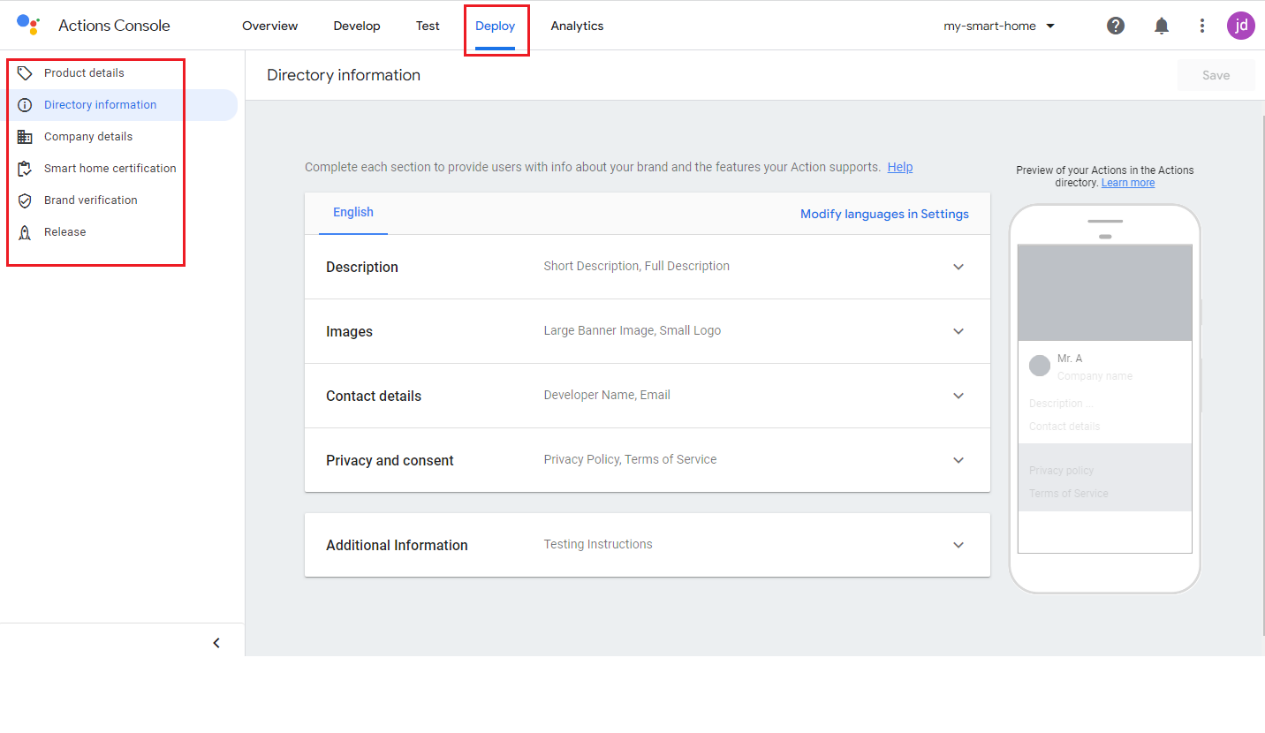
Follow the left menu in order to complete operations and submit the required materials.
Open Platform Configuration (Voice Configuration)1. Product voice configuration entry
Voice control is configured per product. From product development, open the corresponding voice control page and select the Google configuration item.
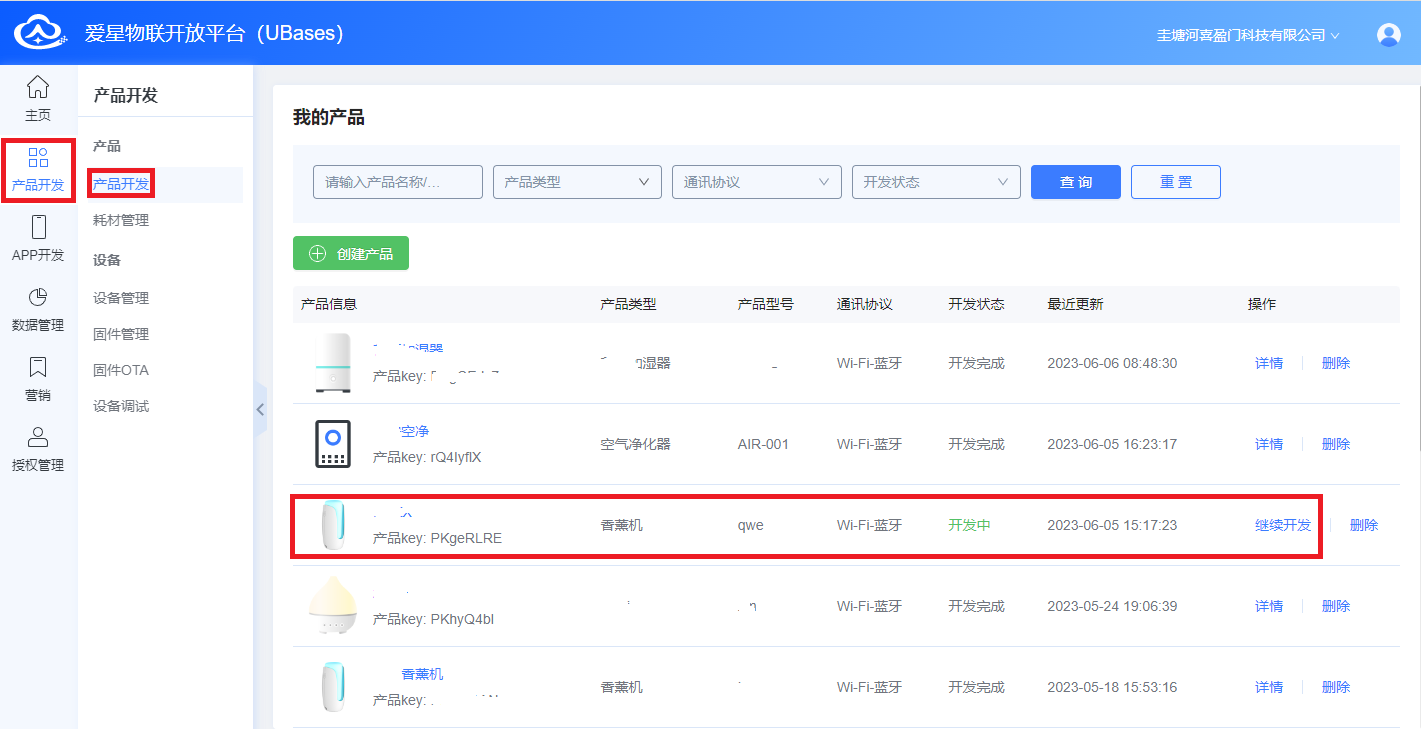
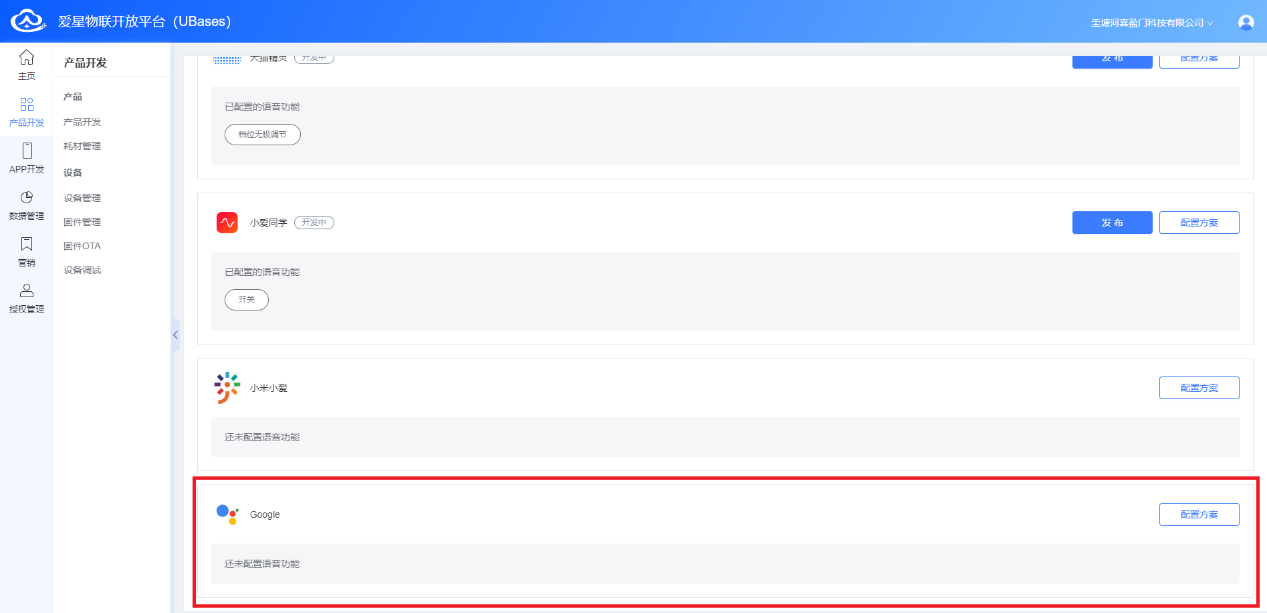
2. Fill in voice configuration information.
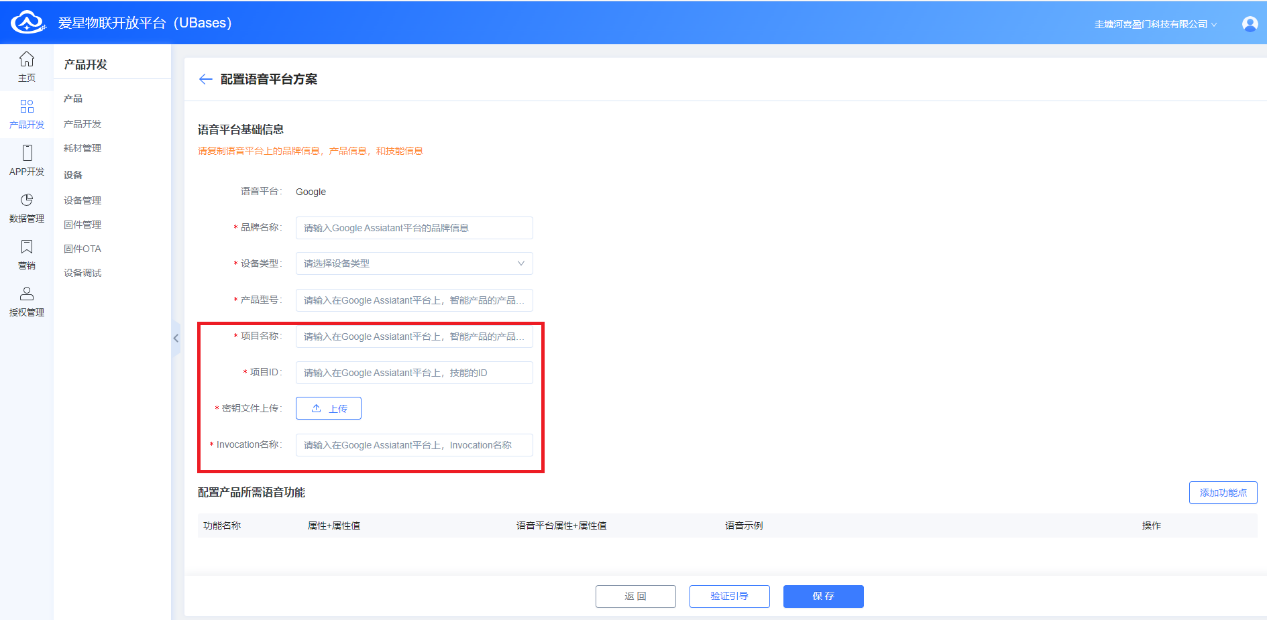
Project name, project ID, key file, and Invocation name come from the Google configuration and must match the Google project settings. Below that is the function point list—add and configure any product features that need voice control. When adding function points, configure them according to the actual feature name, type, and type-related options. Pay attention to aliases: they must be distinctive keywords or phrases; otherwise the speaker may fail to understand or misunderstand the user's speech.
3. Obtain Developer Cloud OAuth authorization information
App Development → Optional Configuration → Voice Service, enable Google Assistant, then click Save and Publish.
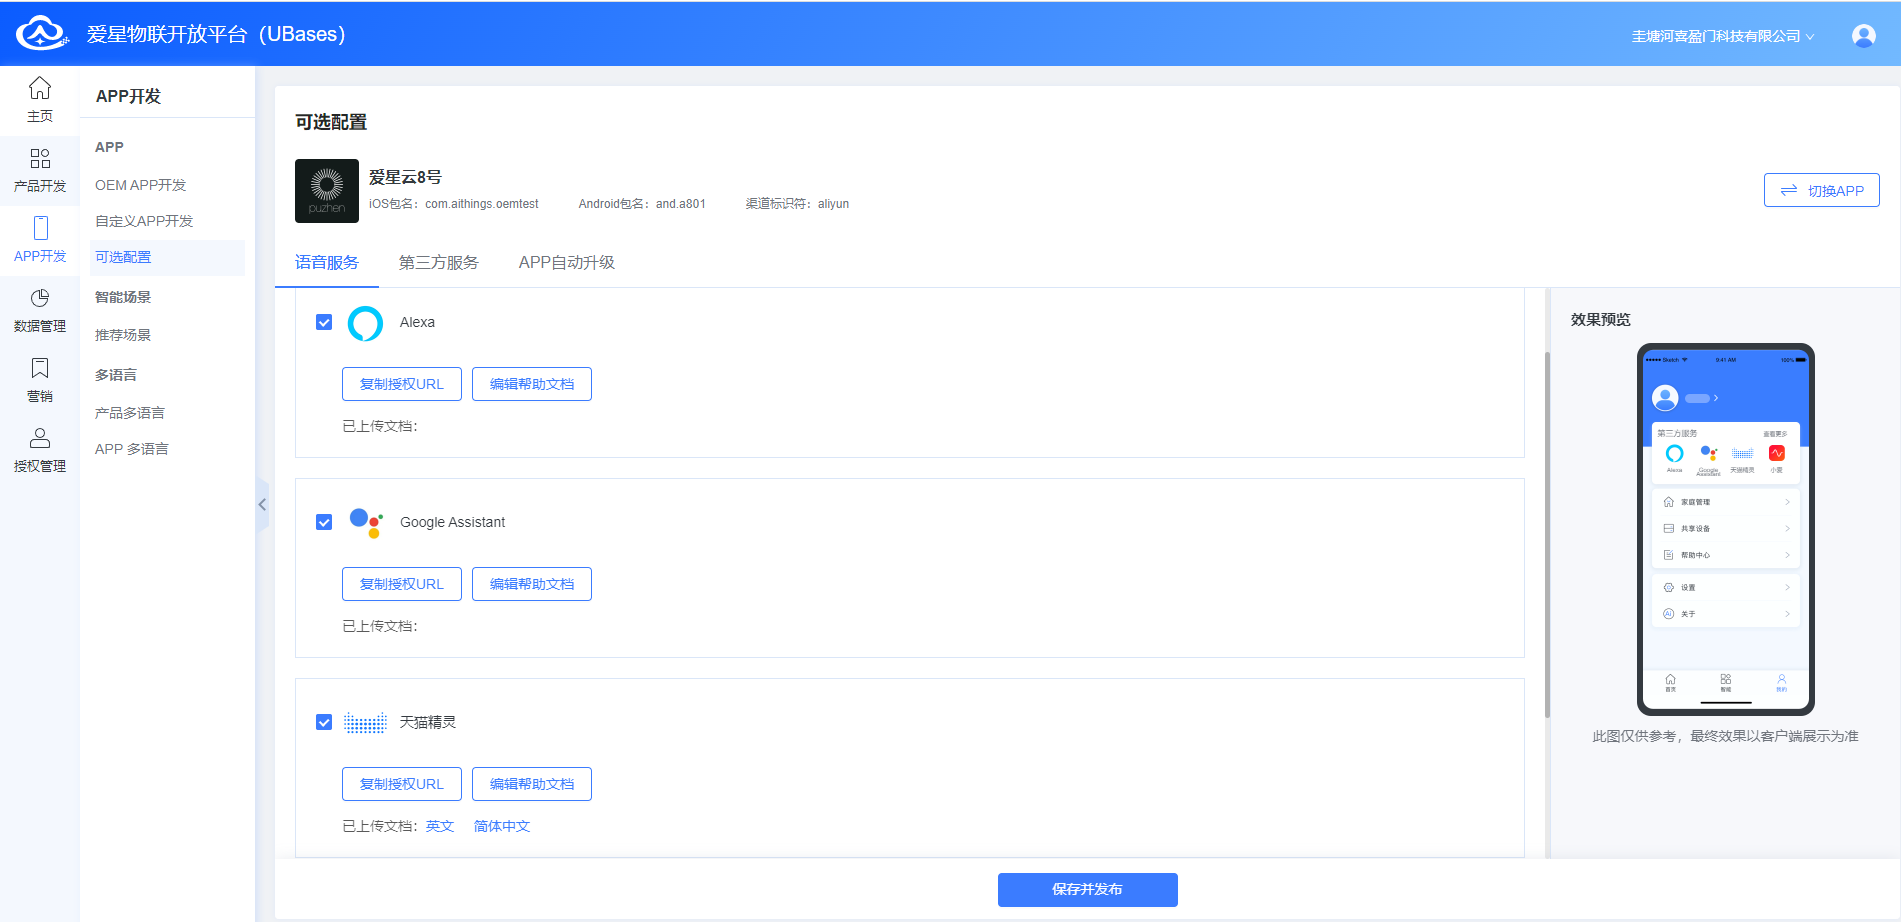
Click Copy Authorization URL to open the following page:
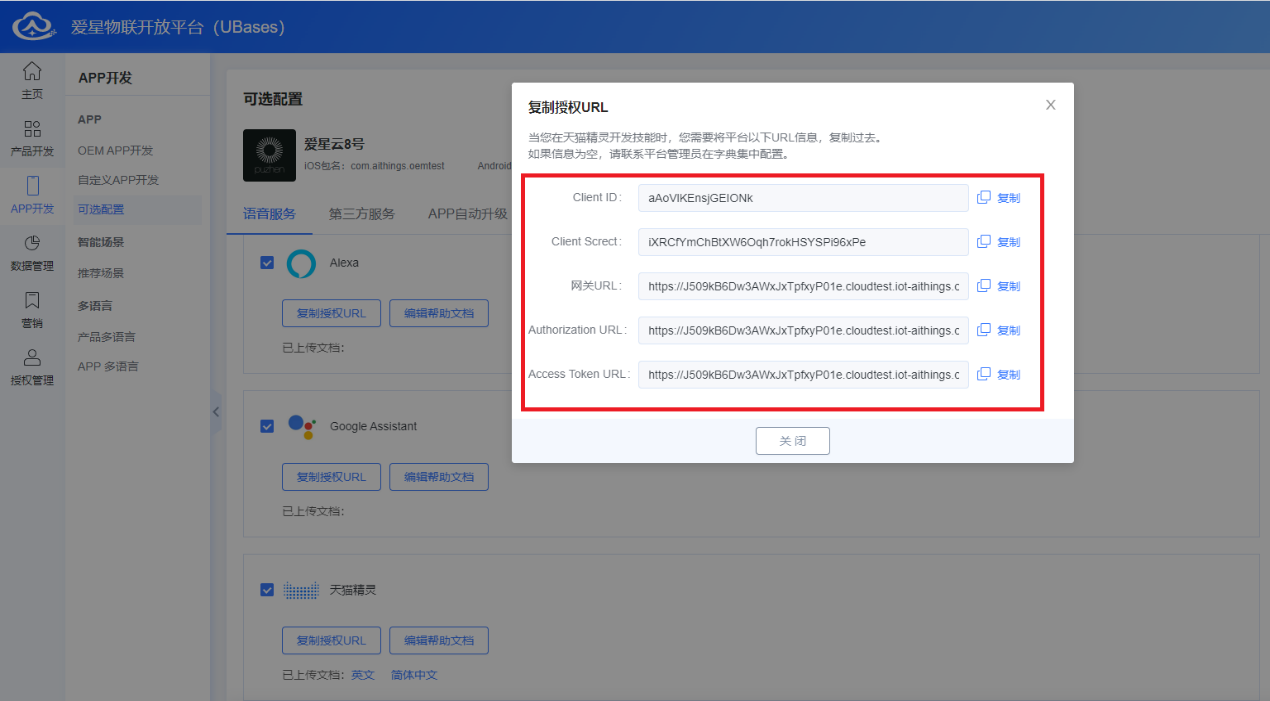
Copy the information in the red boxes in order, and fill them into the Google official Account linking page in step 5 above.
After the above configuration, the cloud-side setup for Google smart-speaker voice control is largely complete. For current Google Home app and speaker setup procedures, refer to the official Google documentation.