Publish an App on the Apple App Store
Preparation
- Record a video for review. The demo phone in the video must be an iPhone. Upload the video to a video site and obtain the link.
The video should show: the App name and icon on the phone home screen; both the phone and the device you operate; main App features; and features Apple reviewers cannot perform themselves, such as network provisioning and controlling devices from the control page. If your device cannot be shown publicly yet, a development board is acceptable.
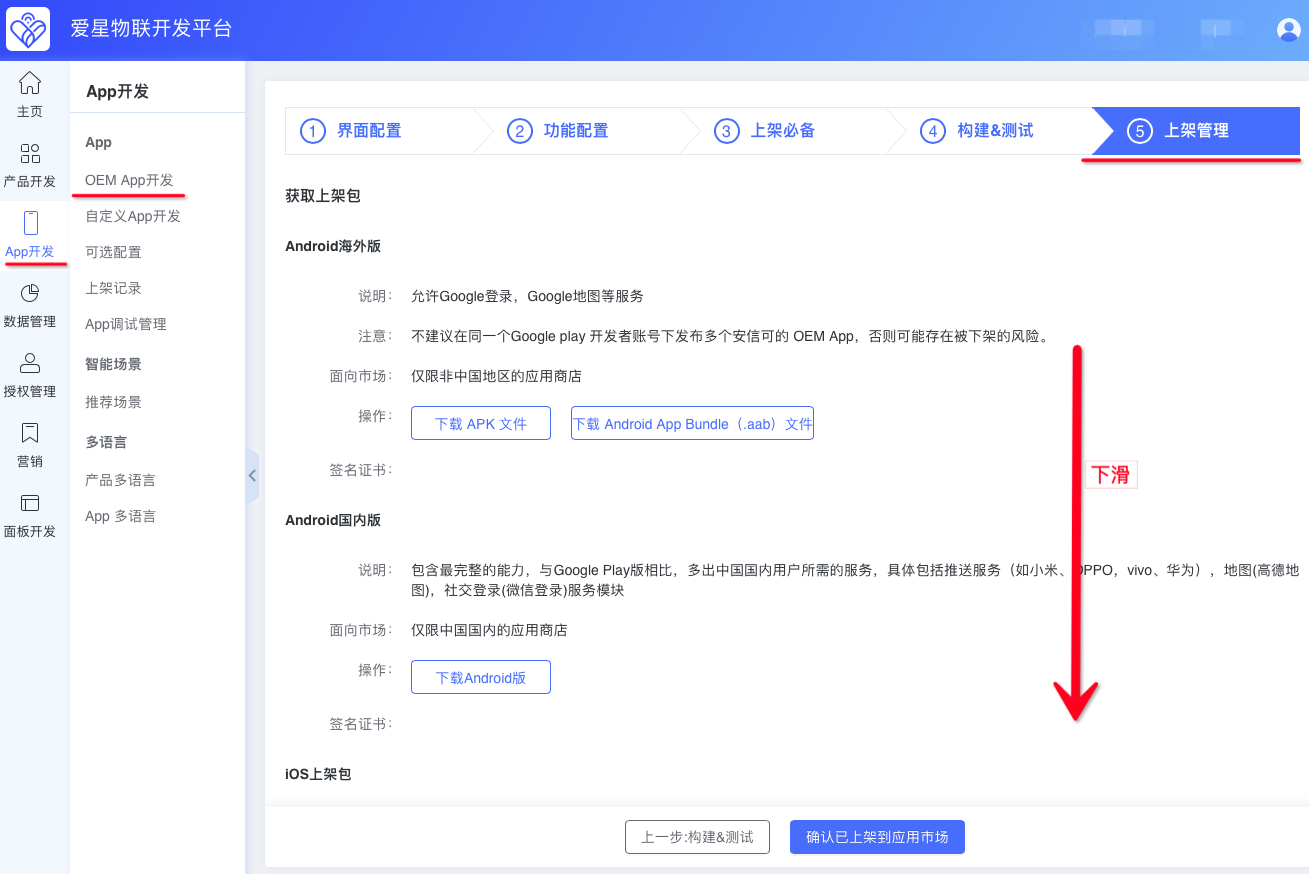
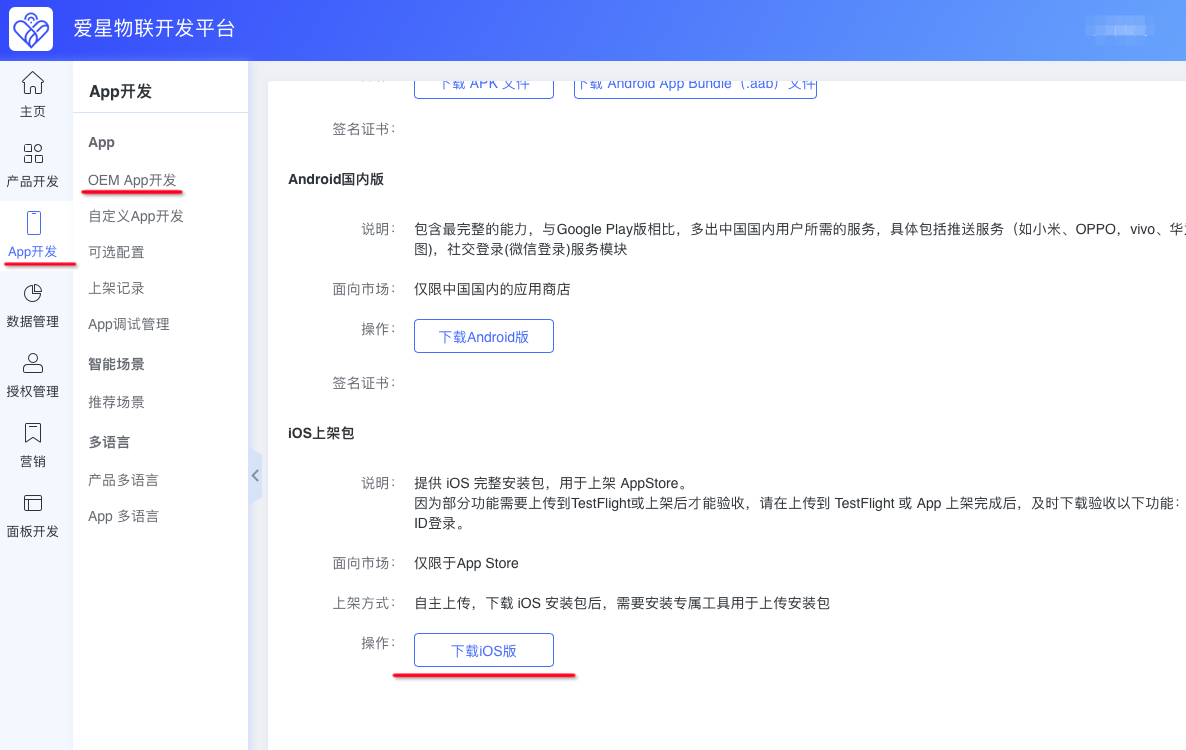
- Download the iOS release package (
.ipafile).
Create an App
If you have already created the App, skip this step.
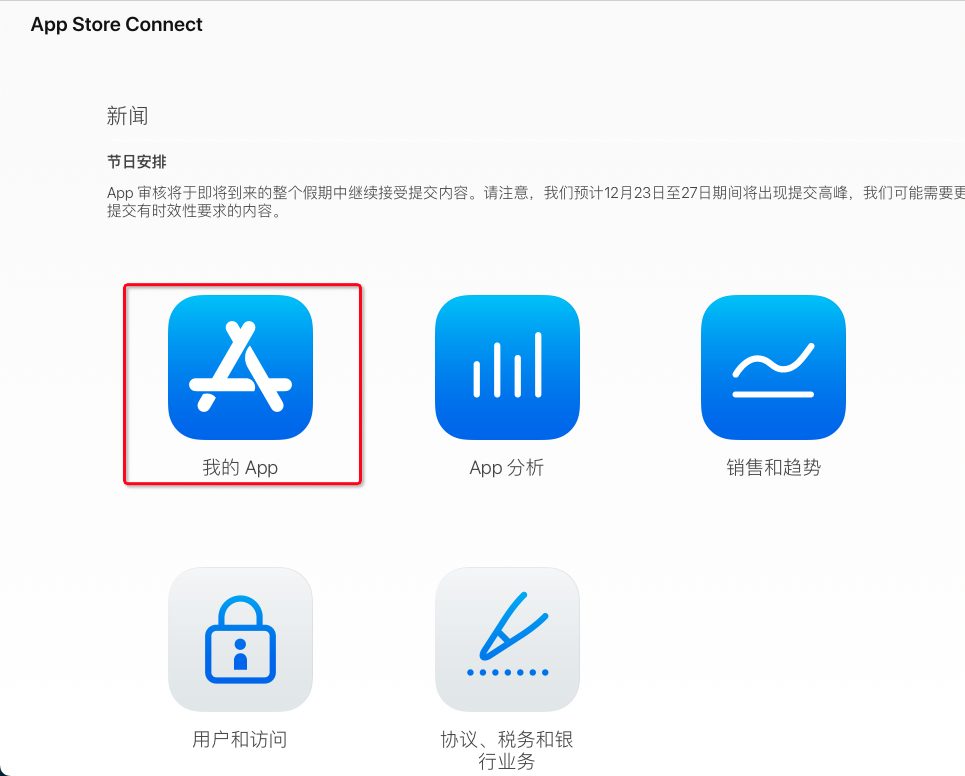
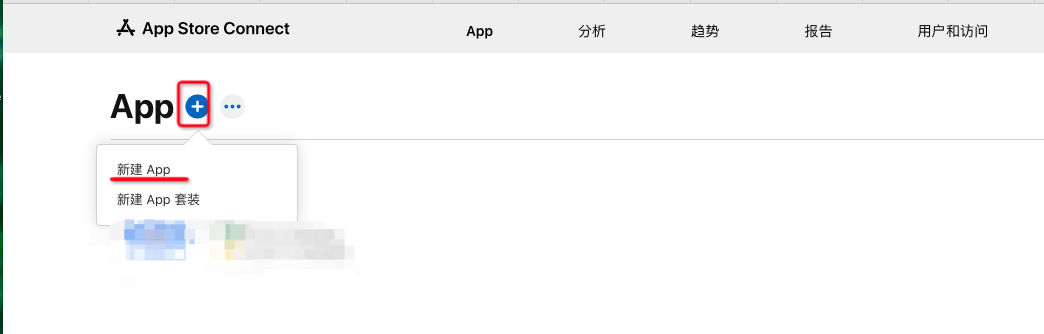
- Sign in to App Store Connect: https://appstoreconnect.apple.com, then click My Apps.
- Click “+” > New App.
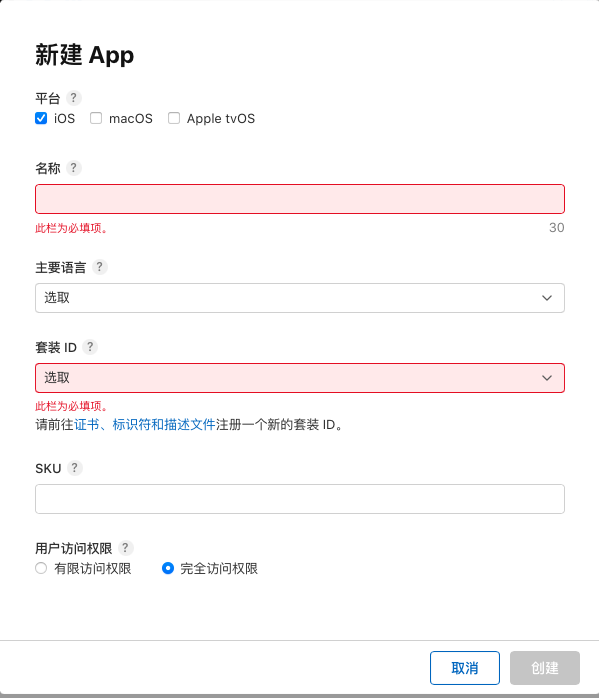
- Fill in the App information, then click Create.
Platforms: check iOS
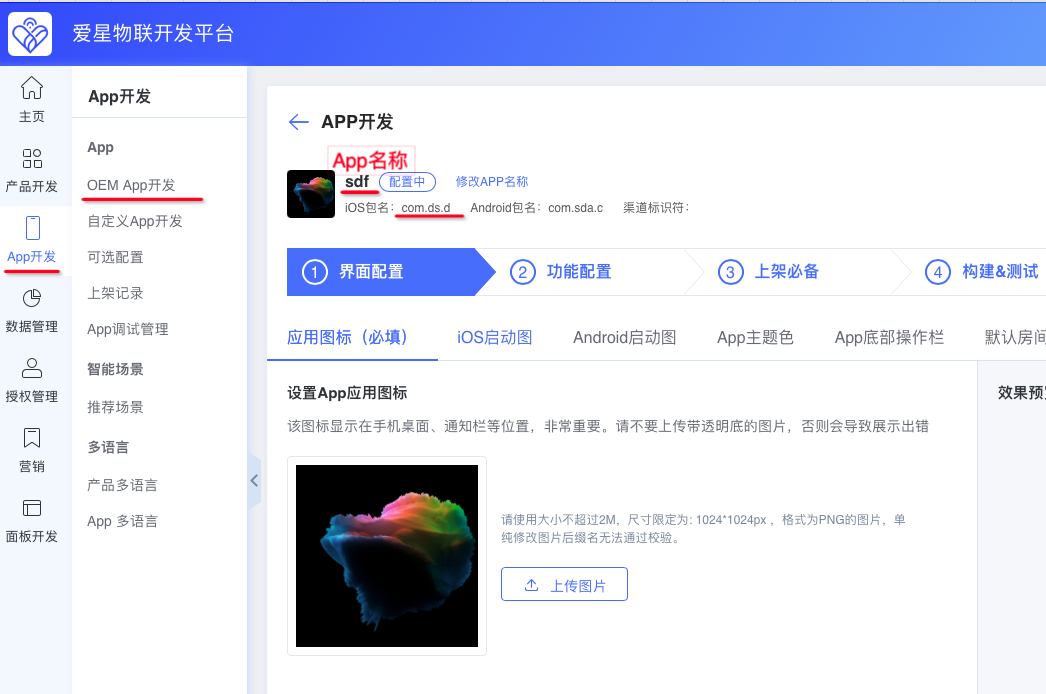
Name: enter the App name or copy it from the Ubases IoT development platform.
Primary Language: select a suitable language.
Bundle ID: select your App package name.
SKU: enter the App package name
User Access: select Full Access.
Where to copy the App name and package name
Fill in App Store Listing Information
- Complete the Prepare for Submission information, then click Save.
iOS Previews and Screenshots: Screenshots for iPhone 6.5-inch and iPhone 5.5-inch displays are required. Capture them on such iPhones, or design 1242×2688 (iPhone 6.5) and 1242×2208 (iPhone 5.5) JPG or PNG promotional images without an alpha channel. You can reference popular apps’ App Store previews, or our official App Ubases IoT:
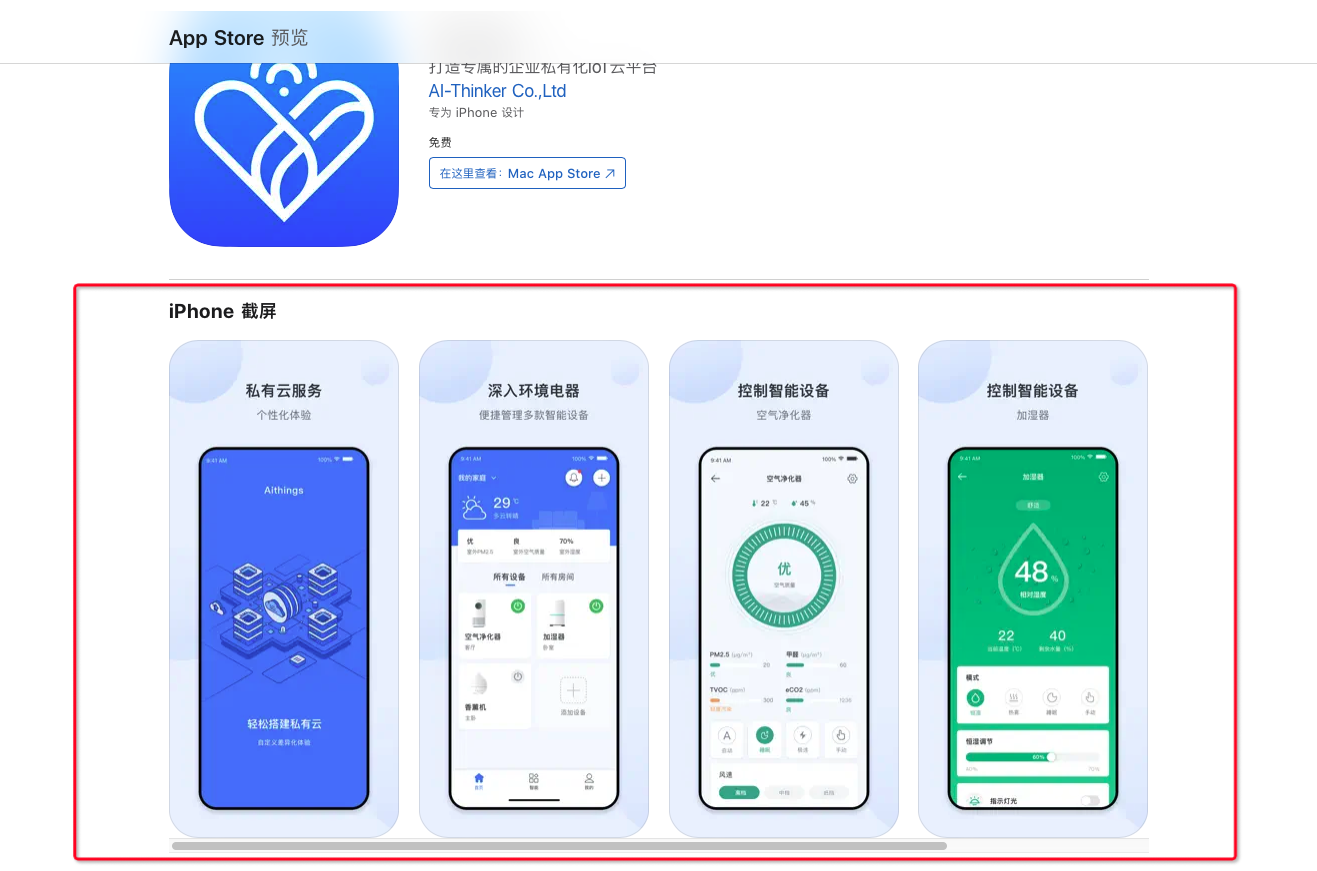
You do not need to provide screenshots for App Clips, iMessage apps, or Apple Watch apps.
Build: select after the app package is uploaded; leave empty for now.
Version: copy from the Ubases IoT development platform.
App Review Information: enter your contact information and a test account. Preferably the test account has an online device for reviewers. In Notes, paste the demo video link and state that it is a demonstration video.
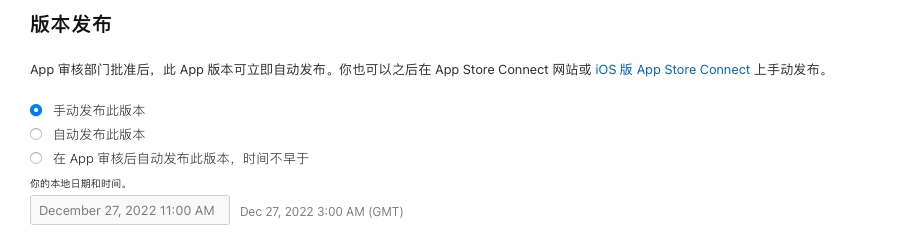
Version Release: choose as needed.
Complete other required fields as prompted. Hover over “?” for tips. For Support URL, you can use your official website if you do not have a dedicated support URL.
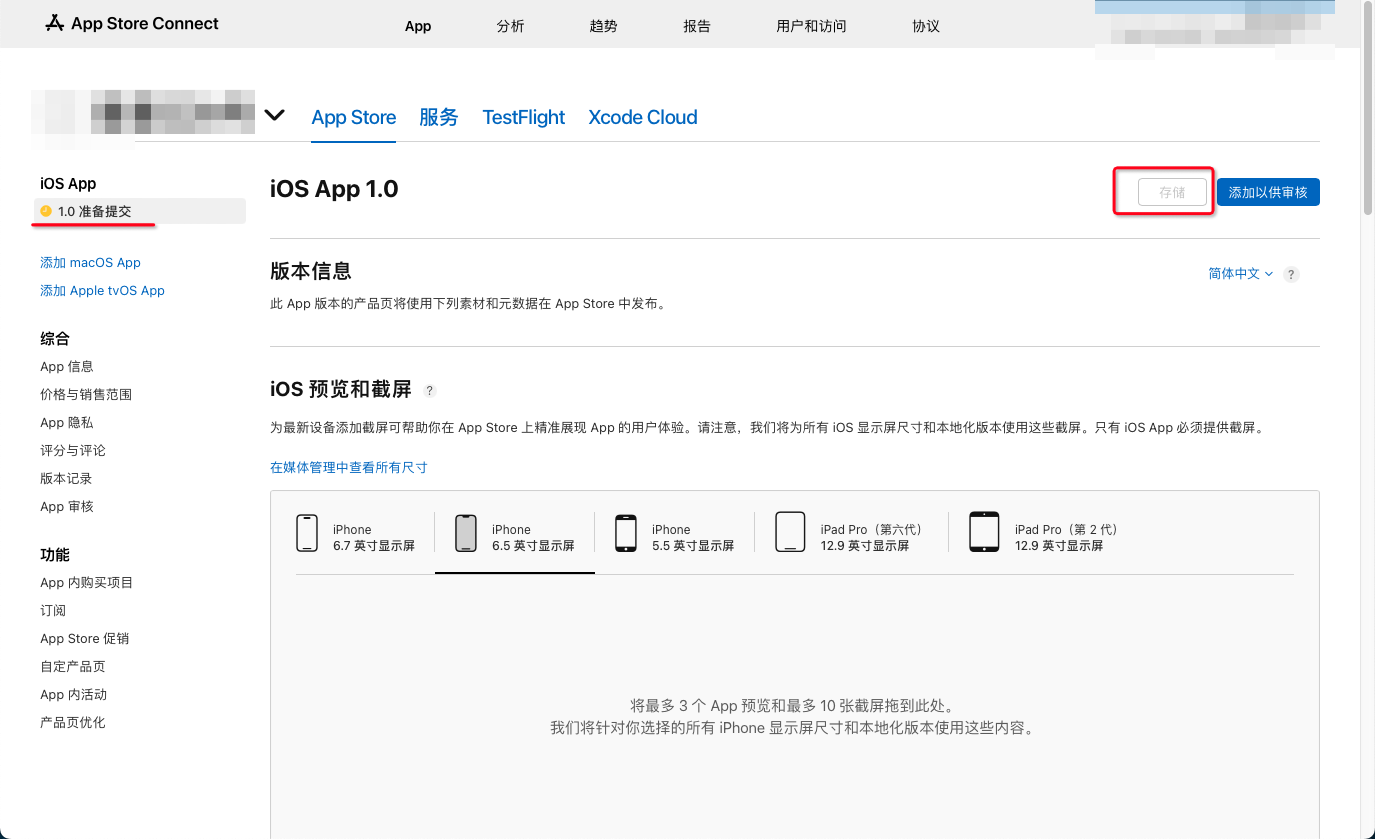
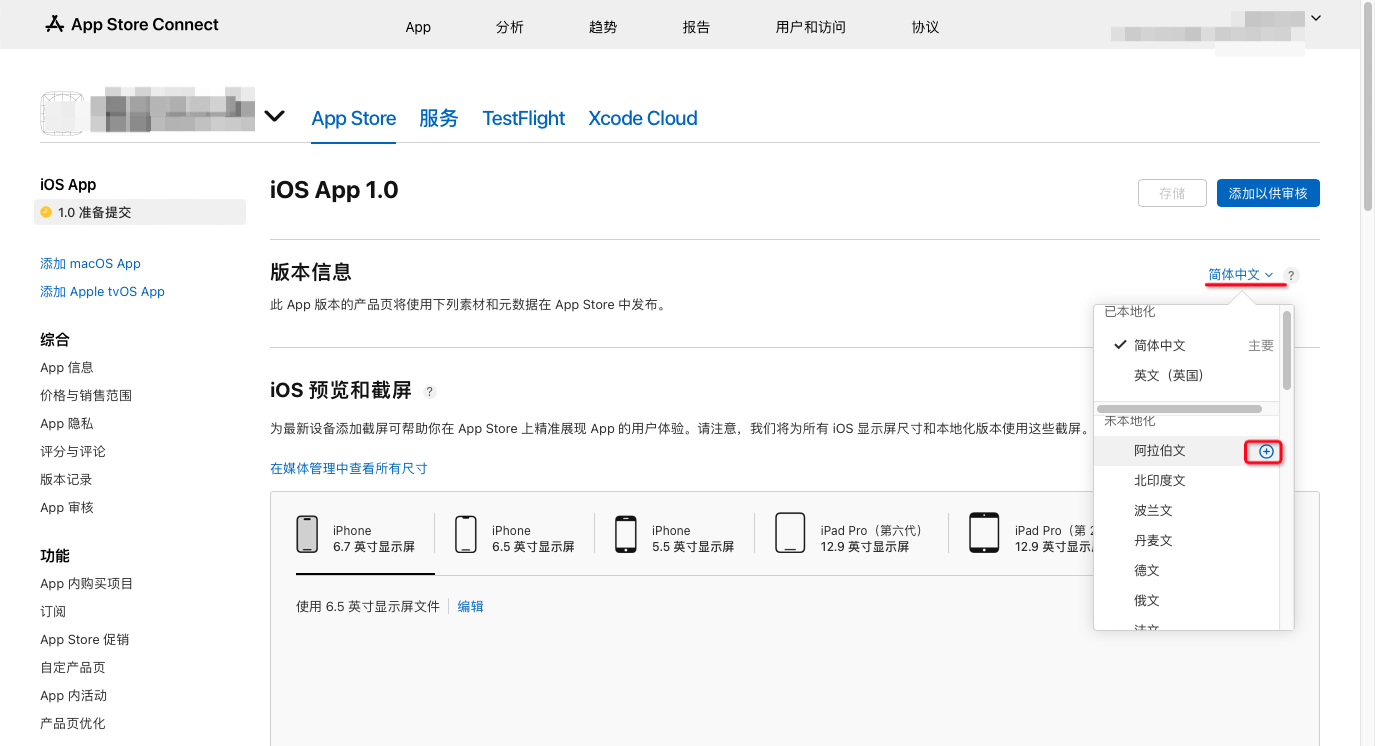
Click languages on the right to Add, Remove, or Switch languages. After adding a language, fill in all corresponding information for each language, including every page that supports language switching. iPhone display screenshots can reuse the same images across languages.
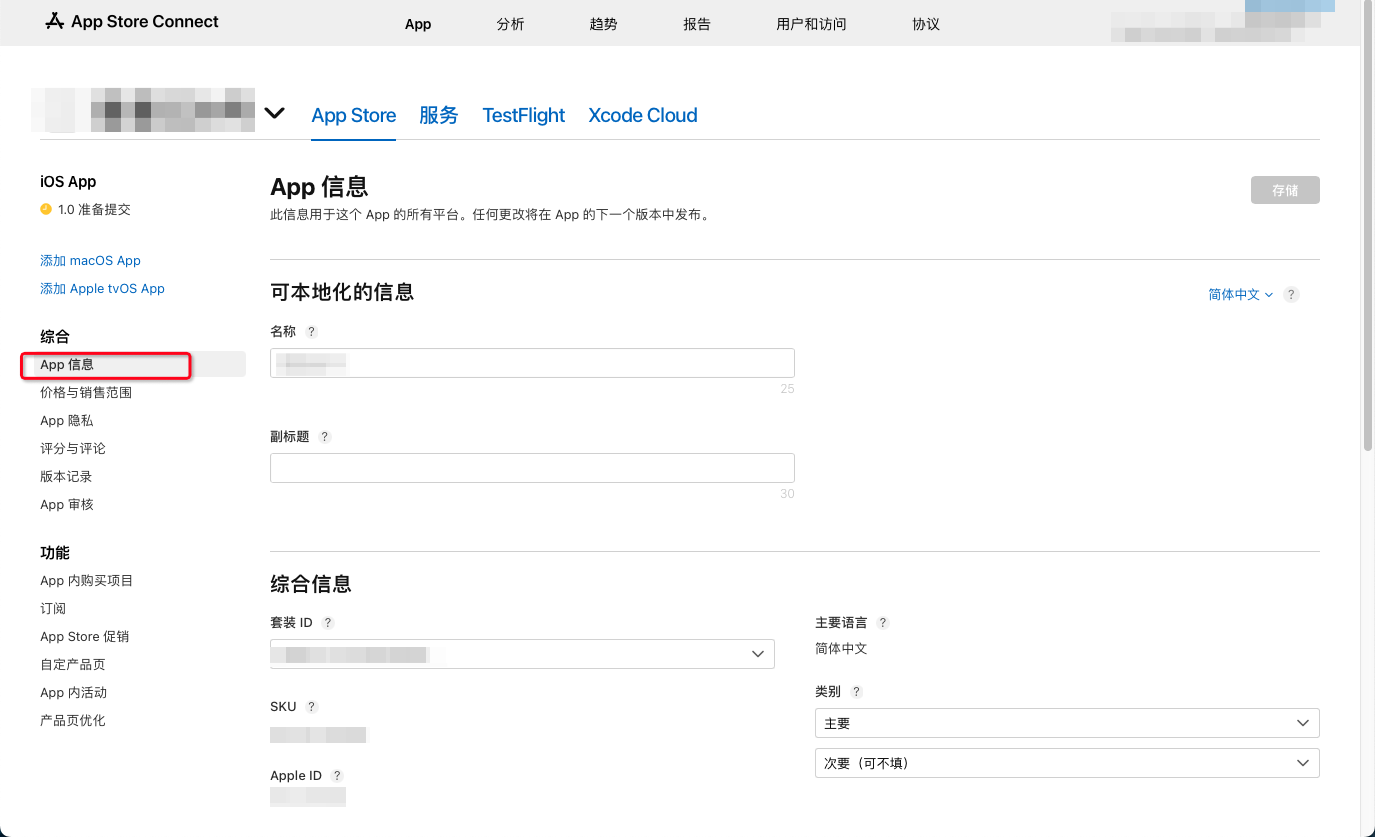
- Complete App Information, then click Save.
Subtitle: optional.
Category: you can select Utilities or Lifestyle
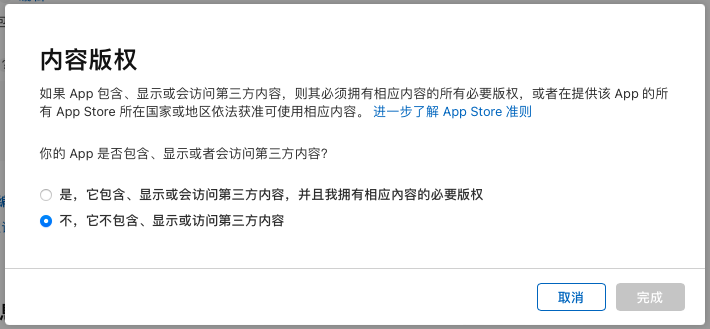
Copyright: select No, it does not contain. Click Done.
Age Rating: select None for all. Click Next.
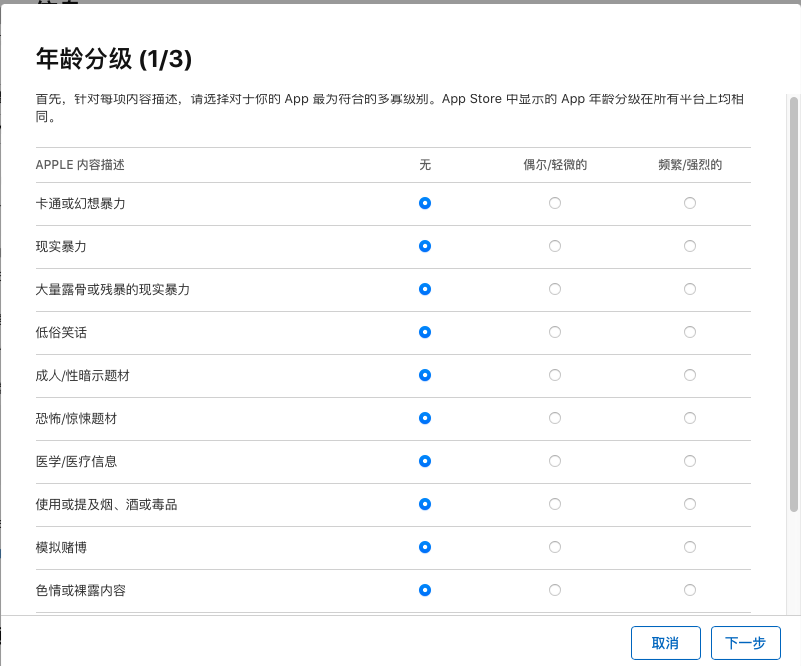
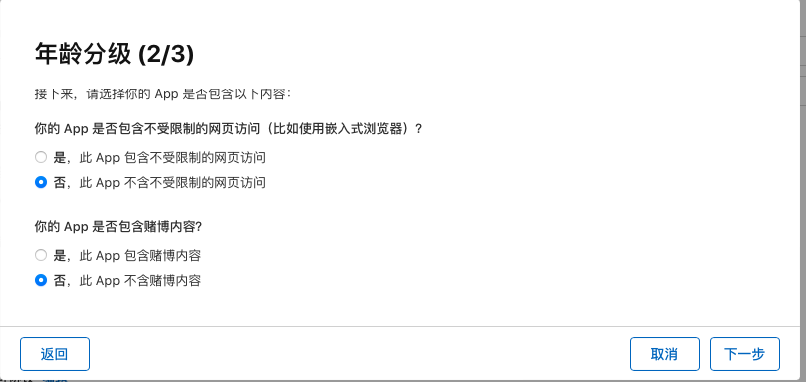
Select No for all.
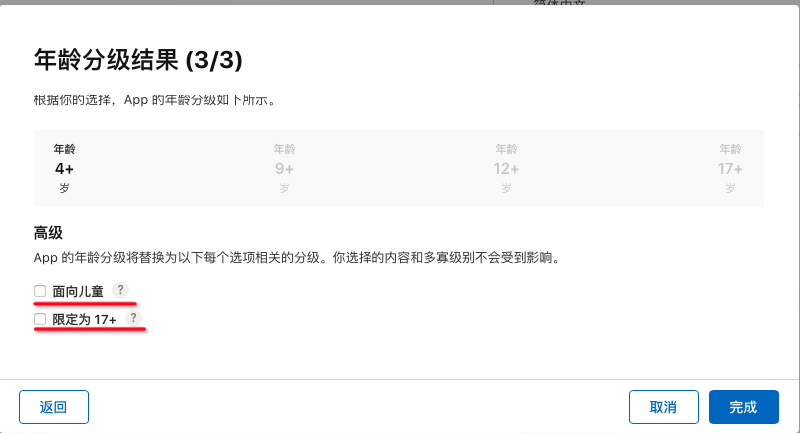
For Made for Kids and Age Rating 17+, choose according to your situation. Click Done, then Save in the upper right.
- Complete Pricing and Availability, then click Save.
Price Schedule: choose as needed.
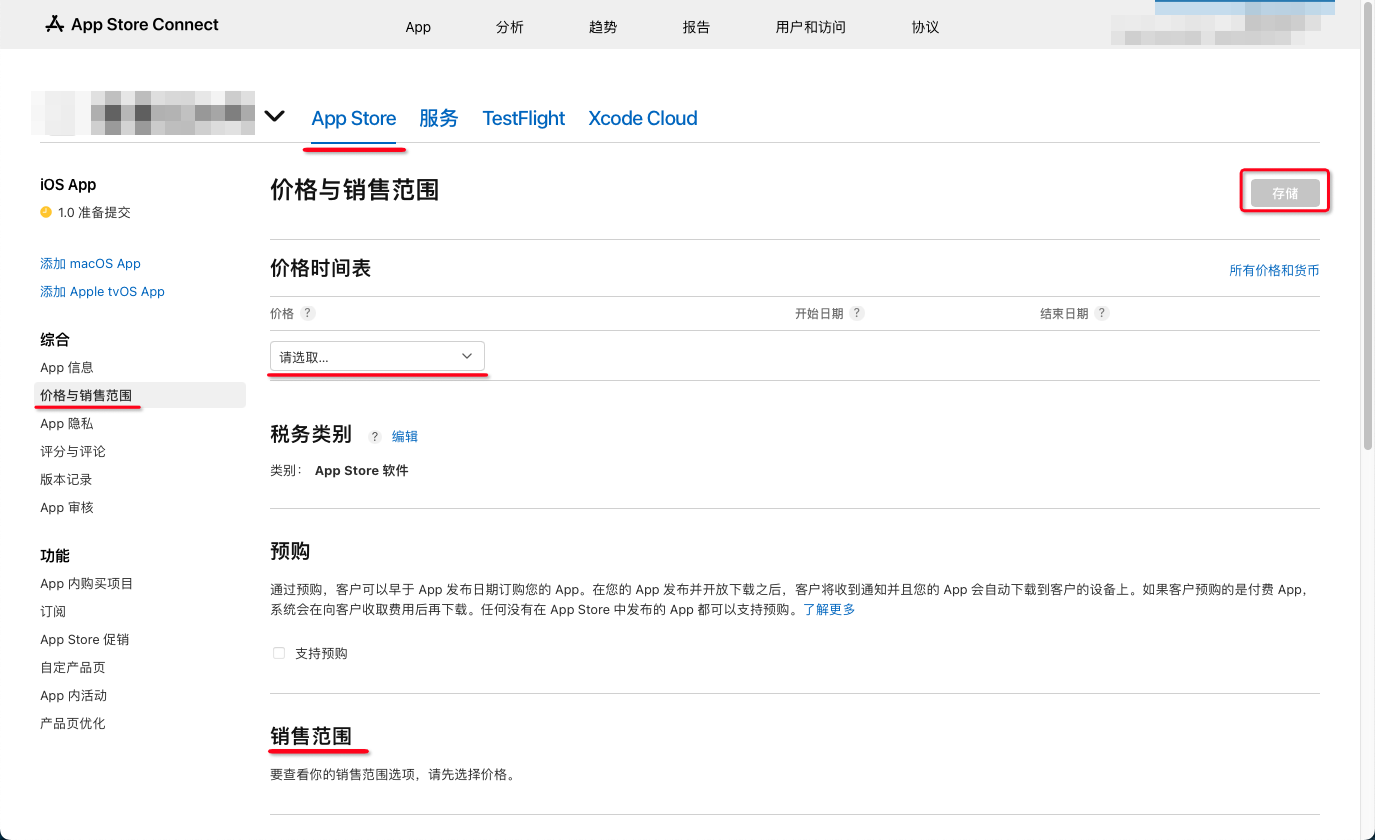
For Availability, click Edit.
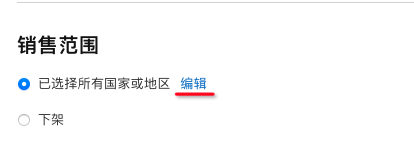
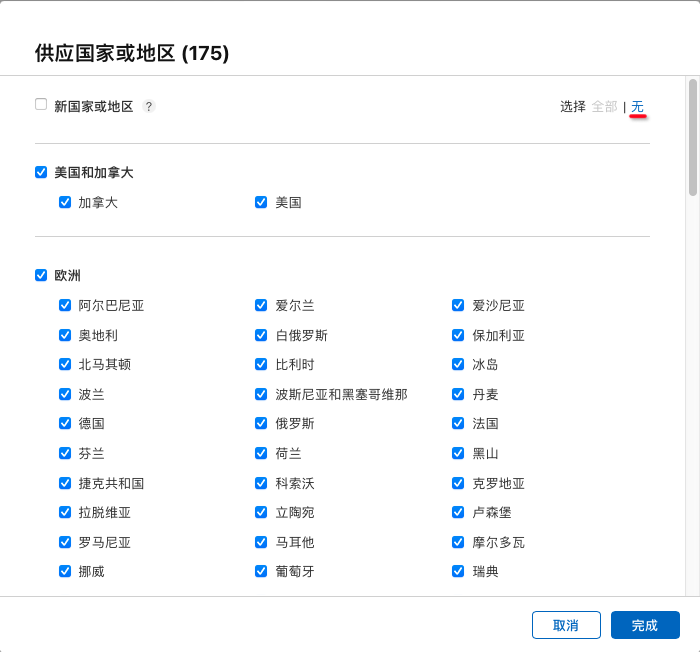
Select the countries where you want to sell, then click Done; click None to clear all selections.
- Complete App Privacy, then click Publish.
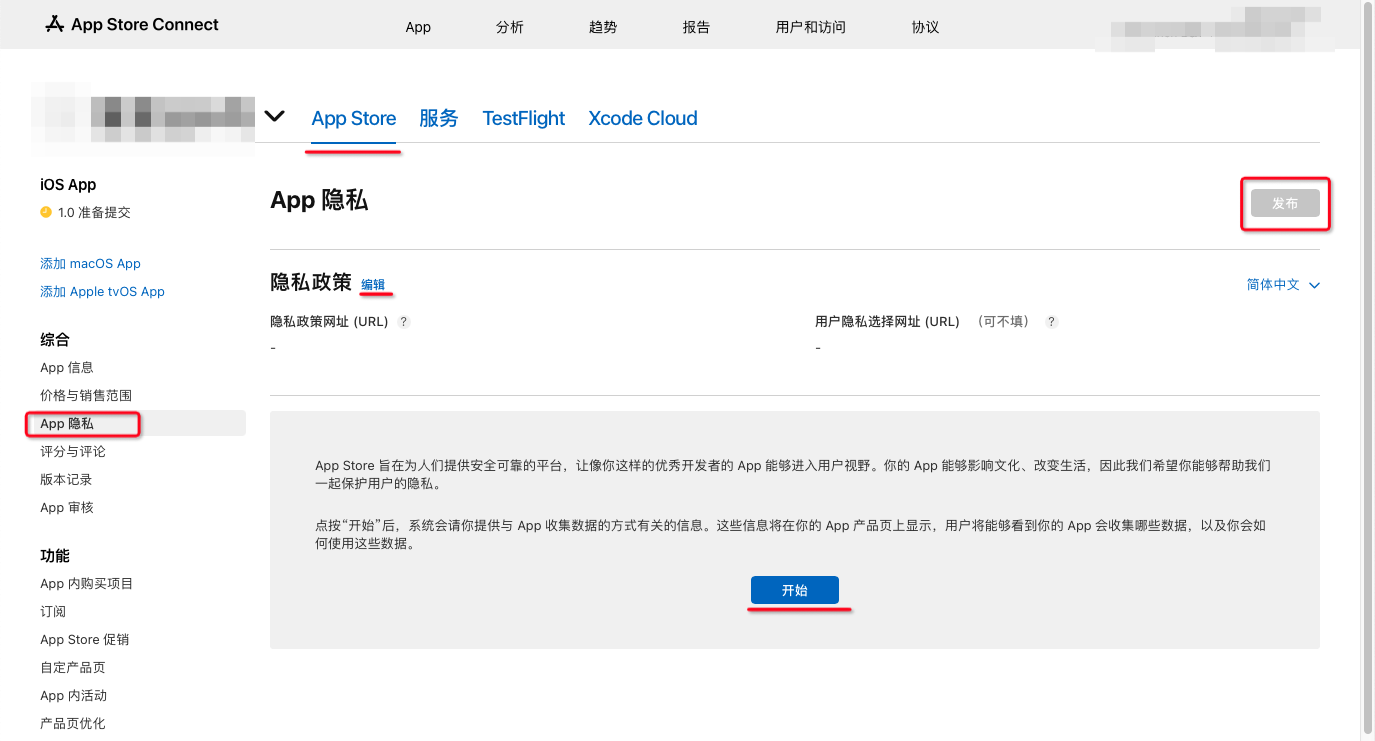
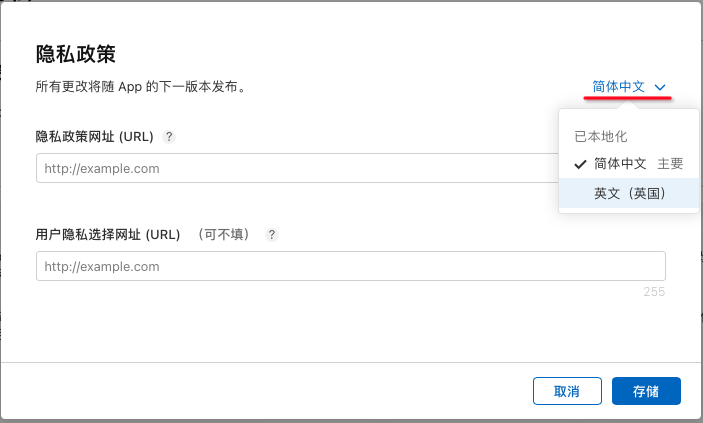
Click Edit, enter the Privacy Policy URL. Switch languages on the right and enter the privacy policy for each language, or use the same URL for multiple languages.
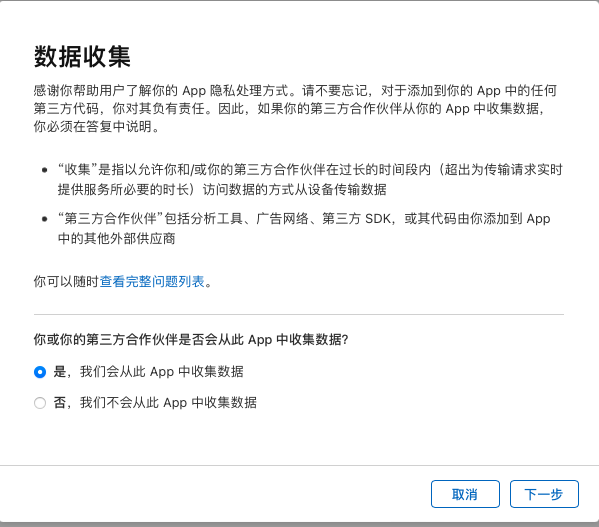
Click Get Started, select Yes for data collection, then click Next.
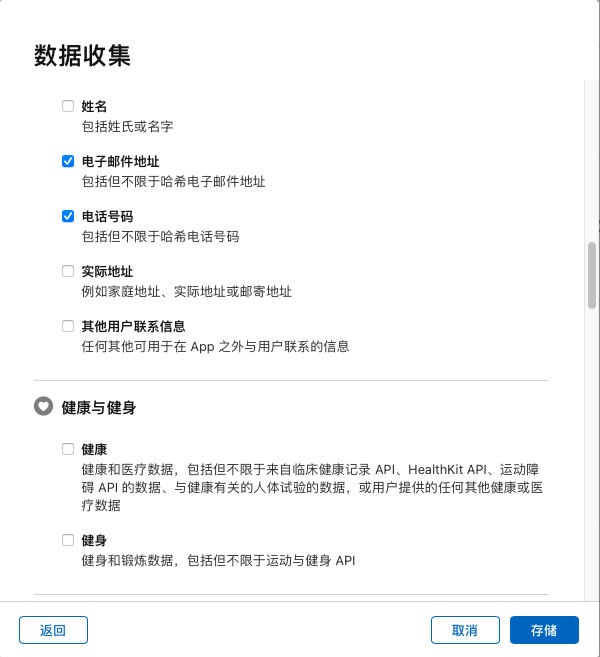
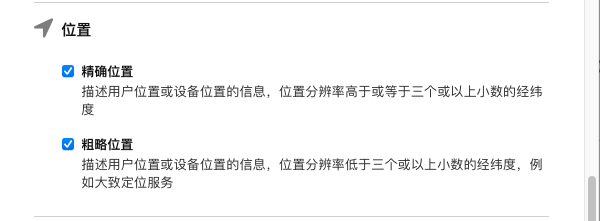
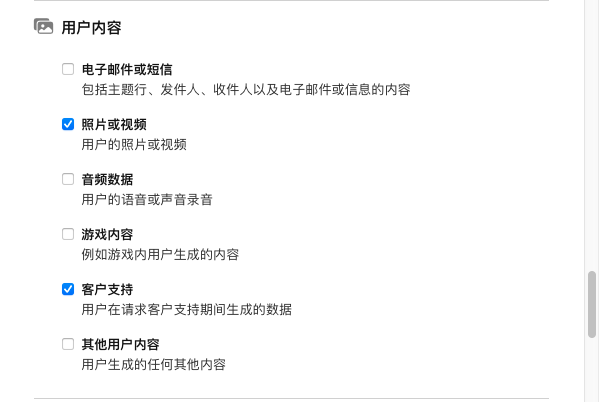
Scroll down and check Email Address, Phone Number, Precise Location, Coarse Location, Photos or Videos, Customer Support, User ID, Device ID, Crash Data, Performance Data, and Other Diagnostic Data, then click Save.
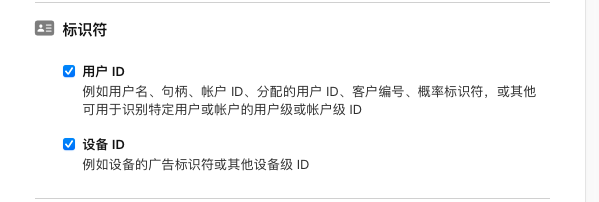
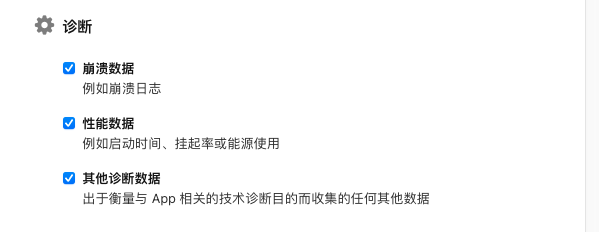
If you missed any, click Edit to adjust. Then configure each collected data type.
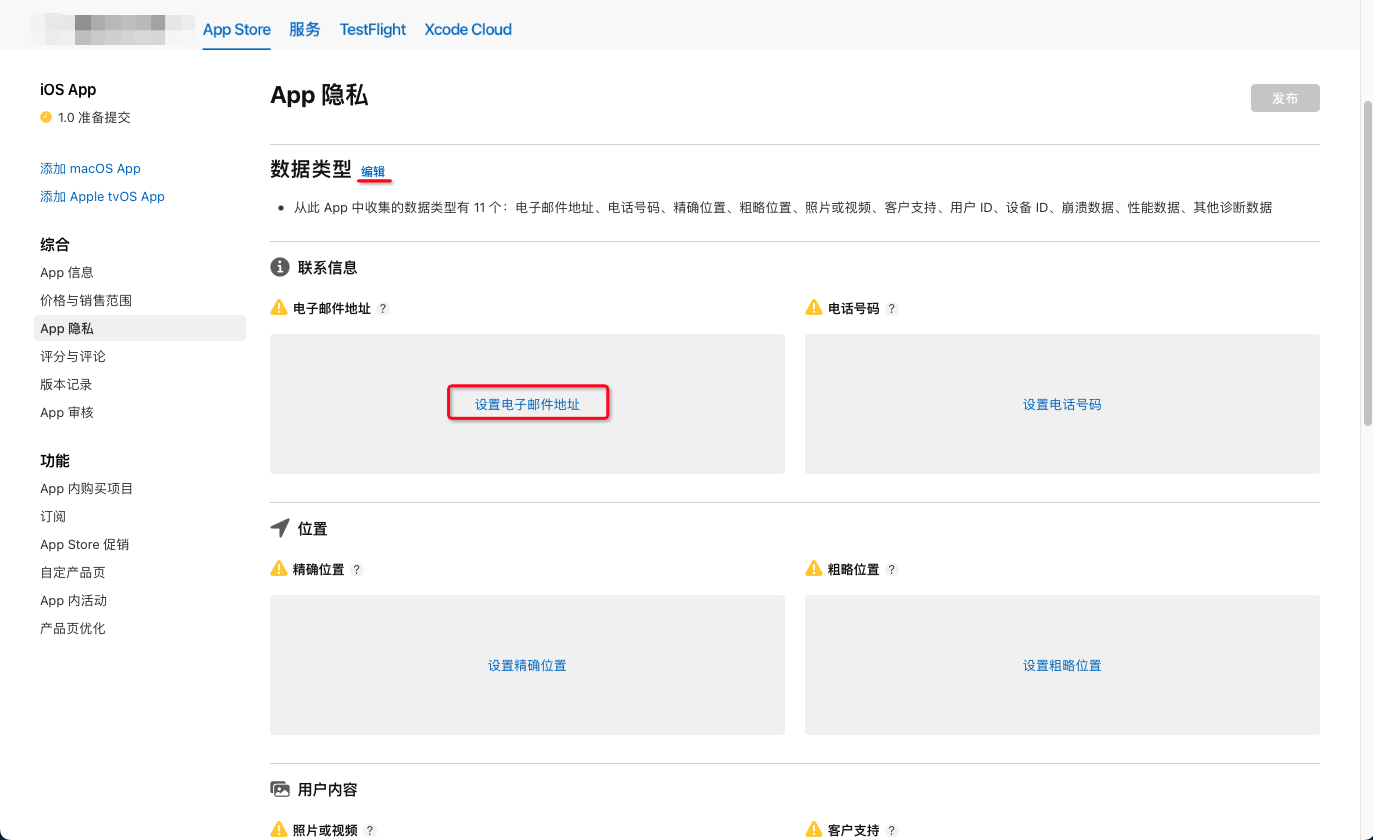
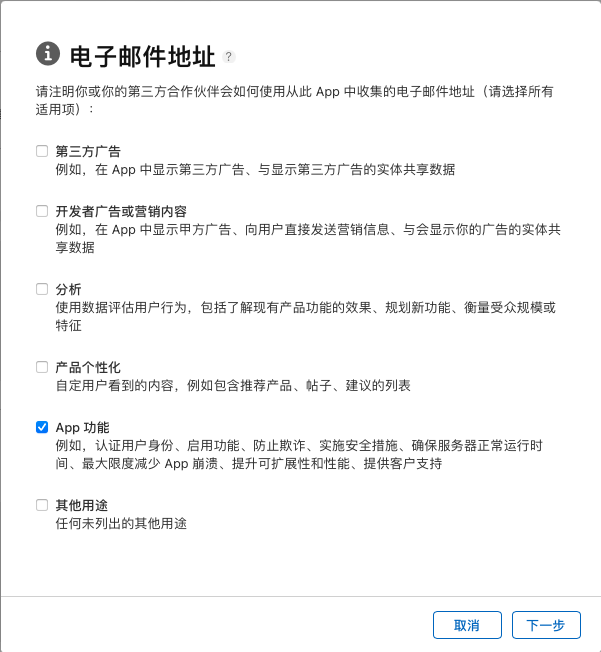
Click Set Up for Email Address, check App Functionality, then click Next.
Select Yes, then click Next.
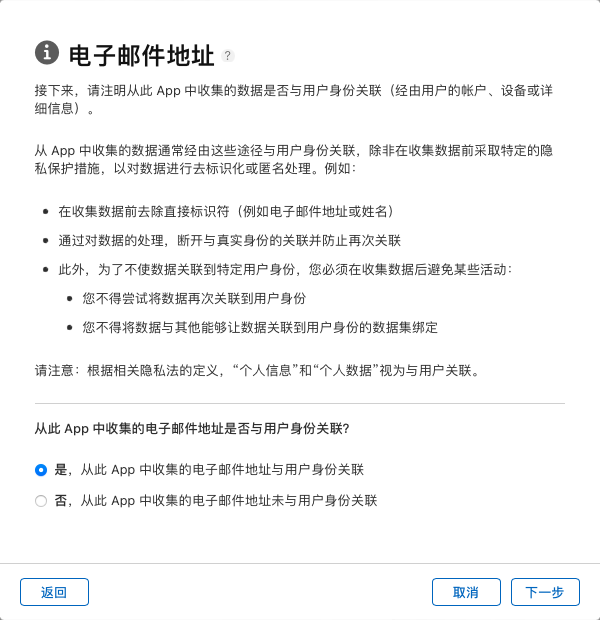
Click Next.
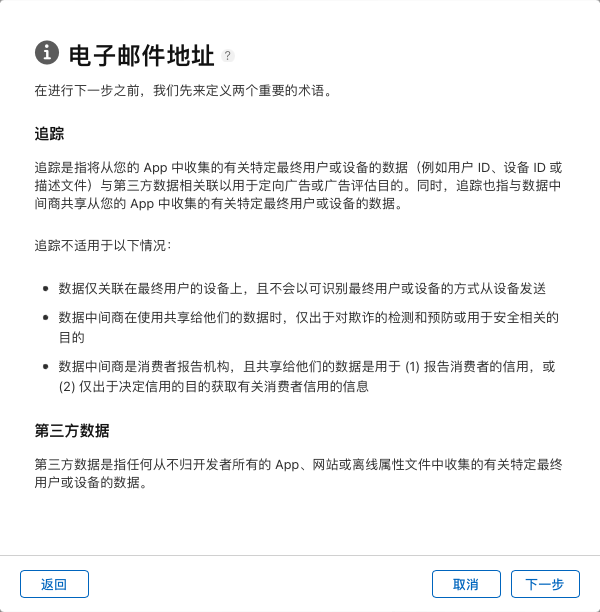
Click Next.
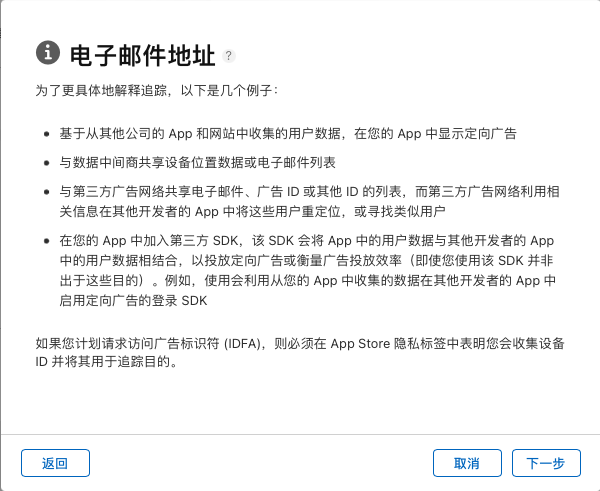
Select No, then click Save.
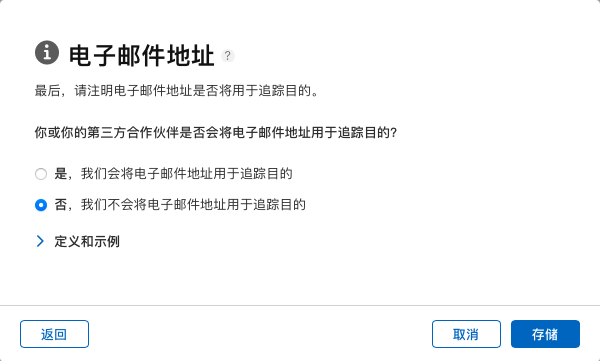
Configure the other data types the same way, using the table below.
| Data type | Purpose | Linked to user identity | Used for tracking |
|---|---|---|---|
| Email Address | App Functionality | Yes | No |
| Phone Number | App Functionality | Yes | No |
| Precise Location | App Functionality | Yes | No |
| Coarse Location | App Functionality | Yes | No |
| Photos or Videos | App Functionality | Yes | No |
| Customer Support | App Functionality | Yes | No |
| User ID | App Functionality | Yes | No |
| Device ID | App Functionality | Yes | No |
| Crash Data | App Functionality | Yes | No |
| Performance Data | App Functionality | No | No |
| Other Diagnostic Data | App Functionality | No | No |
When all are configured, it looks like this. Then click Publish.
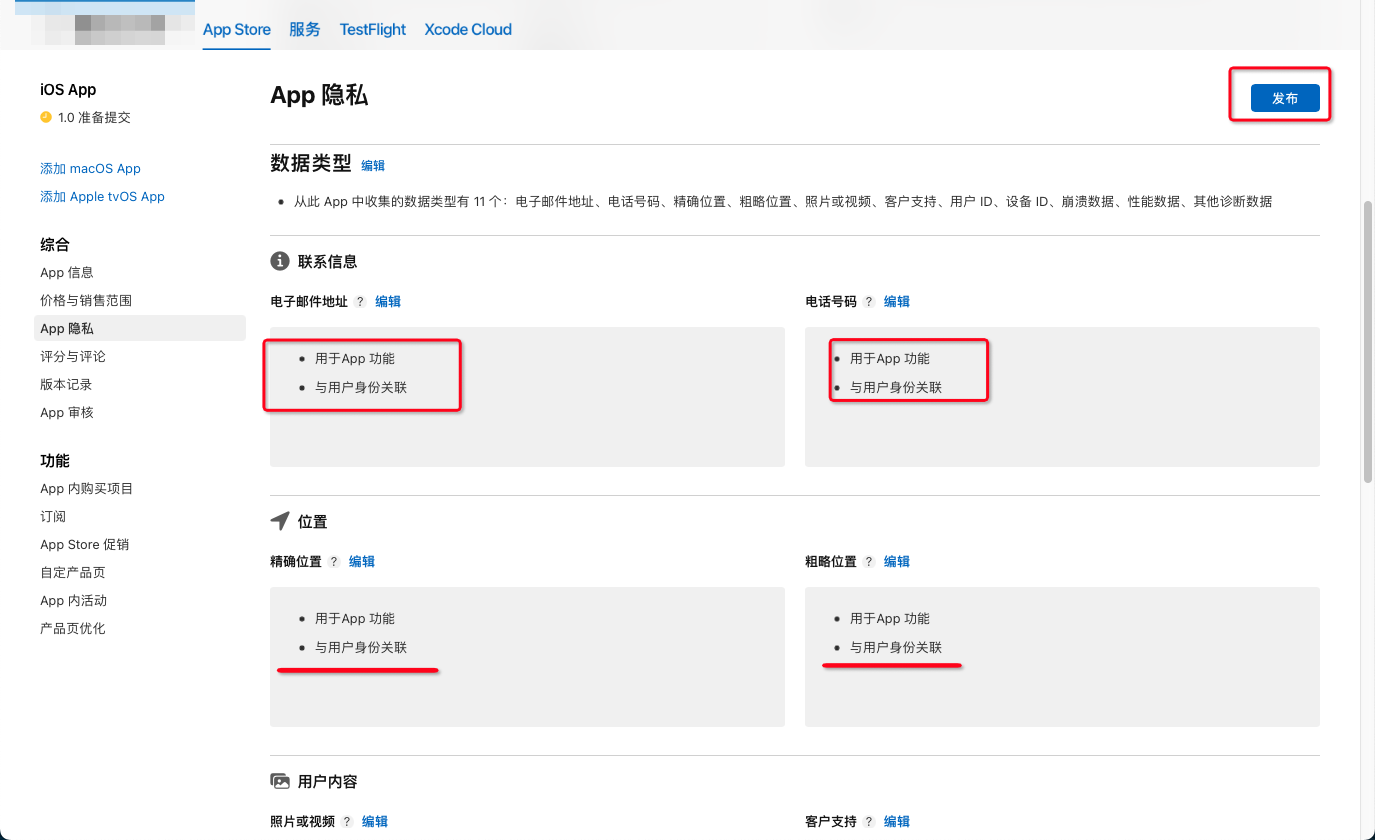
Click Publish.
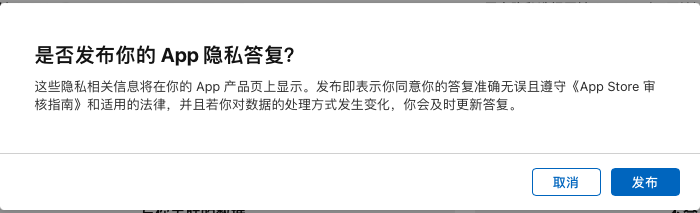
Upload the App
Download the Transporter app from the Mac App Store.
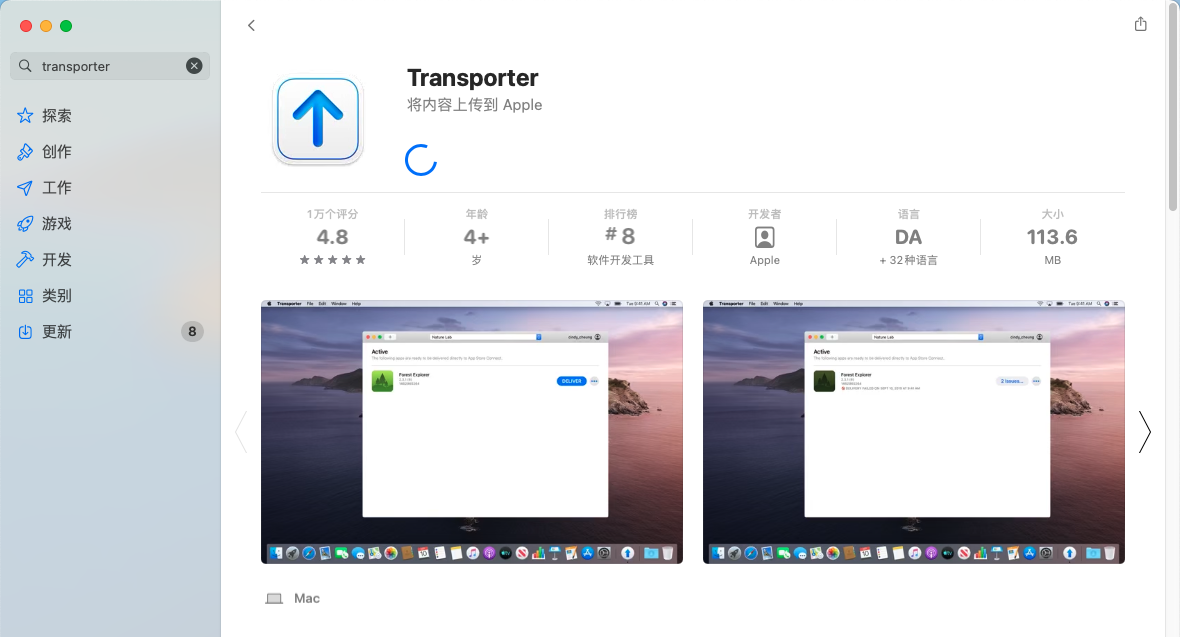
On a Mac, open Transporter and sign in.
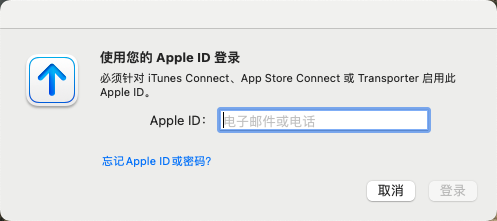
Click Add App and select the
.iparelease package you downloaded.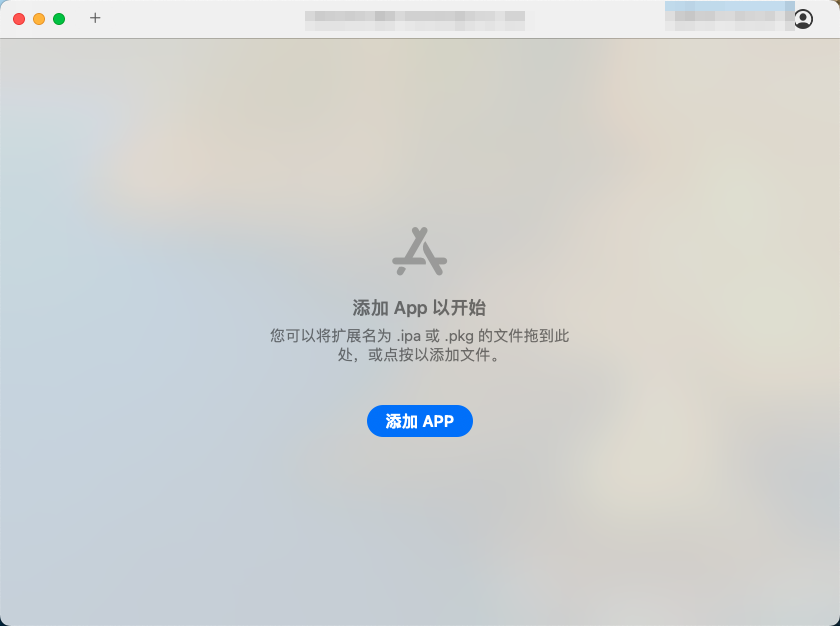
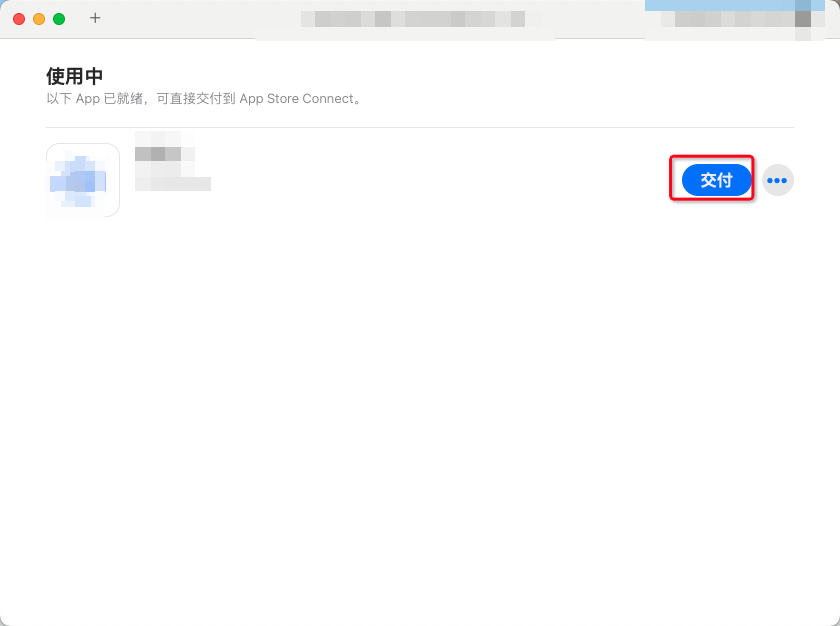
Click Deliver. If upload fails or takes too long, retry several times.
Submit for Review
After the package is uploaded, wait 15 minutes to 1 hour, return to App Store Connect, refresh the Prepare for Submission page until Build shows a + or Add Build button.
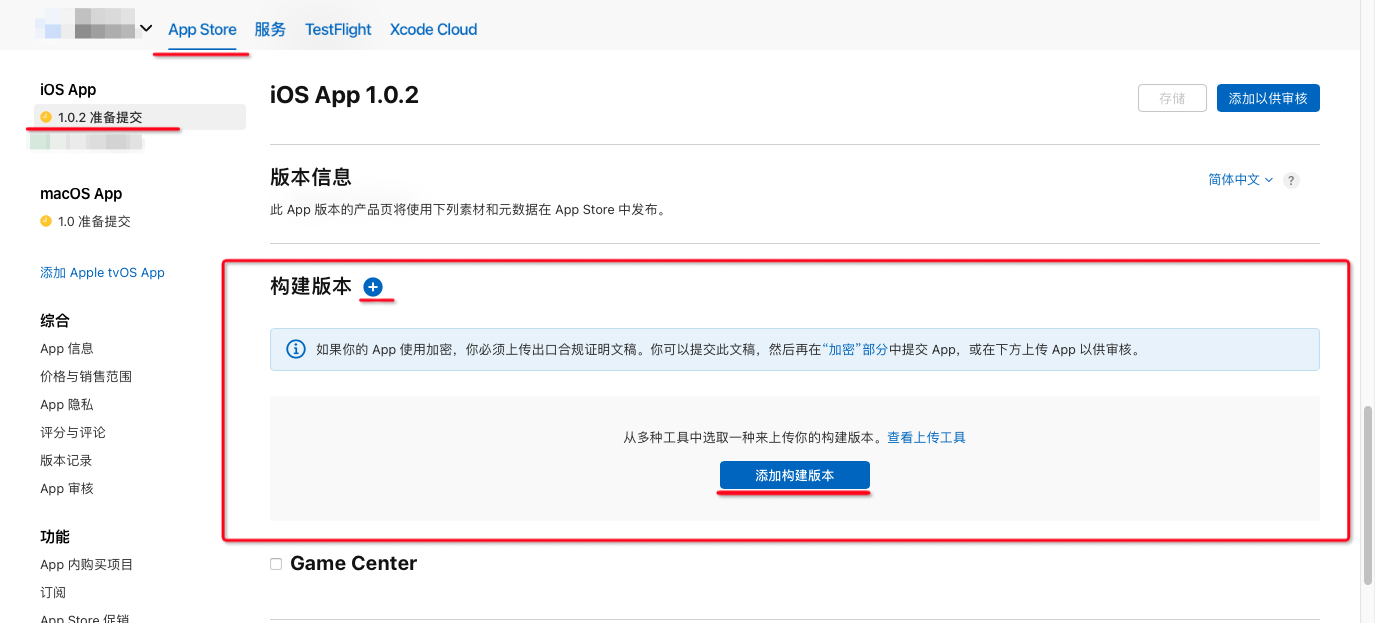
Click either button, select the version you just uploaded. If it shows Processing, wait until processing finishes, manually refresh, then select it and click Done.
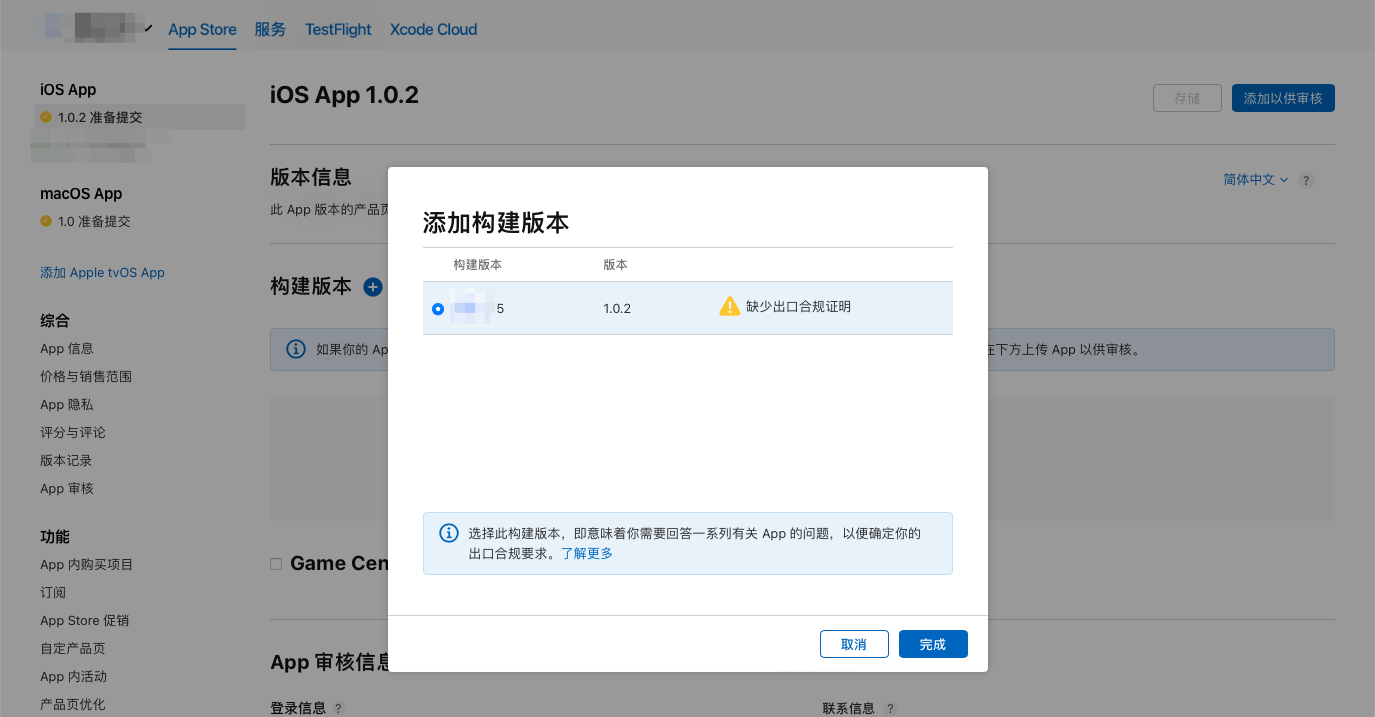
If you see Missing Export Compliance, click Manage.
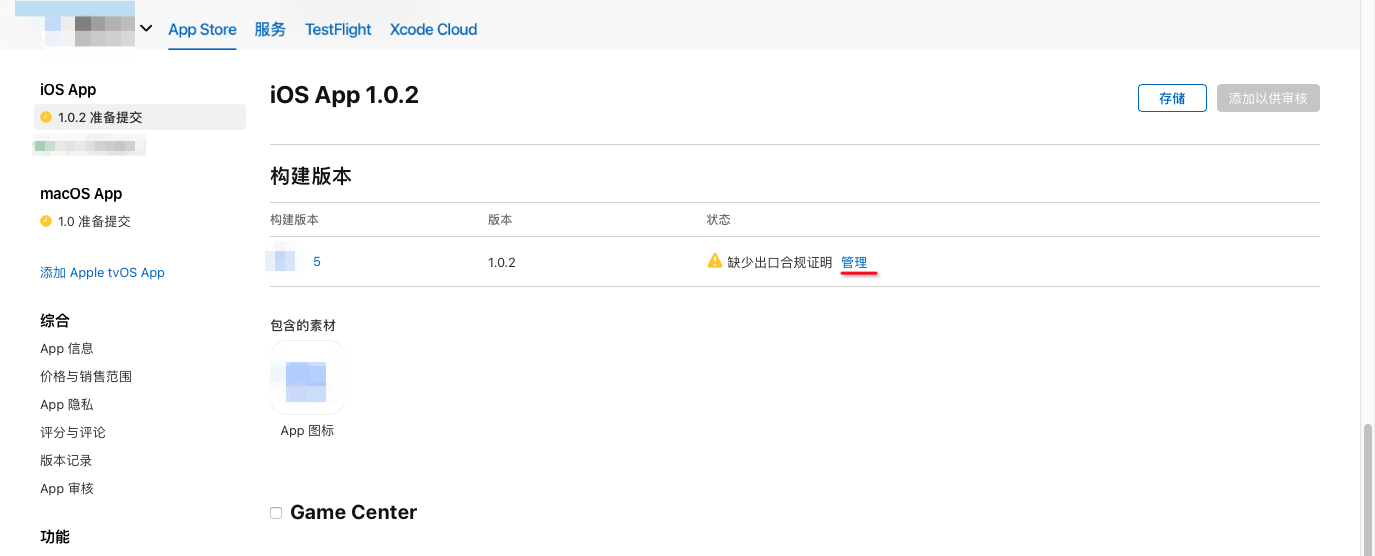
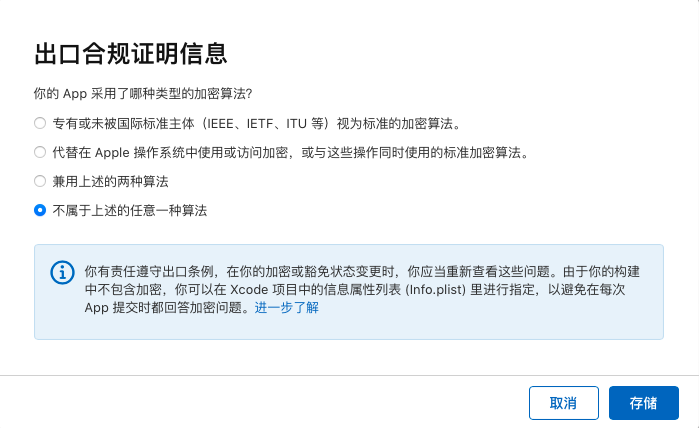
Select None of the algorithms mentioned above..., then click Save.
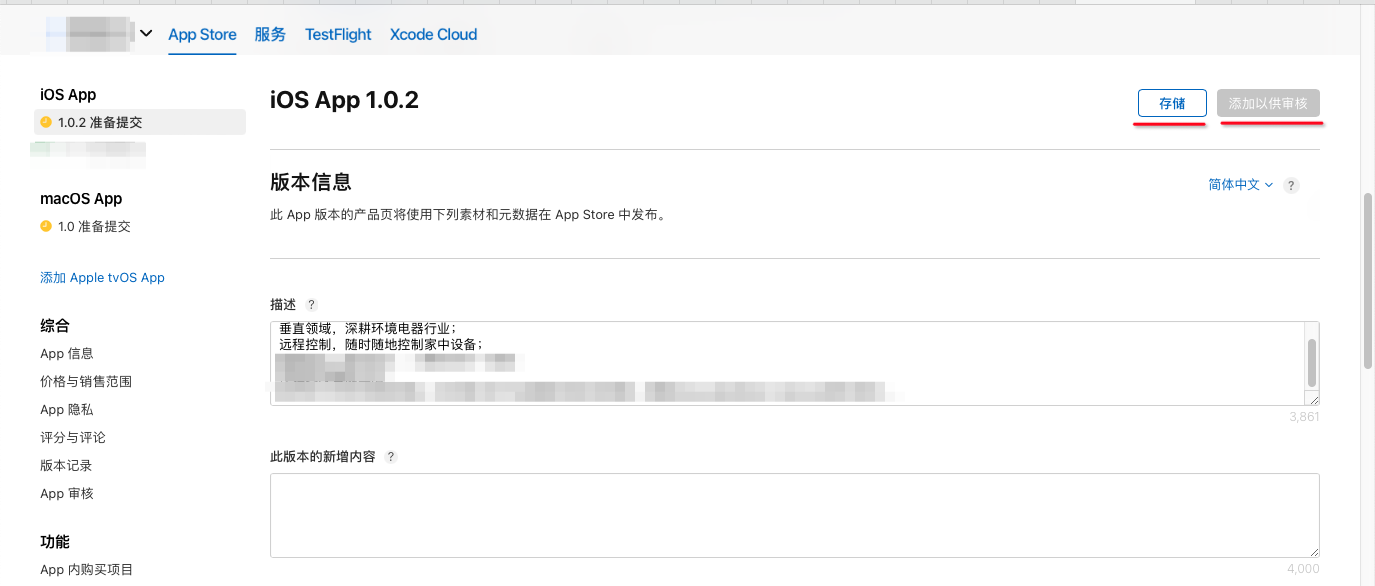
Click Save, then Add for Review.
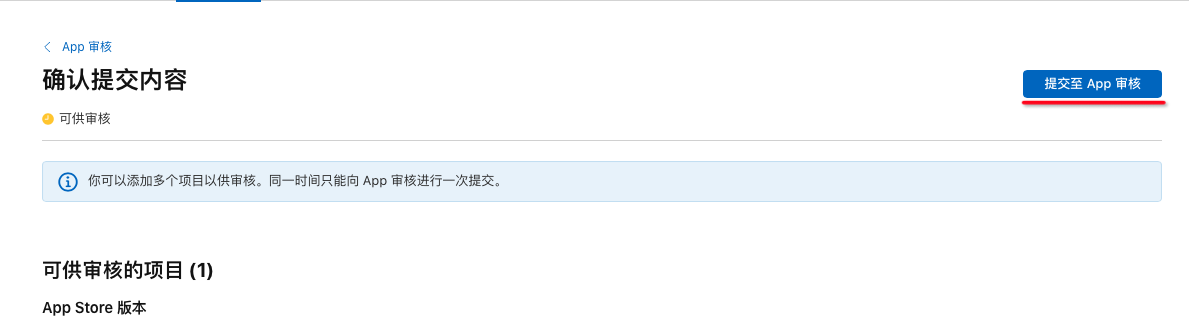
Click Submit to App Review.
Review usually takes 1–3 business days. After approval, the contact email address receives a notification. If you selected Automatically release this version, the App is released on the App Store automatically. If you selected Manually release this version, return to App Store Connect and release it manually.