OEM App Build Process
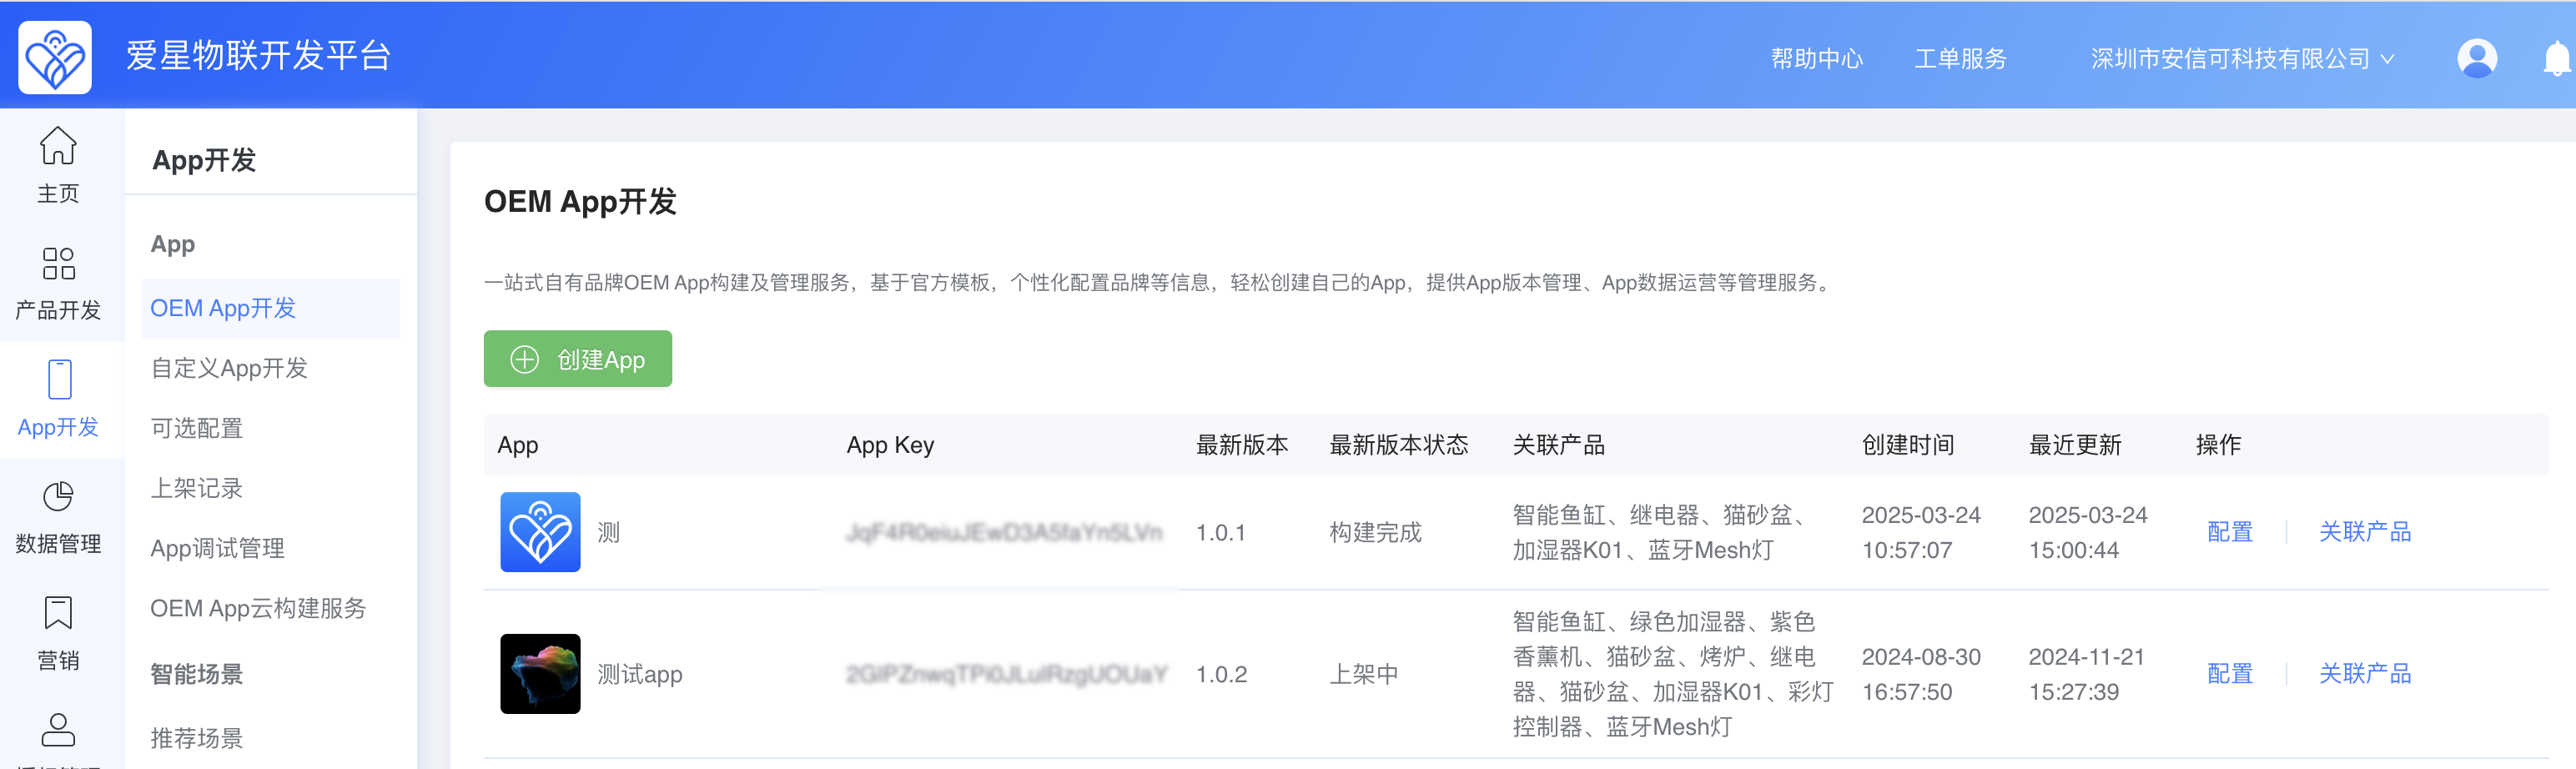
Sign in to the Ubases IoT development platform, go to App Development, and click Create App.
Follow the prompts in the dialog and enter the required app information. When finished, click Create Now. 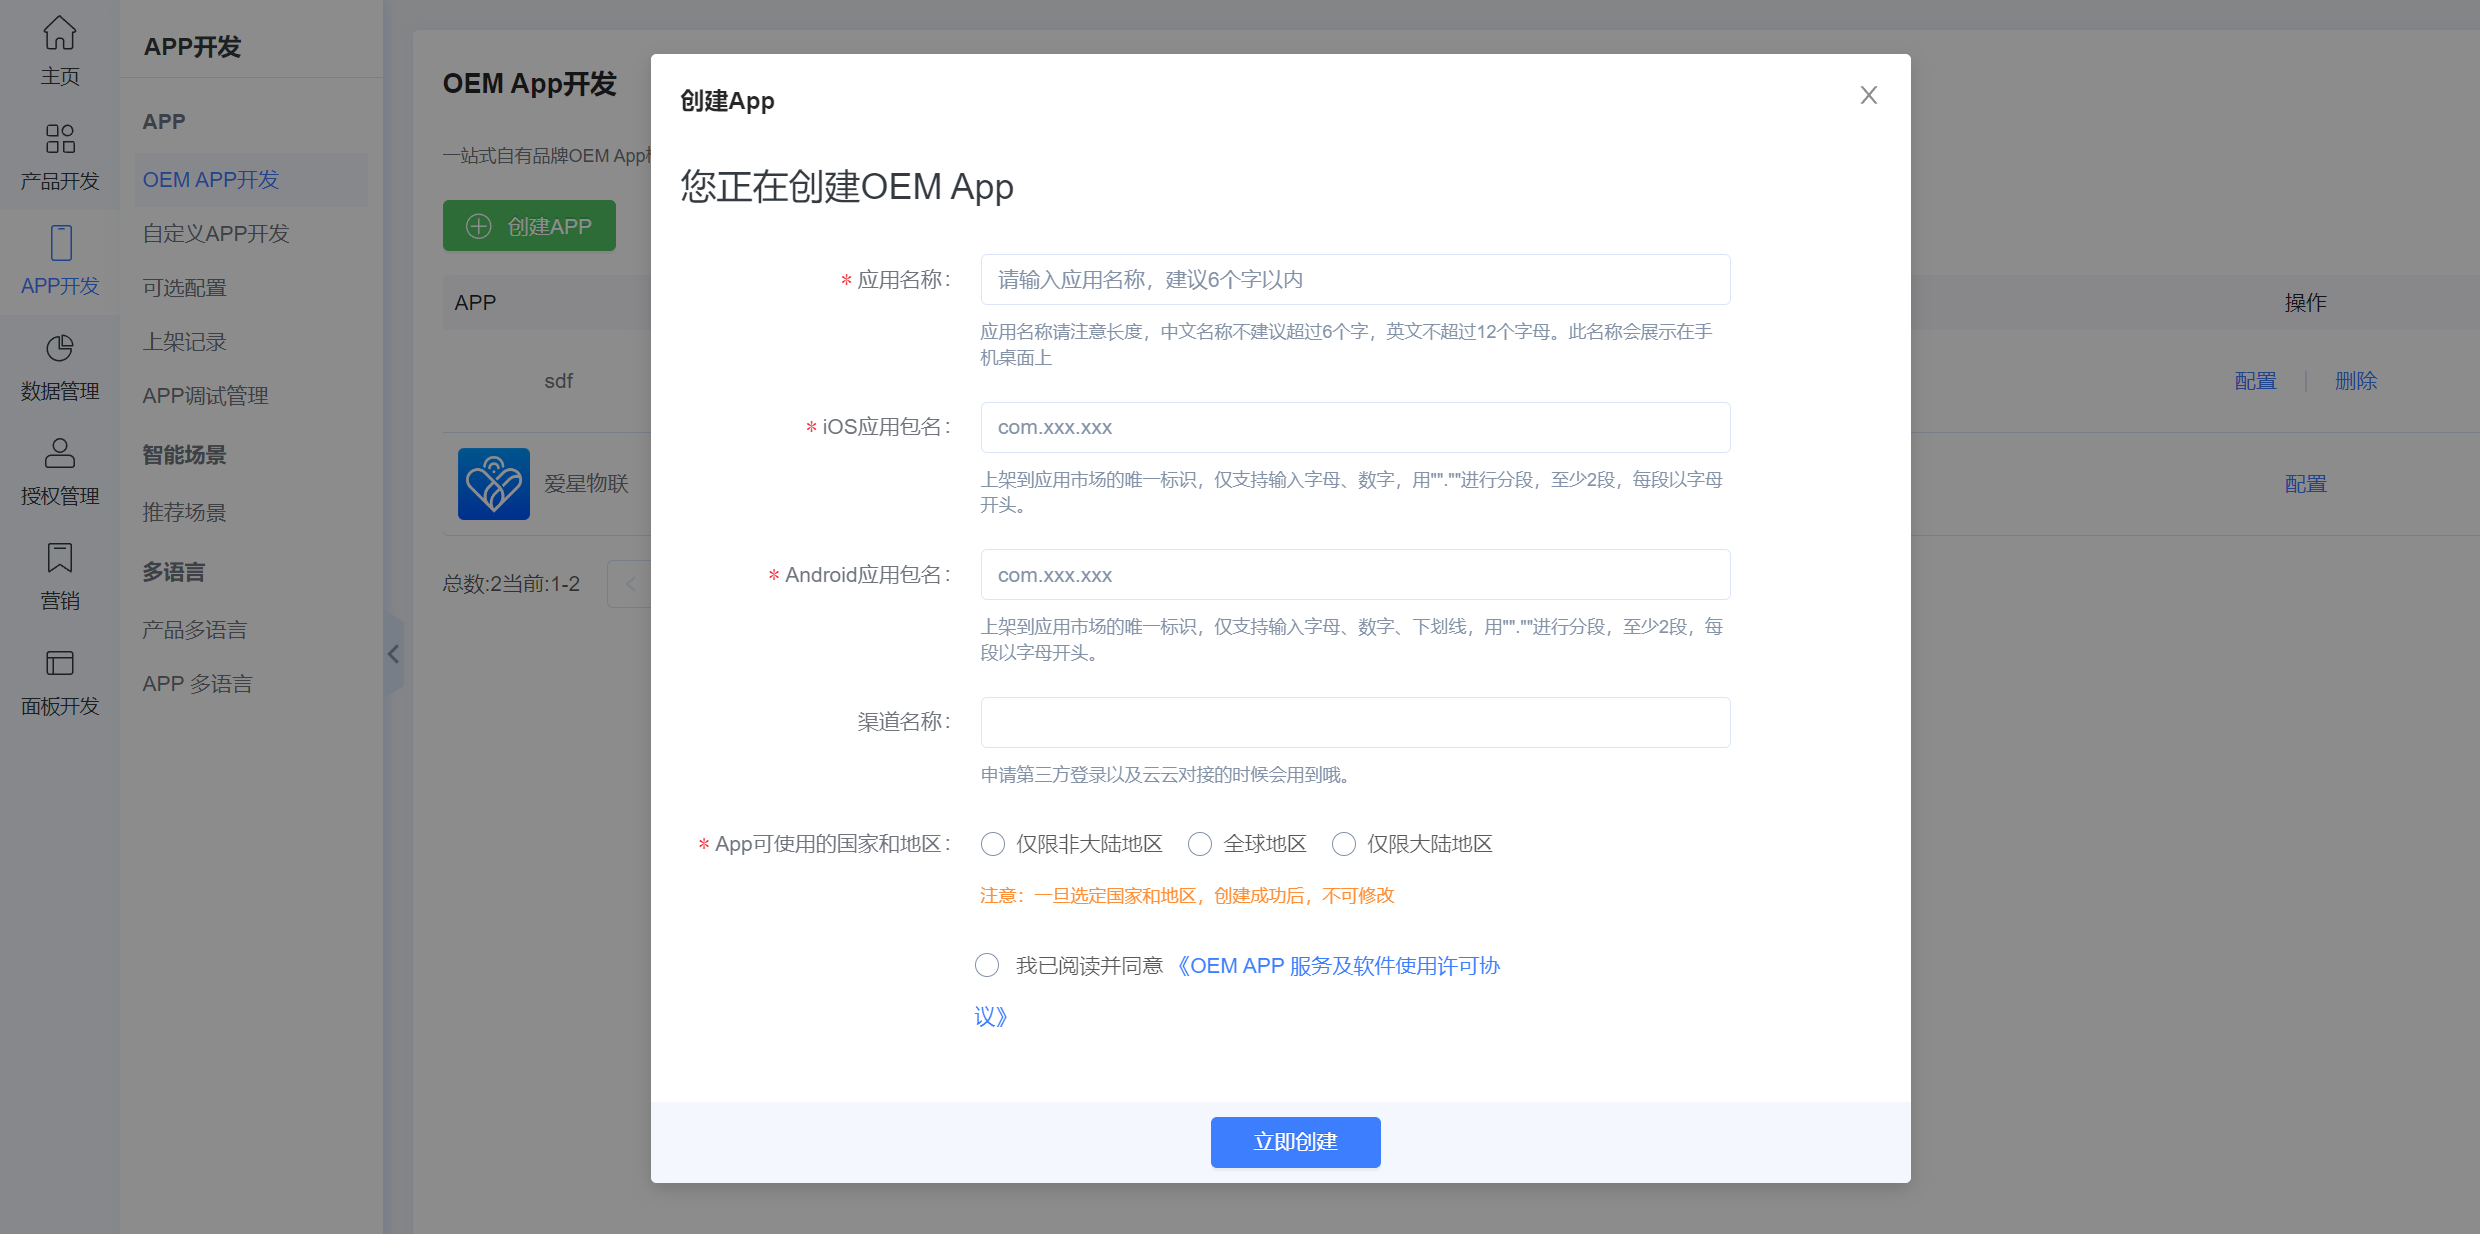
1) UI Configuration
Upload App Icon
Follow the page prompts to upload the app icon. The icon must be square, 1024*1024, and no larger than 2 MB.
After uploading, you can preview how the app appears on a phone on the right. 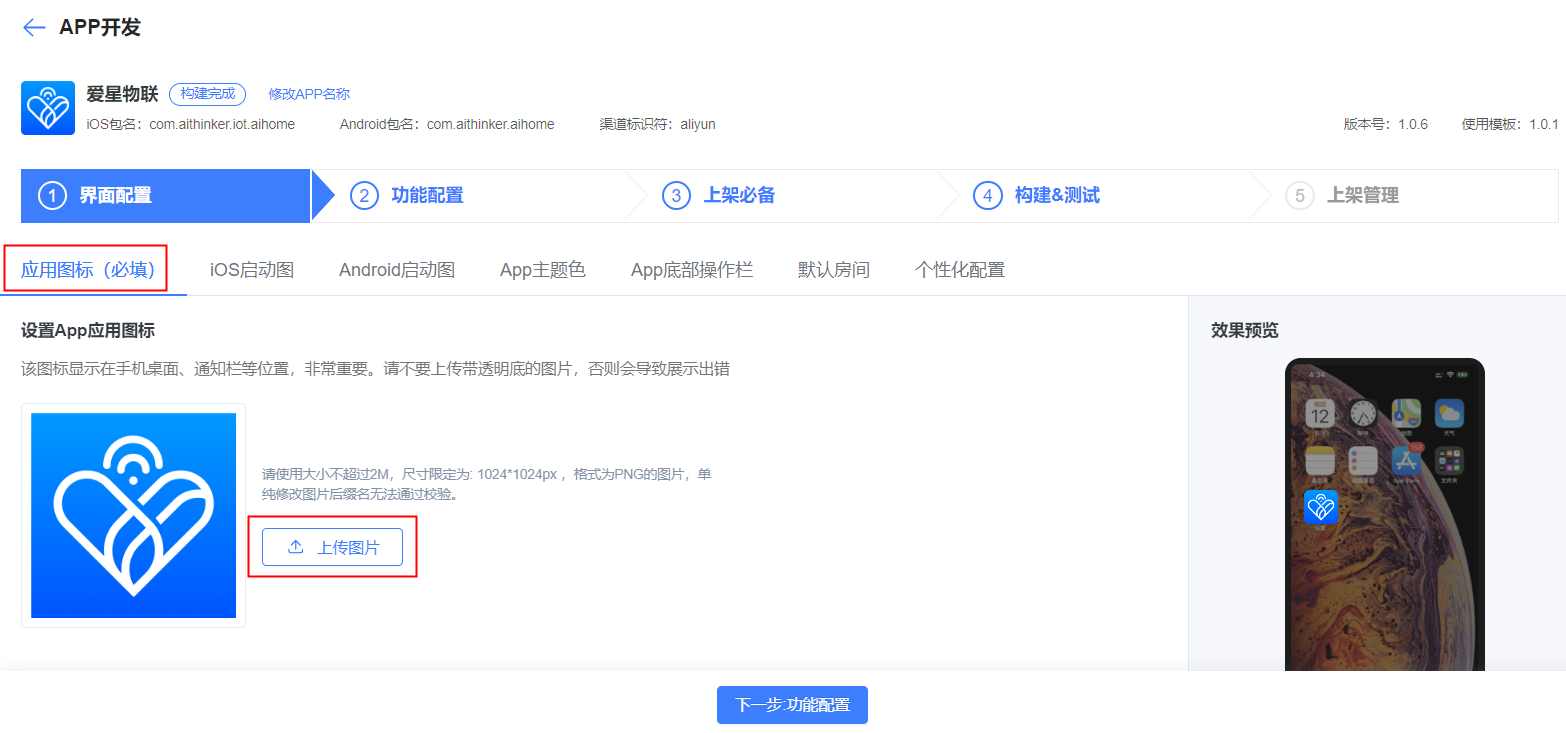
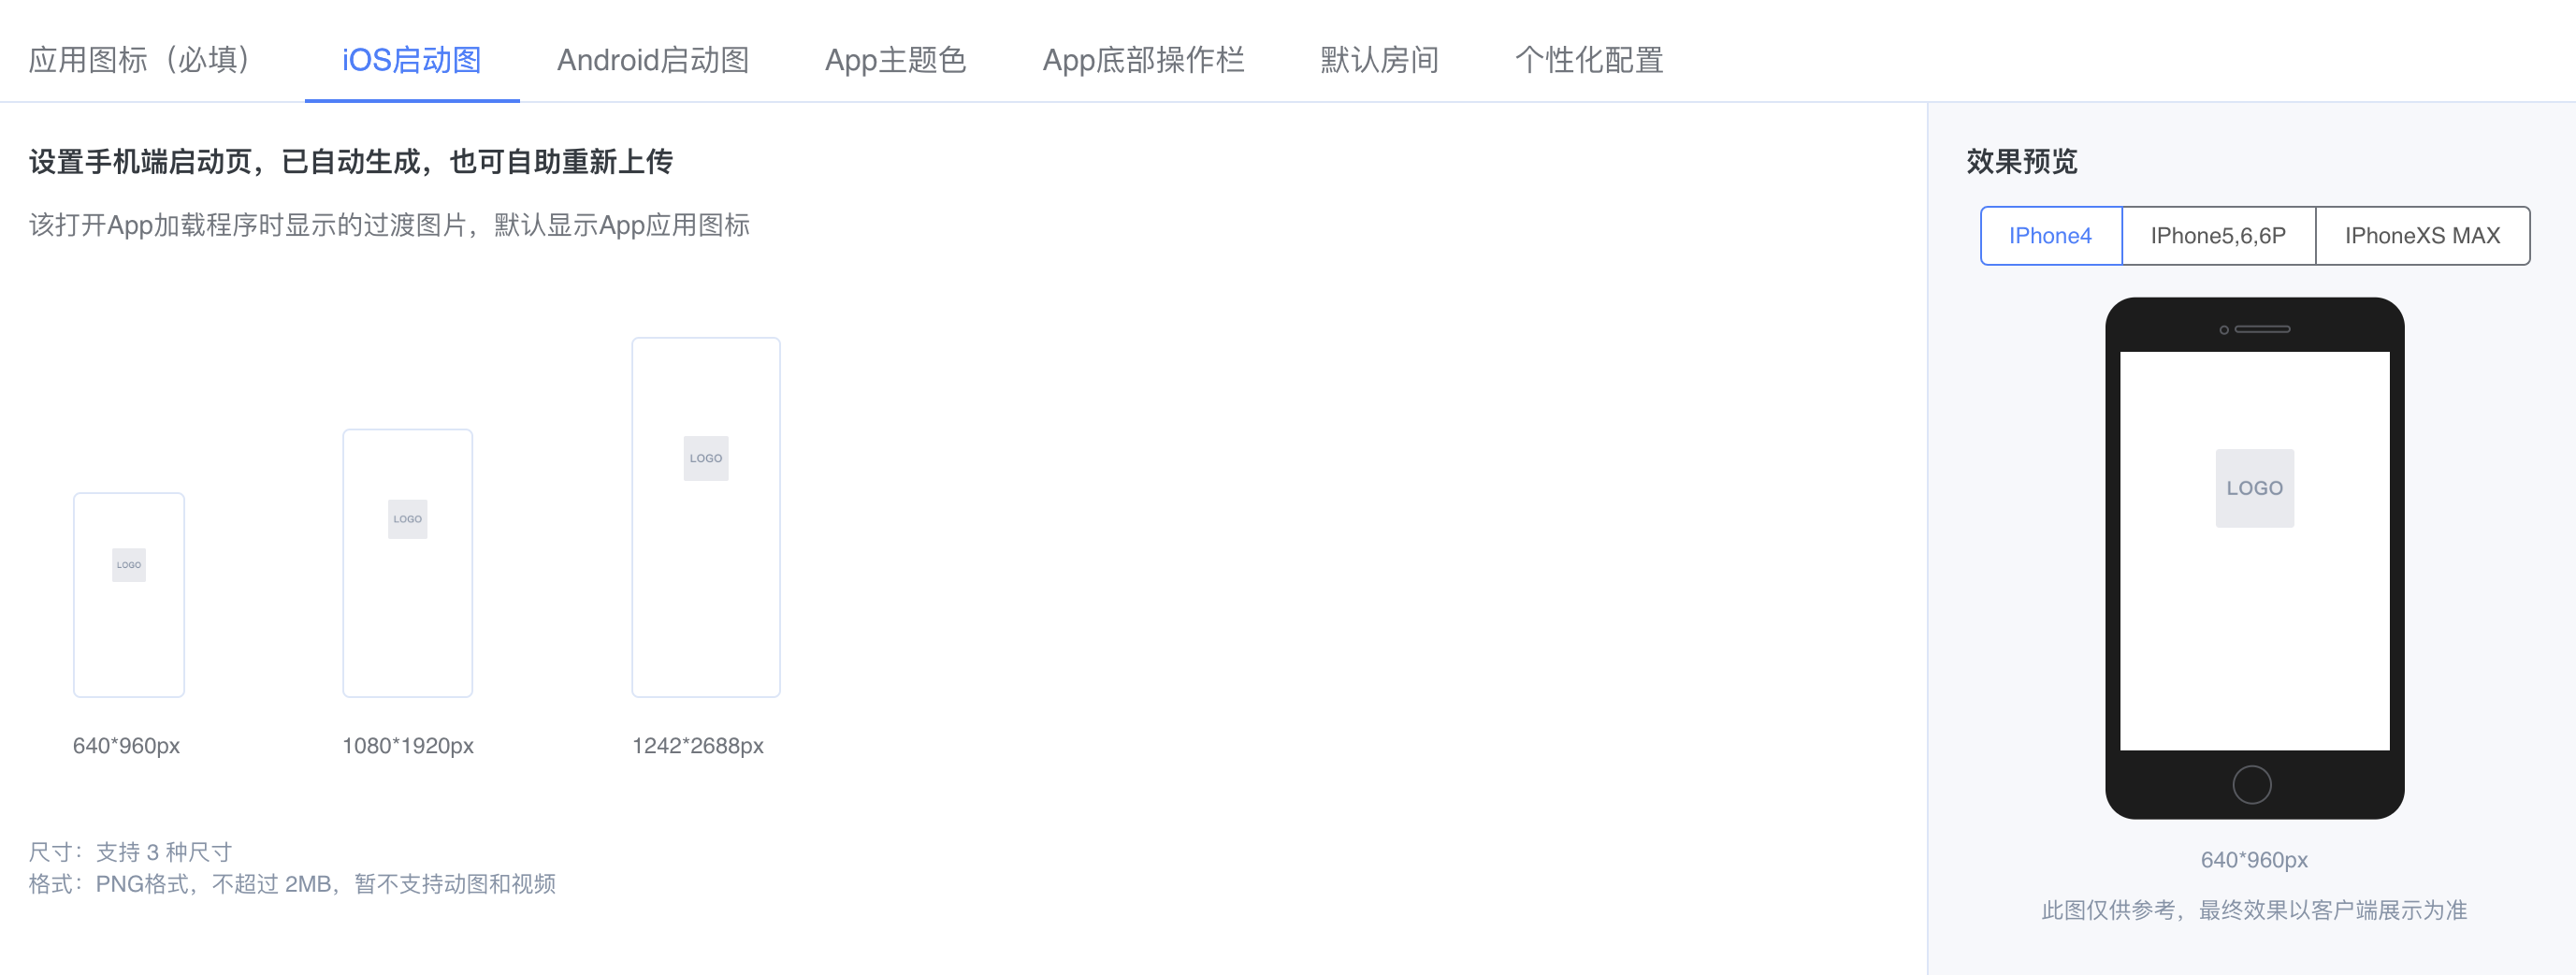
Upload iOS Splash Screen
Next, open the iOS splash screen page. The iOS splash screen is automatically generated from the app icon. On the right you can preview splash screens for different device models. You can also upload custom iOS splash screens. Three sizes are supported: 640*960px, 1080*1920px, and 1242*2688px. Each image must be no larger than 2 MB and in PNG format.
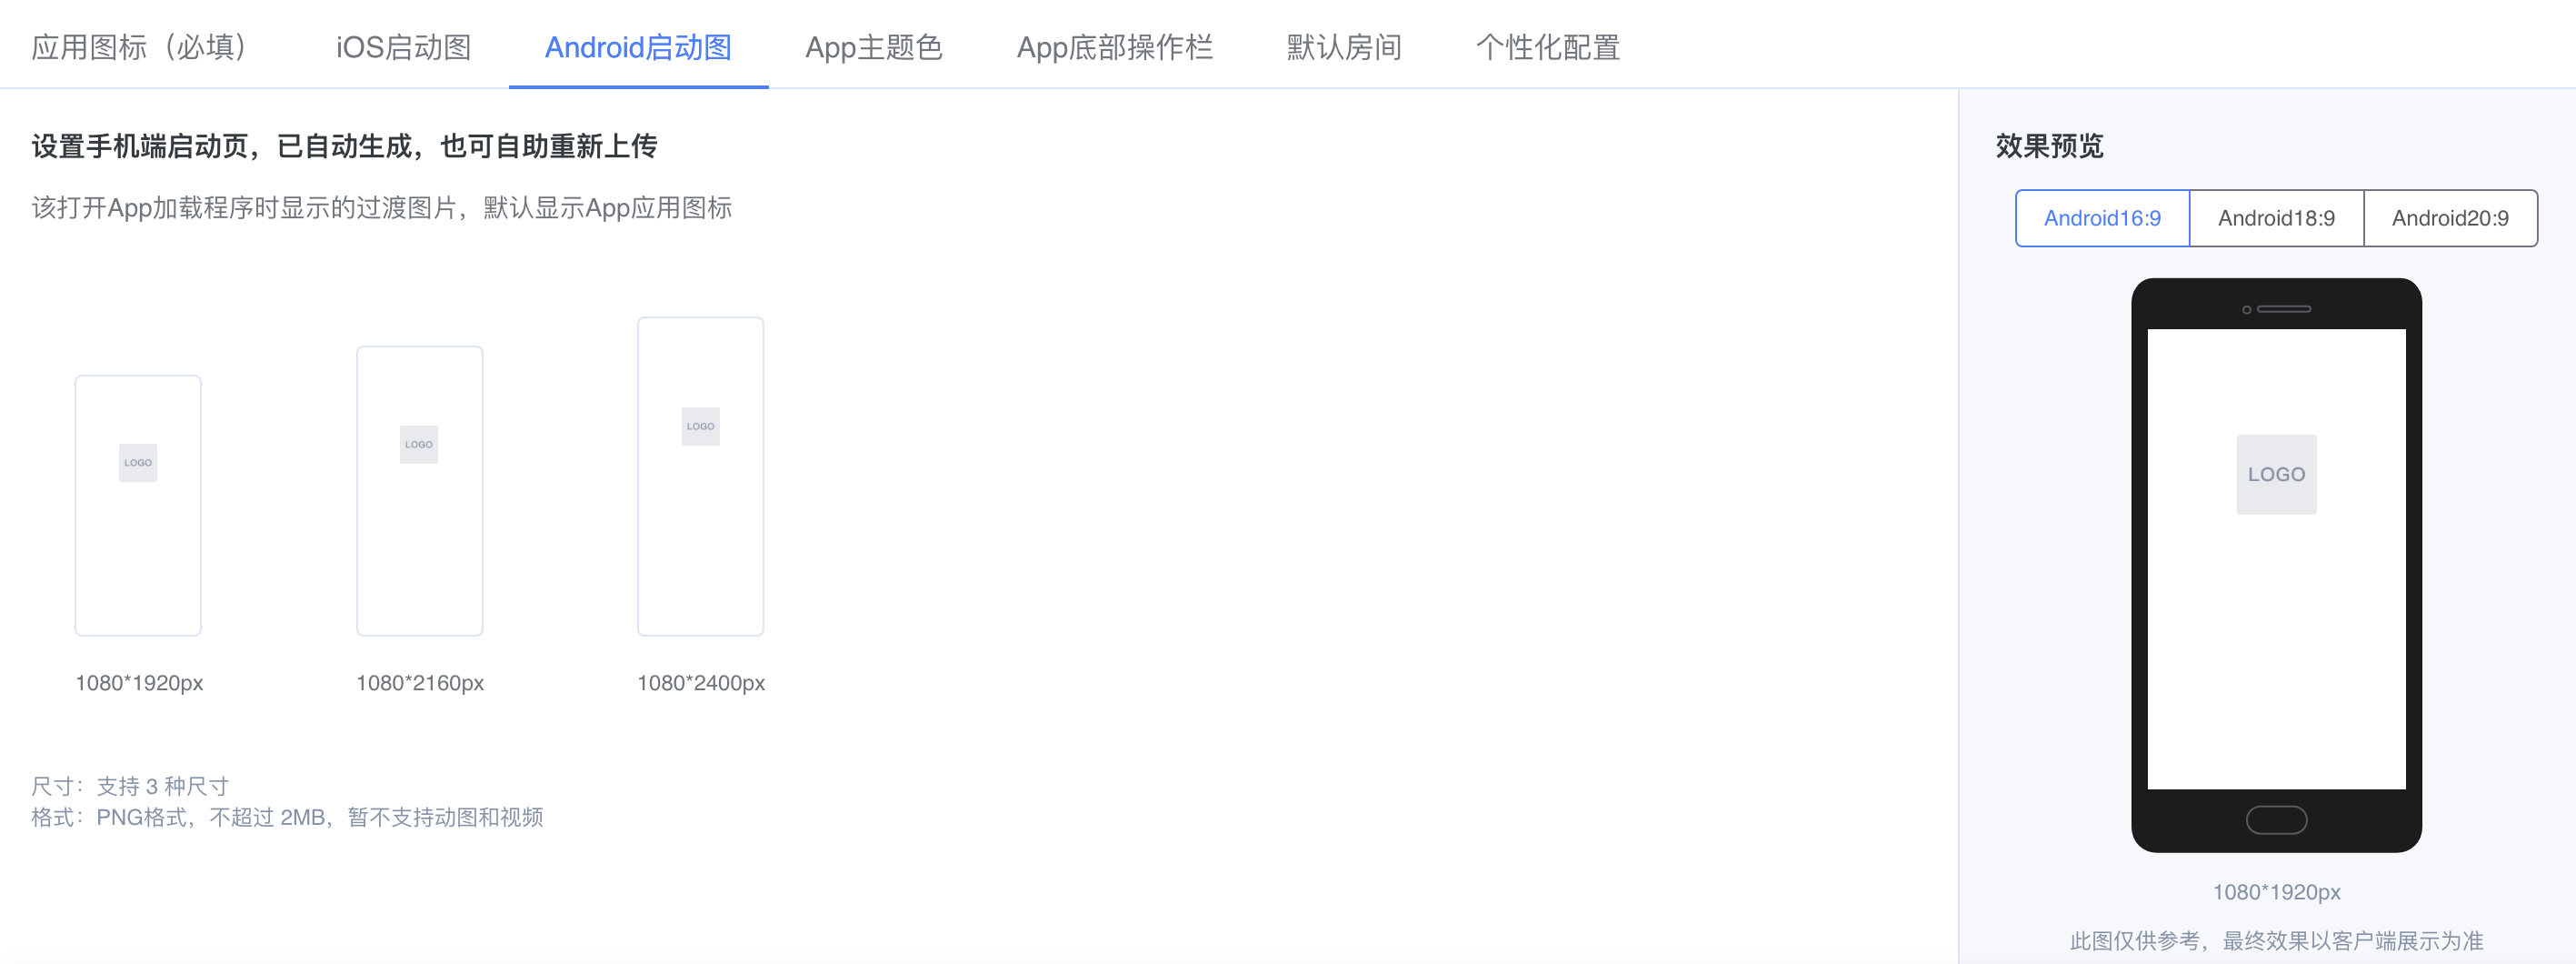
Upload Android Splash Screen
After confirming the iOS splash screen, configure the Android splash screen. Android also supports three sizes: 1080*1920px, 1080*2160px, and 1080*2400px. Each image must be no larger than 2 MB and in PNG format.
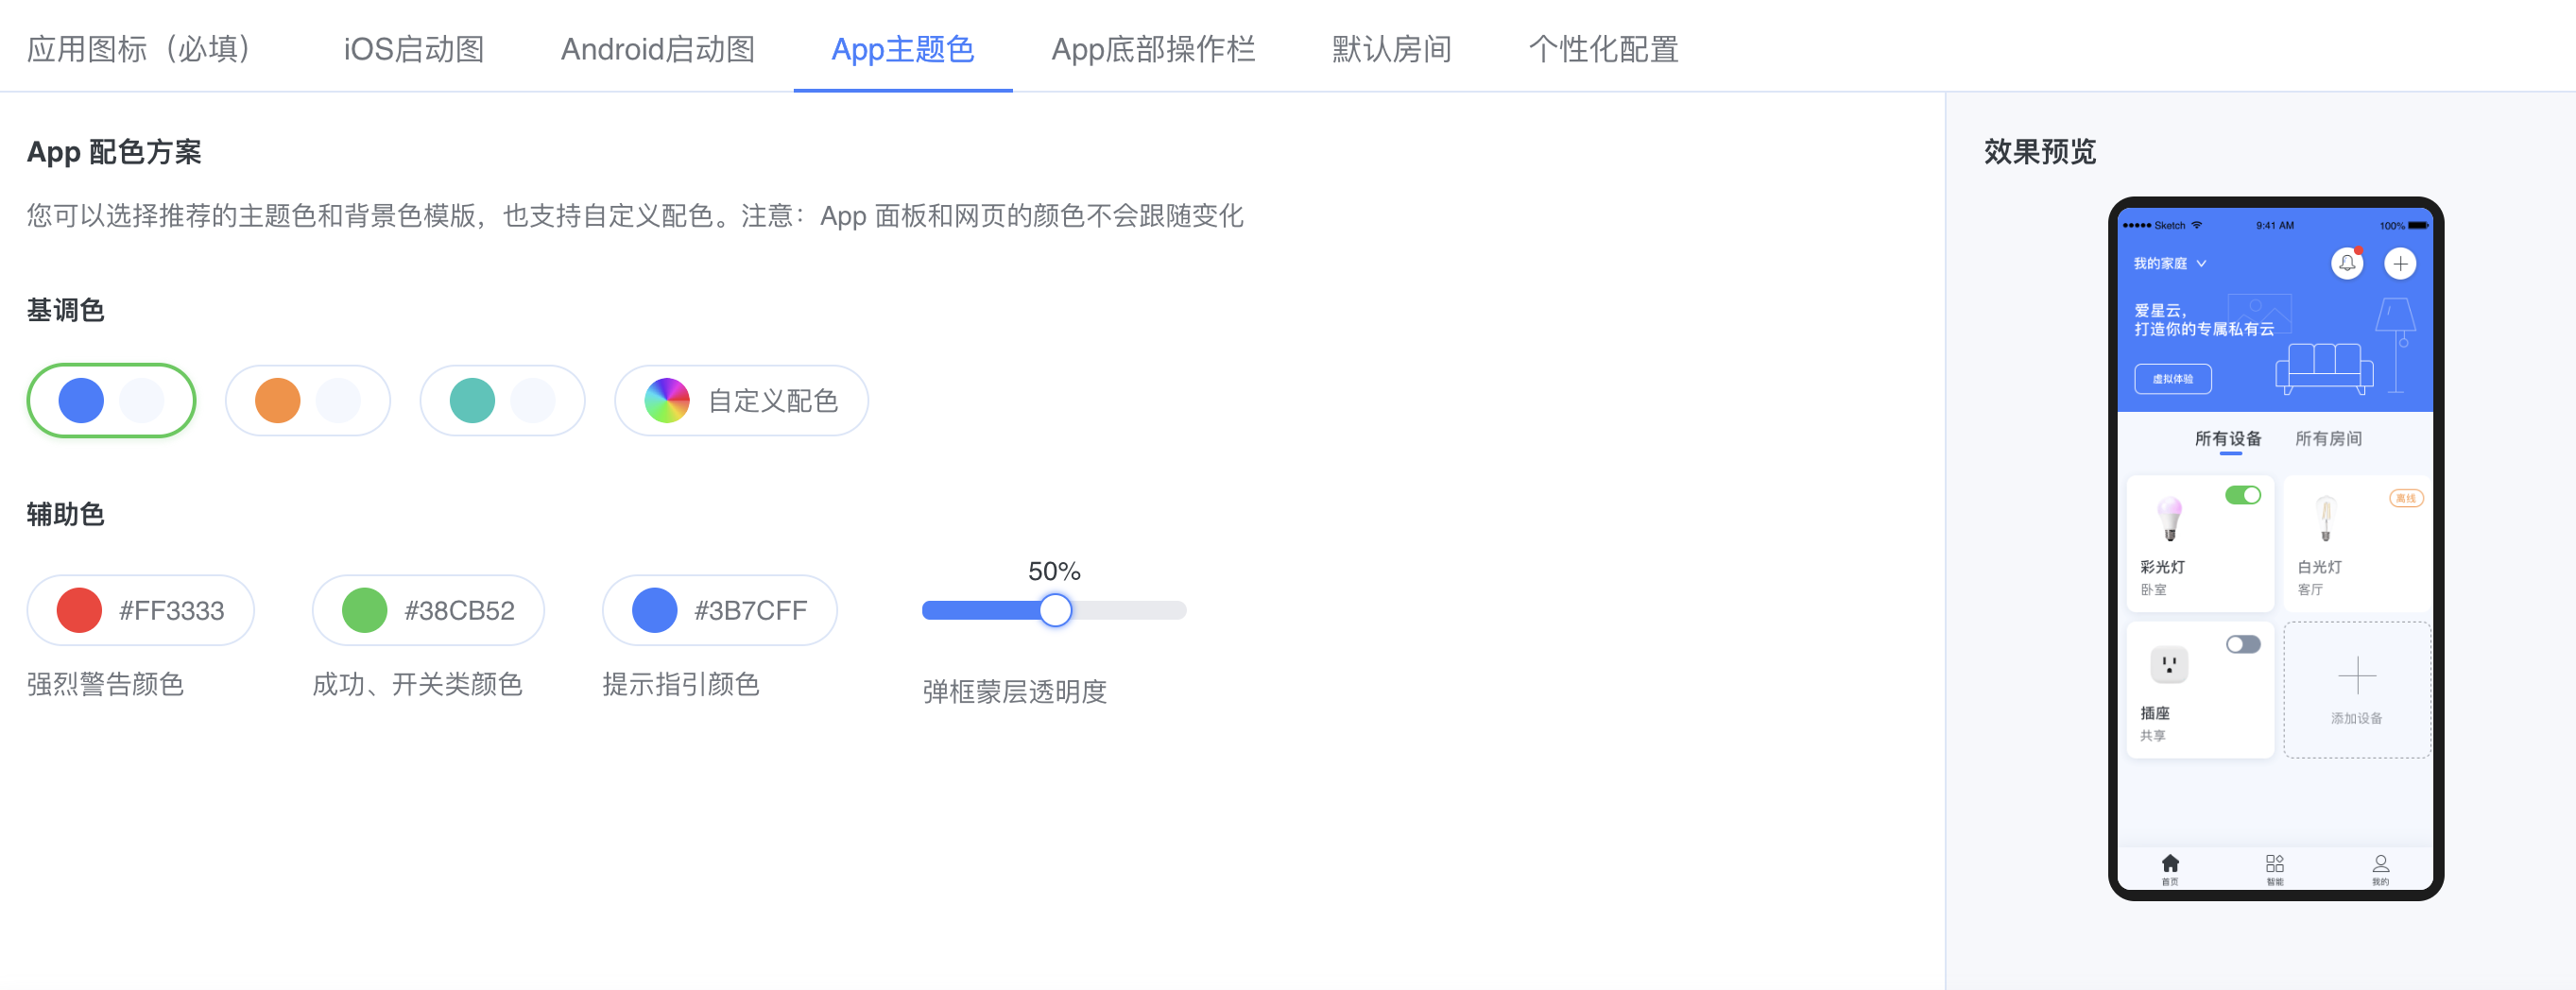
Set App Theme Colors
Set the App primary and secondary colors as needed. You can preview the effect on the right while configuring.
Set App Bottom Tab Bar
Set the default and selected text colors for the App bottom menu bar as needed. The bottom menu bar includes three required items by default: Home, Scene, and Me. You can edit their default and selected states. After configuration, preview the effect on the right. If the result is not what you expect, click Restore Defaults to return to the system defaults.
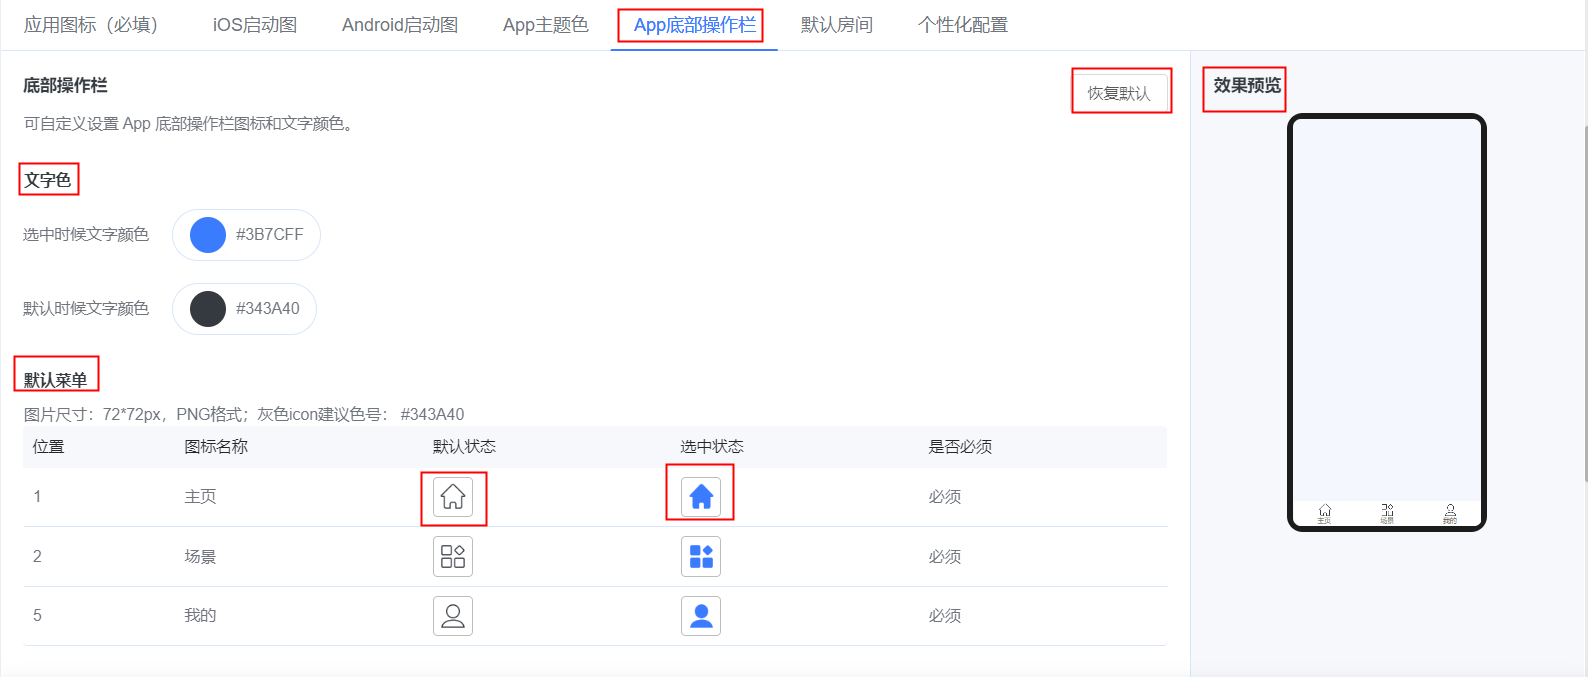
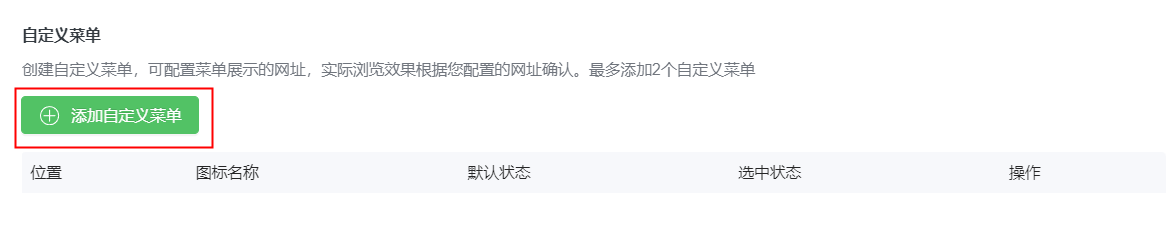
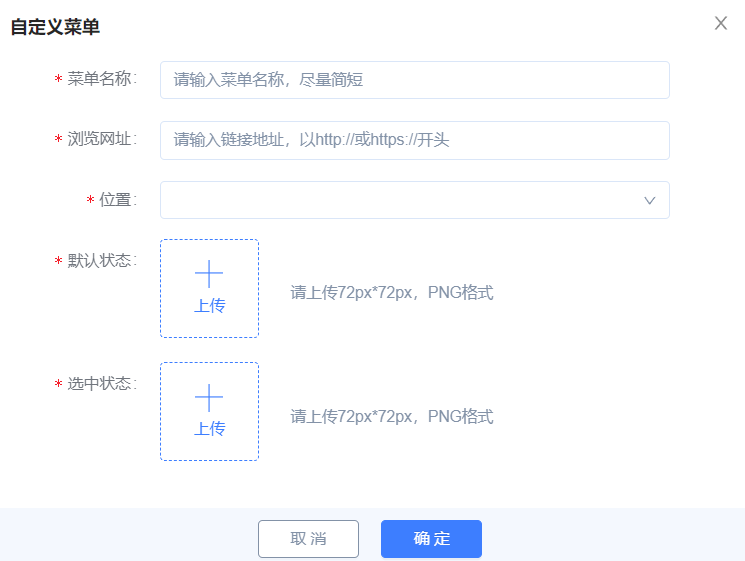
If the three default menus are not enough, you can add up to 2 custom menus. Click the red-boxed button in the figure below to add a menu.
Configure Default Rooms
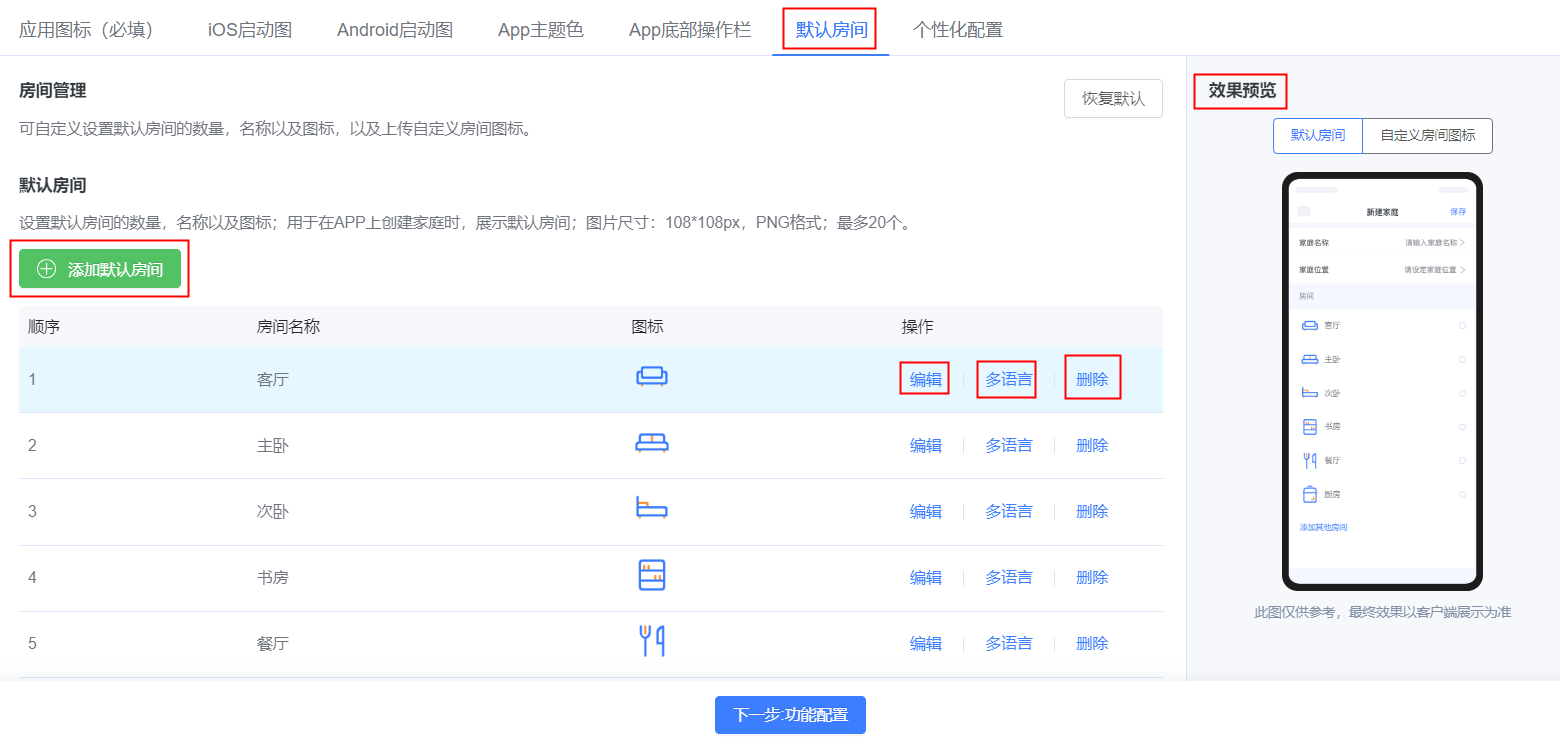
You can configure up to 20 default rooms. Click Edit to change room names, order, and icons. For App internationalization, click Multilingual to configure languages. Click Delete to remove unwanted rooms.
Personalized Configuration
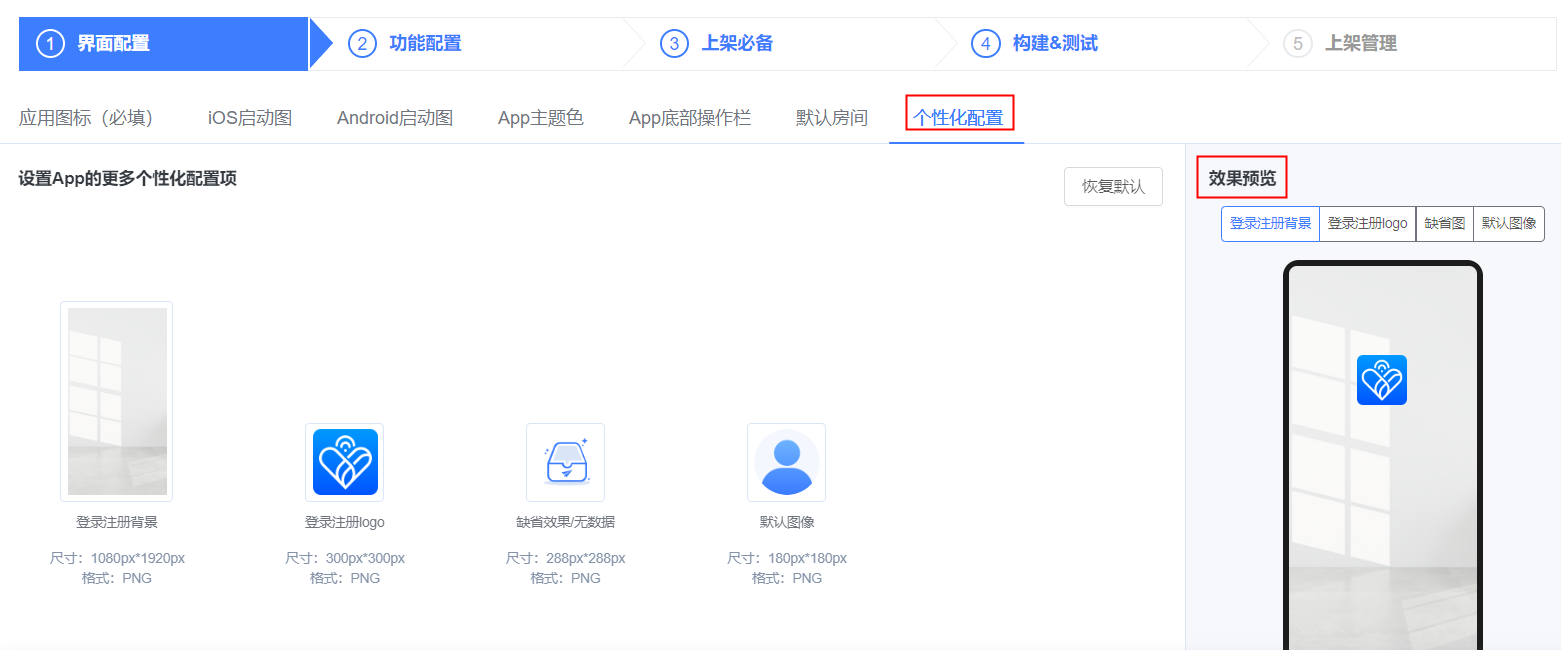
If you need to replace the default App login/registration background, login/registration logo, empty state illustration, default avatar, and similar assets, upload your own images as required. After this step, UI configuration is complete.
2) Feature Configuration
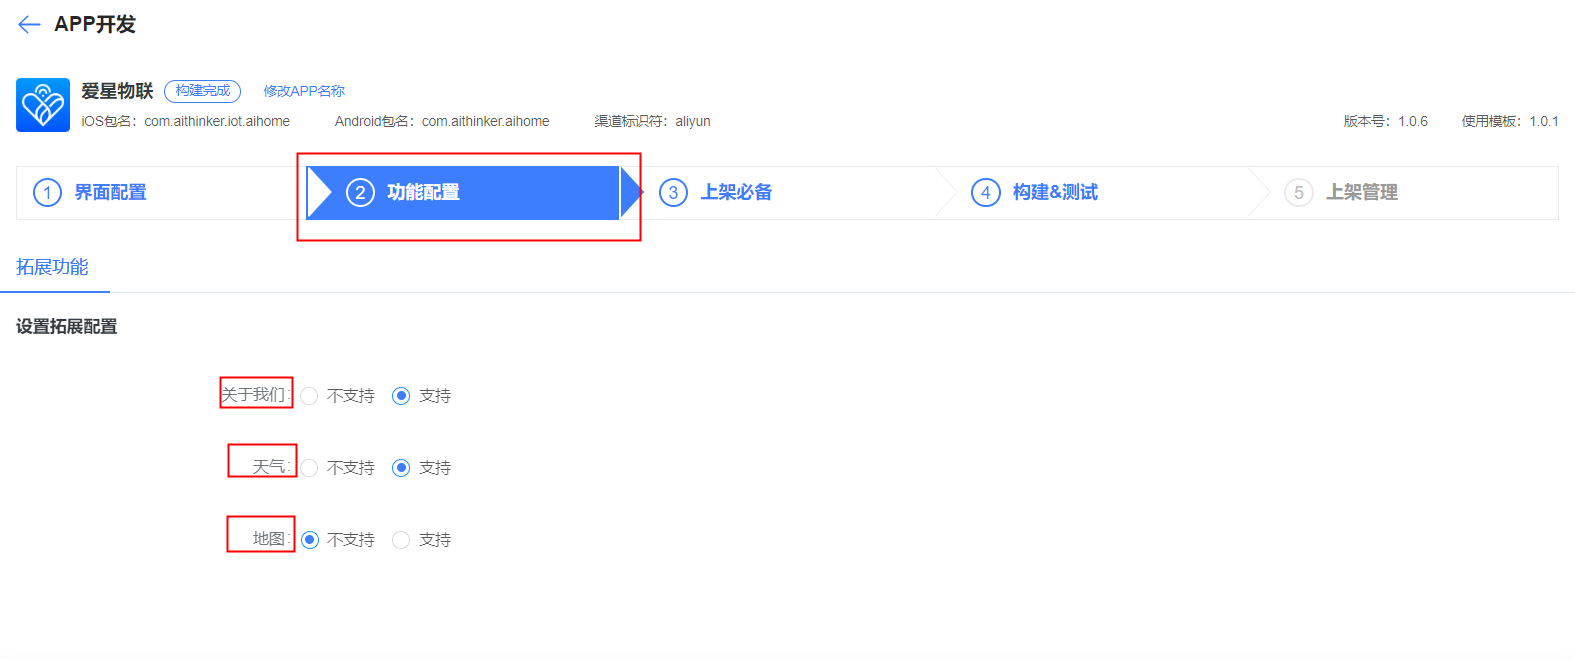
Configure whether to support About Us, Weather, and Maps as needed.
3) Store Listing Essentials
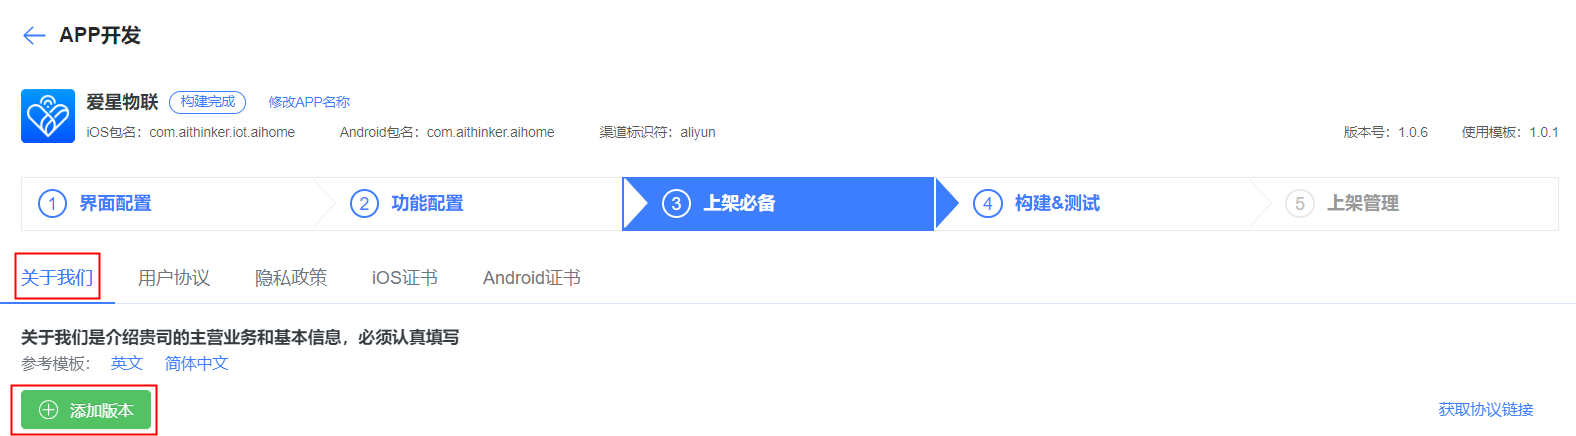
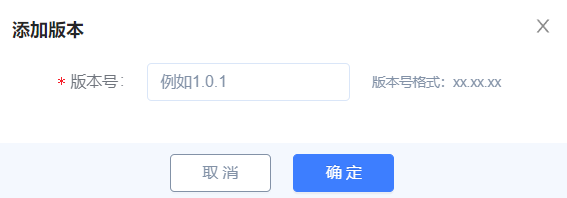
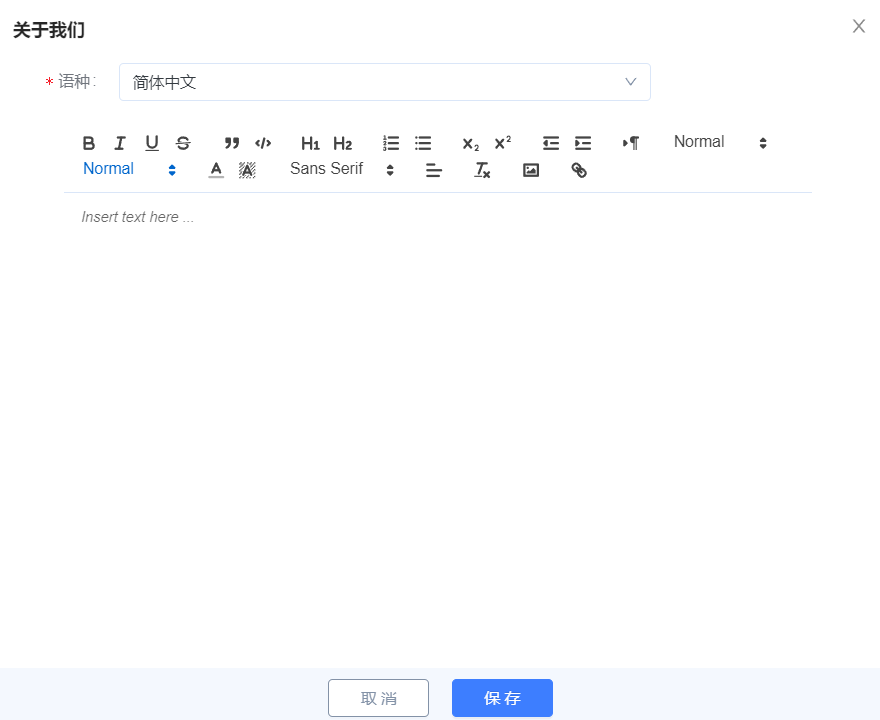
Open the About Us page, click Add Version, enter the version number, select the required languages, enter the content, and click Save. After saving, click Enable. The enabled About Us content is included when the App is built.
Adding the User Agreement and Privacy Policy follows the same steps as About Us.
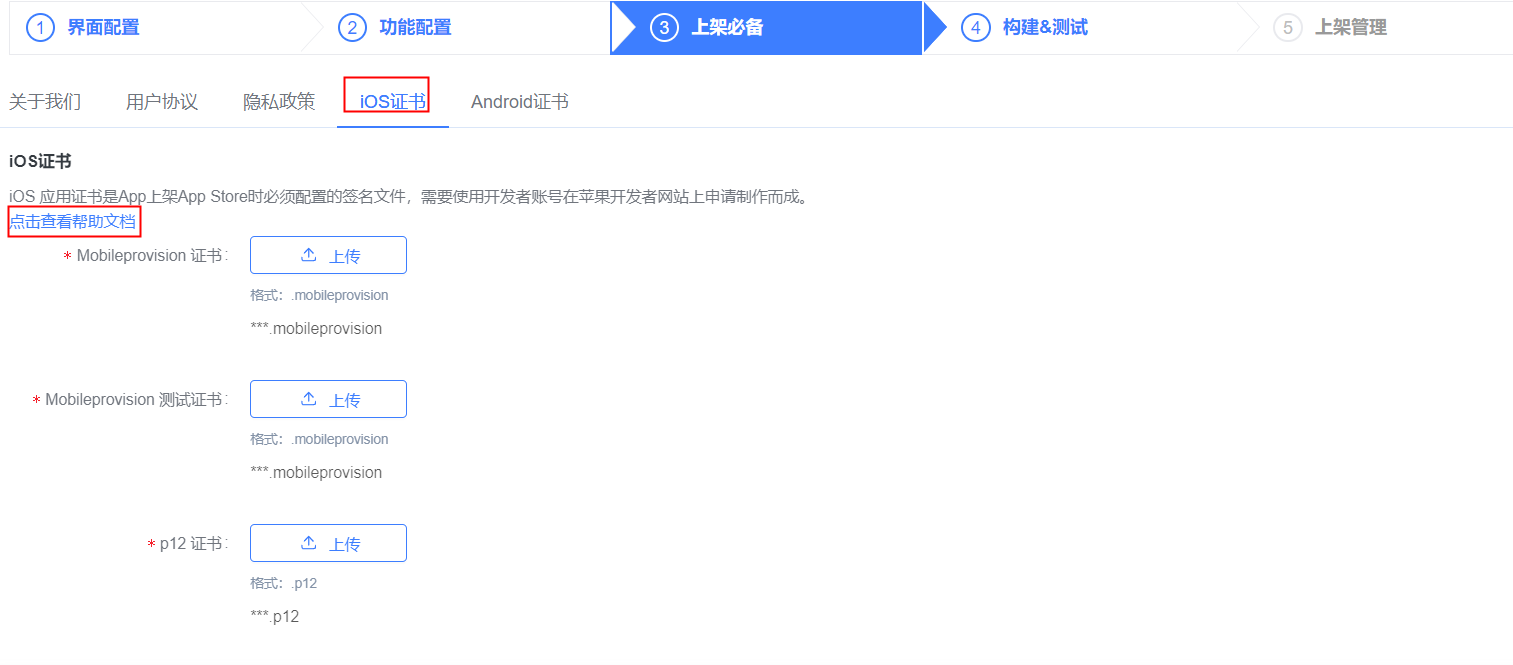
4) Configure iOS Certificates
To configure iOS certificates, click View Help Docs and follow the help docs to obtain and upload iOS certificates.
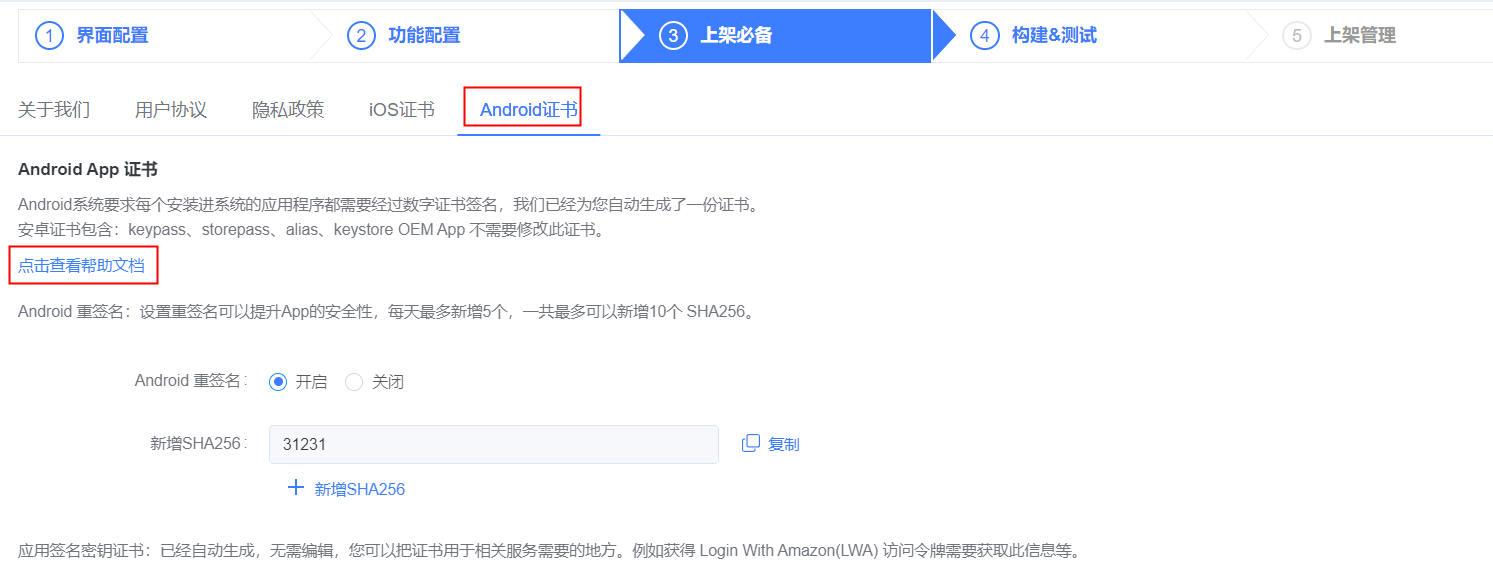
5) Configure Android Certificates
Open the help docs to learn how to obtain and upload Android certificates, then configure the certificates as instructed.
6) Build & Test
This step confirms whether the iOS certificates, Android certificates, User Agreement, and Privacy Policy are fully and correctly configured. If everything is complete, proceed to build the App. If you see a Go Configure prompt, configuration is incomplete—click it to return and finish configuration, then come back to verify.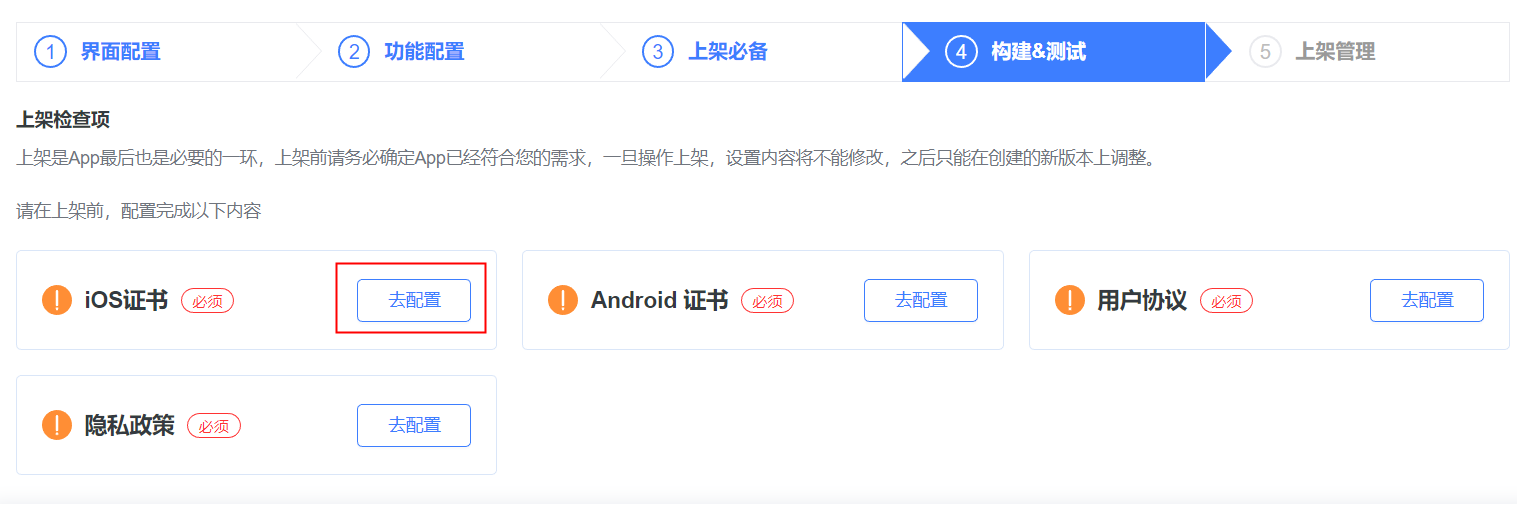
When everything is confirmed, click Build Now to open the following page. Select the App packages you need and click Build.
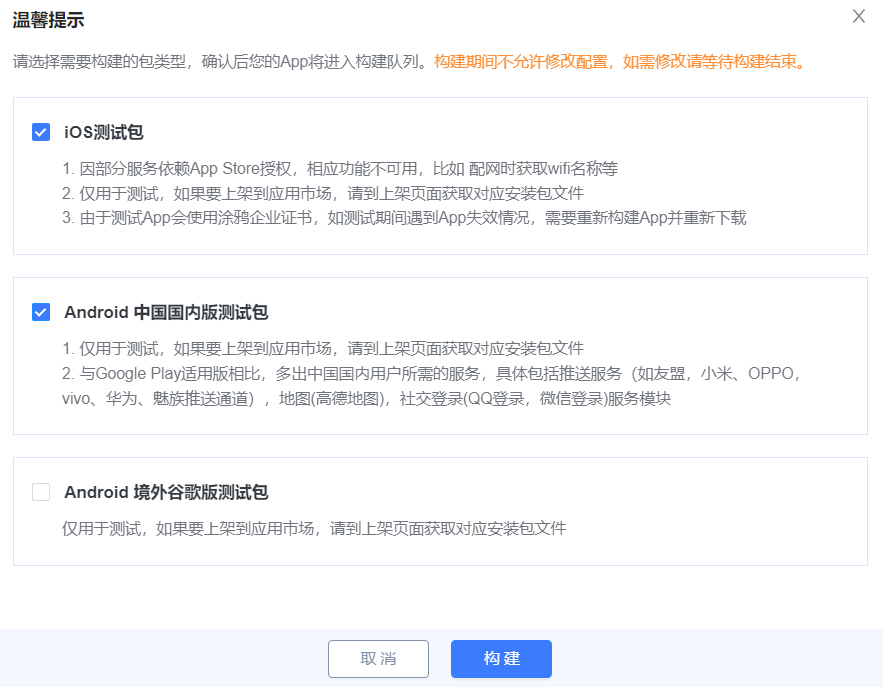
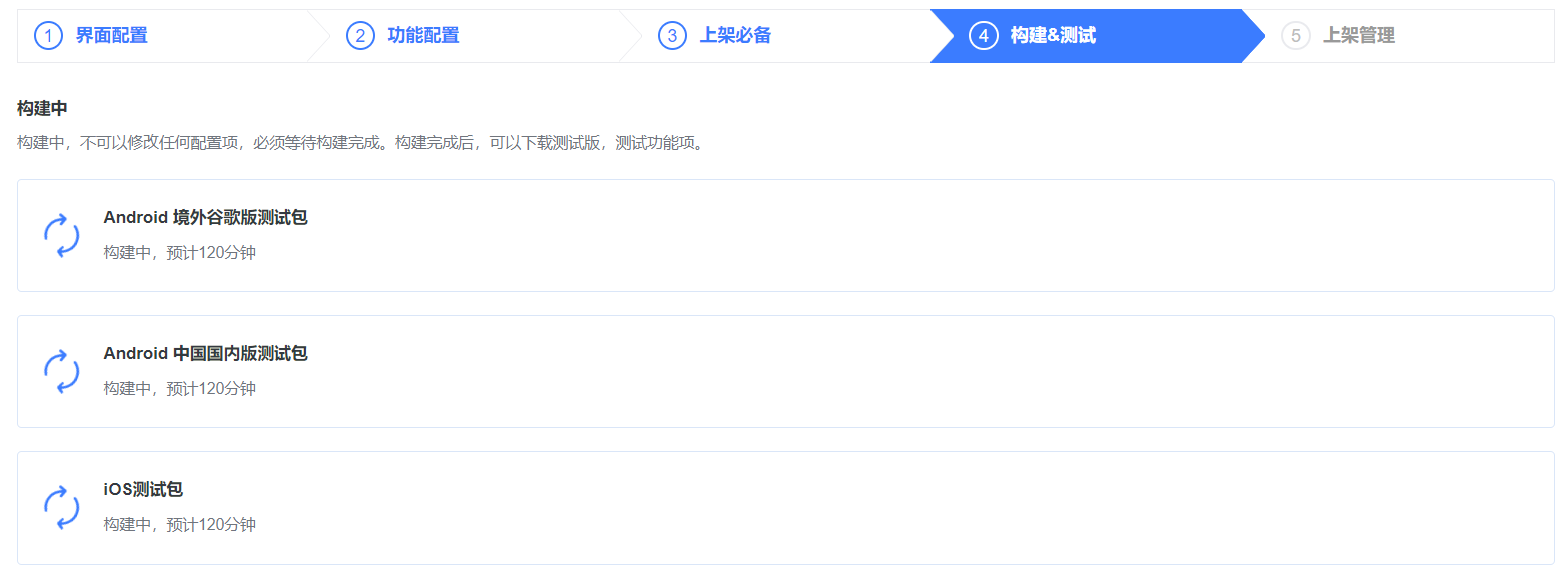
After clicking Build, the page shows that the App package is building. Wait as prompted.
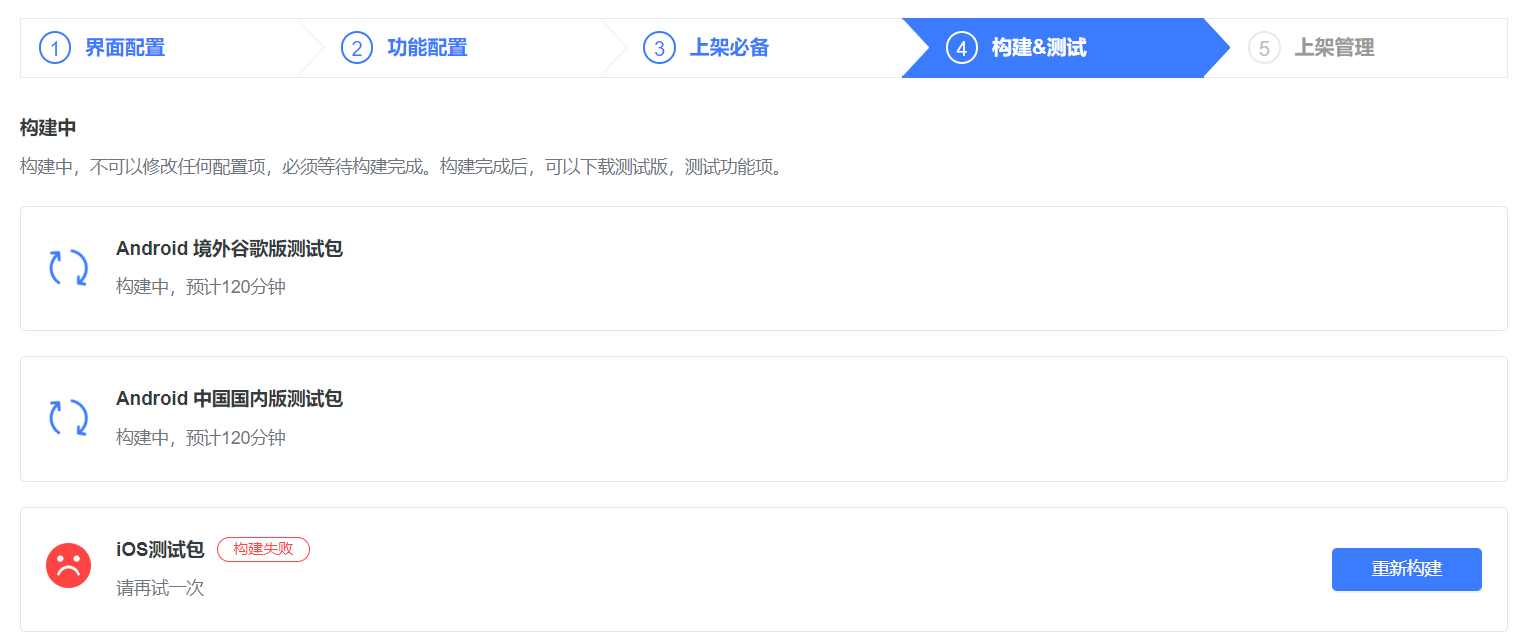
Occasionally a build may fail. Click Rebuild and try again. If builds fail repeatedly, check the FAQ for solutions.
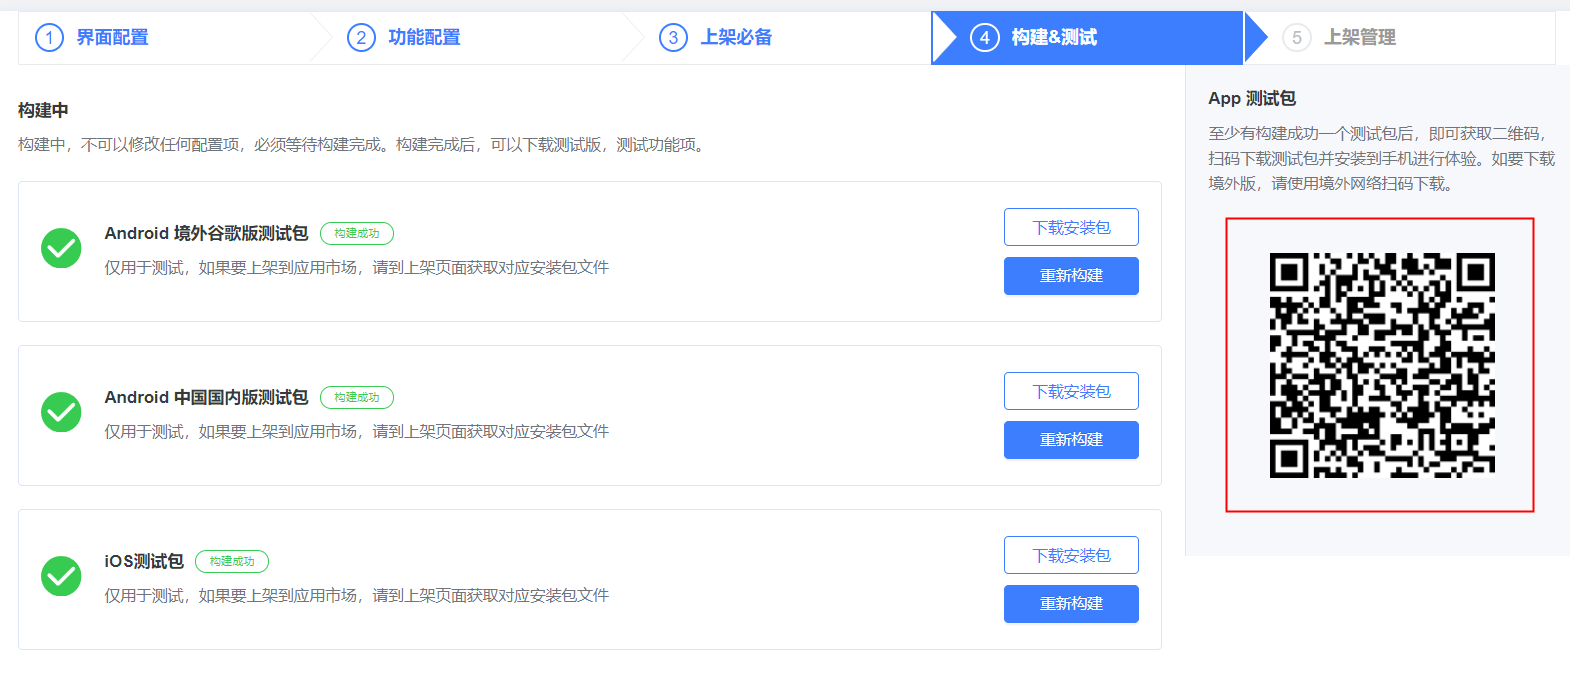
When the App build succeeds, a success message appears. Click Download Package, or scan the QR code on the right to install the App and test its features. This completes the App build process.
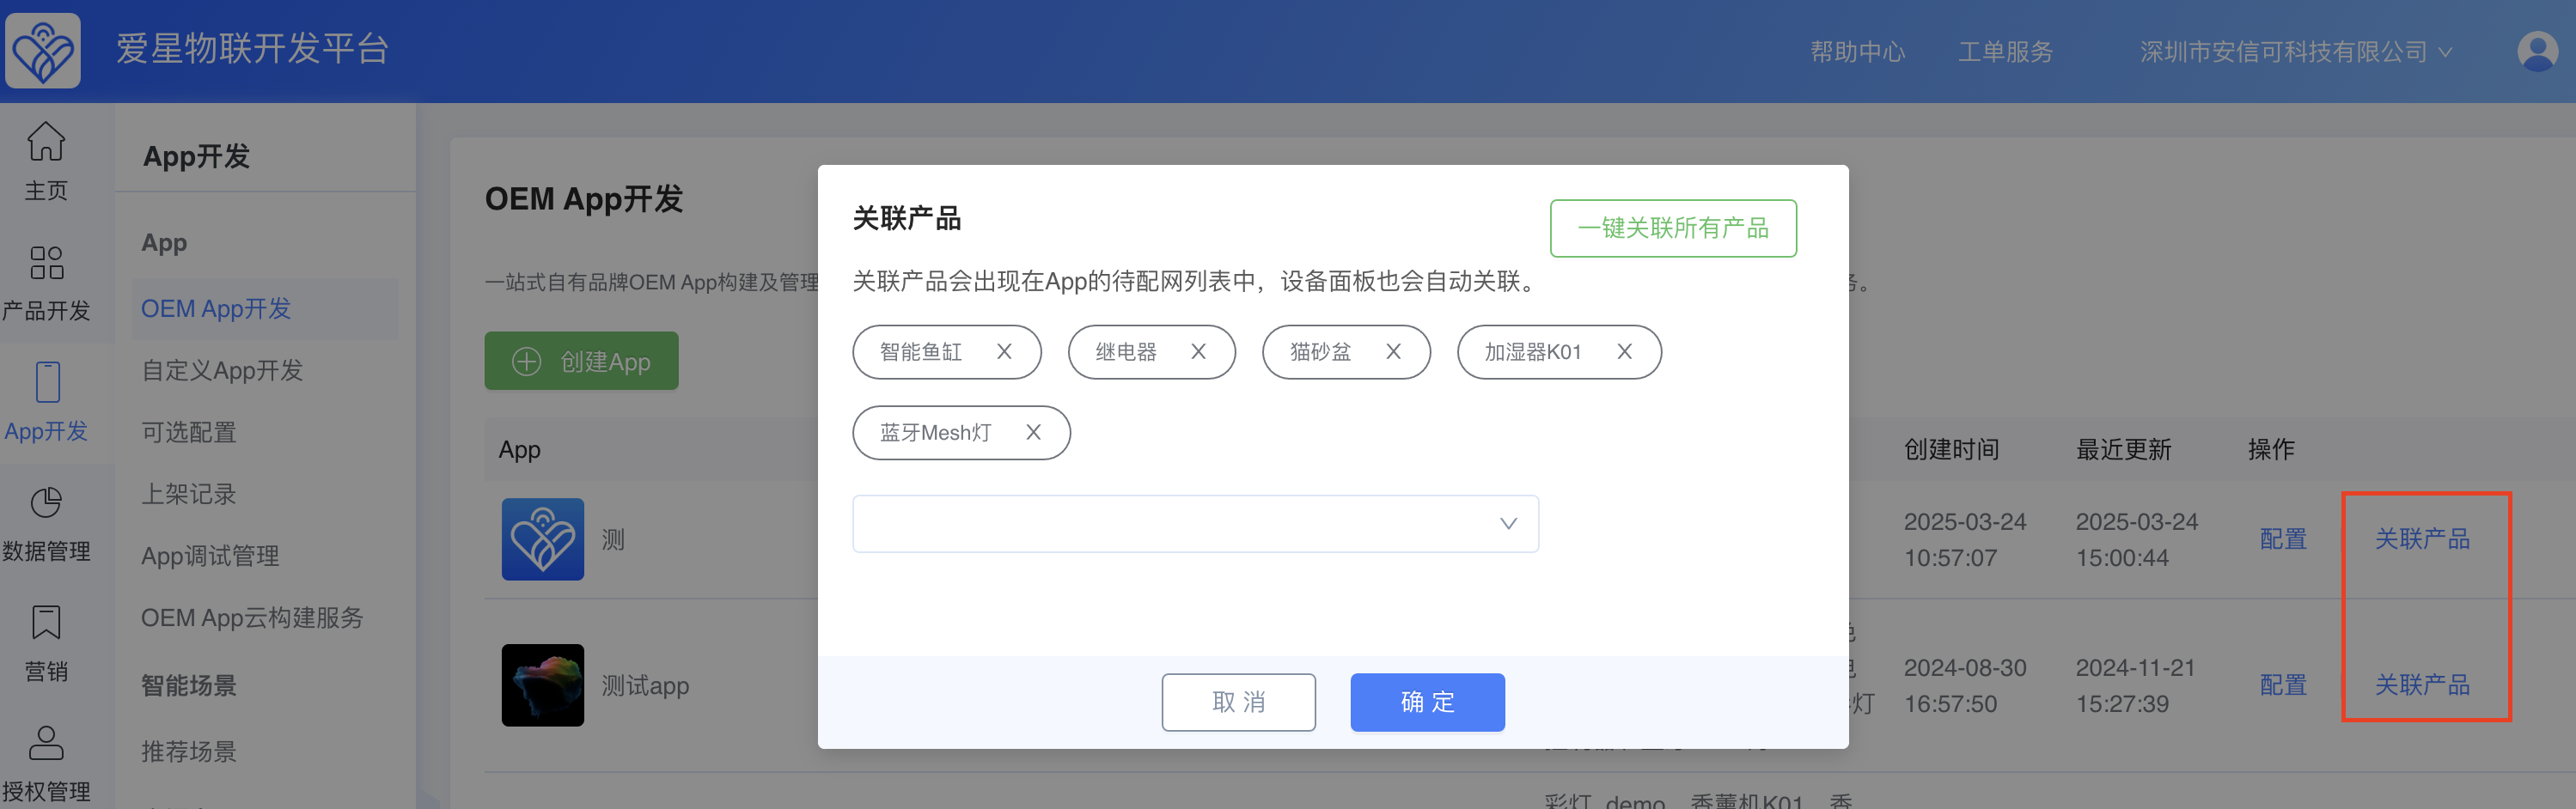
7) Associate Products
Before the App goes live, associate specific smart products with the App in the backend. Users can then see associated products in the App, complete network provisioning, and automatically load the corresponding device control panels, simplifying the user flow.
8) Store Listing Management
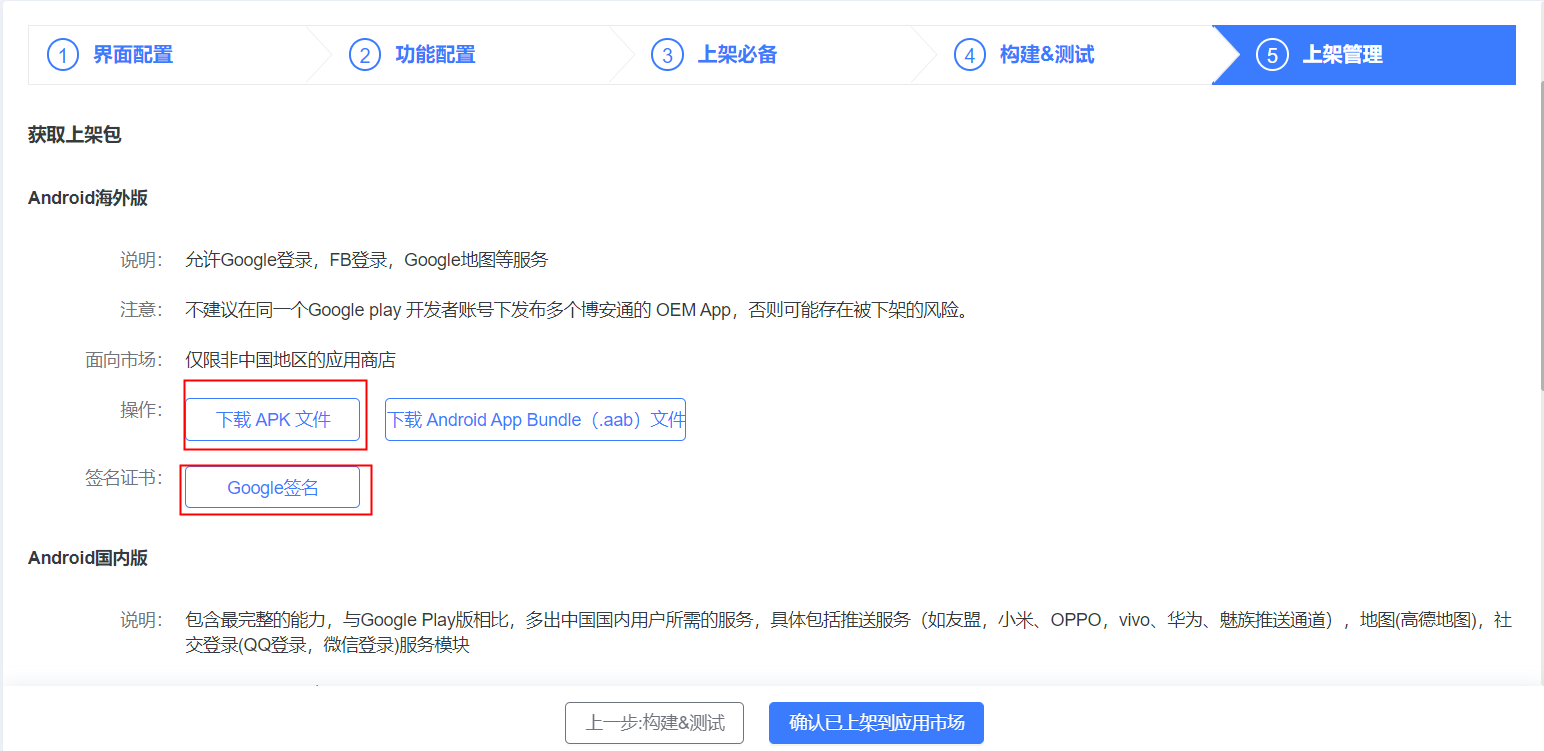
After testing is complete, proceed to Store Listing Management when you are ready to publish the App. Click Store Listing Management to obtain the release package for submission to the target app store.