

⚠️ 产品声明 / Product Disclaimer
非量产产品,仅供工程验证,不承诺符合 RoHS。 Non-mass-production product; for engineering verification only. RoHS compliance is not guaranteed.
Overview
Before you start developing, install all the software used in this tutorial in one go. Every build, flash, and other command in this tutorial runs in a WSL (Ubuntu) terminal, so setting up the environment is the top priority.
Once you have installed all the software on this page, you can start STM32 CMake Project Creation.
WSL2 is the Linux runtime built into Windows; every command in this tutorial (git clone, building, flashing) runs inside it.
-
Press the
Winkey, typePowerShell, right-click Run as administrator. -
Run this command and press Enter:
wsl --install -d Ubuntu-22.04If it says no distribution was found, run
wsl --updatefirst and retry. -
After installation, reboot your PC; on startup you enter the Ubuntu terminal automatically. Set your username and password as prompted (remember the password — you’ll need it for sudo later).
-
Update the software sources and verify:
sudo apt update
cat /etc/os-release
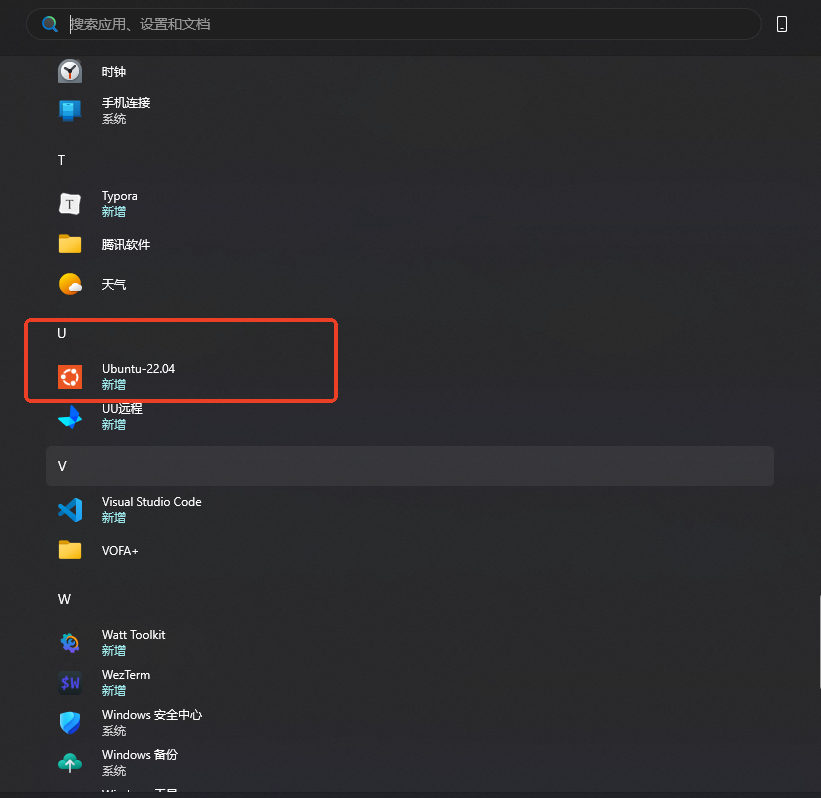
Once installed, open the Ubuntu terminal (search for Ubuntu in the Start menu) to enter the WSL environment.
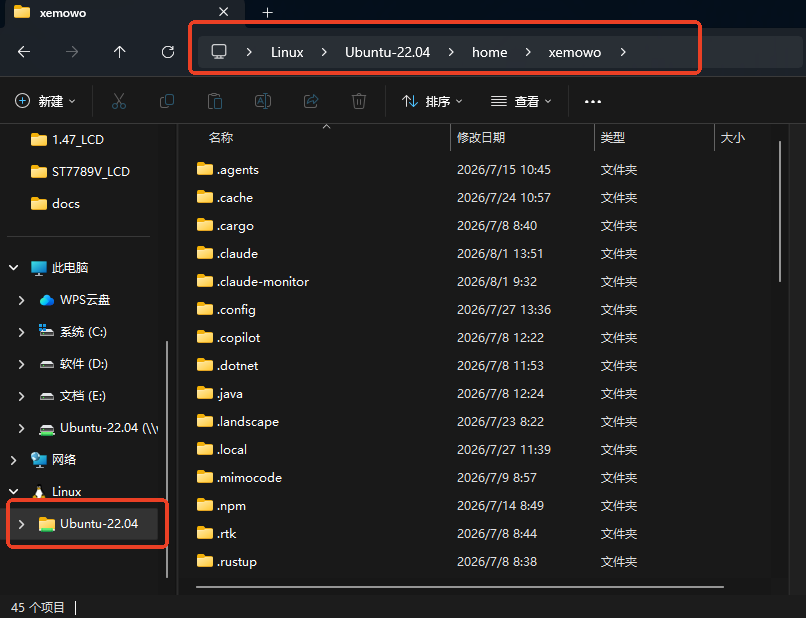
WSL directory basics: inside Linux,
/mnt/c/is the Windows C: drive; WSL’s own files live under/home/YourName/.
Run
sudo apt updateonce first. If it is very slow or fails, the default software source is overseas — first follow the “Switch to a China-based mirror” steps below, then come back and install the toolchain.
📖 Guide to switching to a China-based mirror (run this when apt is slow or failing — pick either one)
① Tsinghua mirror (recommended):
# Back up the original configuration
sudo cp /etc/apt/sources.list /etc/apt/sources.list.bak
# Replace with the Tsinghua mirror
sudo sed -i 's@//.*archive.ubuntu.com@//mirrors.tuna.tsinghua.edu.cn@g; s@//security.ubuntu.com@//mirrors.tuna.tsinghua.edu.cn@g' /etc/apt/sources.list
# Update
sudo apt update
② Aliyun mirror:
sudo cp /etc/apt/sources.list /etc/apt/sources.list.bak
sudo sed -i 's@//.*archive.ubuntu.com@//mirrors.aliyun.com@g; s@//security.ubuntu.com@//mirrors.aliyun.com@g' /etc/apt/sources.list
sudo apt update
After switching mirrors, sudo apt update should finish quickly. Then install the 4 toolchains below one by one (each has its own copy box — install one, verify one):
1️⃣ Install Git (to pull the code)
sudo apt install -y git
git --version
2️⃣ Install the ARM cross compiler (compiles C into STM32 machine code)
sudo apt install -y gcc-arm-none-eabi
arm-none-eabi-gcc --version
3️⃣ Install CMake and Ninja (build system)
sudo apt install -y cmake ninja-build
cmake --version
ninja --version
4️⃣ Install OpenOCD (works with ST-Link for flashing/debugging)
sudo apt install -y openocd
openocd --version
Version requirements: gcc-arm-none-eabi ≥ 10.3, cmake ≥ 3.22, ninja ≥ 1.10, openocd ≥ 0.12. If all four commands print their versions normally, the toolchain installation is complete.
Order matters: WSL was already installed in step ①. VSCode extensions fall into two groups — UI extensions go on the Windows side (the Chinese language pack and the WSL extension), while development extensions must be installed on the WSL side (C/C++, CMake Tools, etc., which provide building and IntelliSense). So you must connect to WSL first, then install the development extensions.
-
Download and install VSCode: https://code.visualstudio.com/ (Windows version, default installation).
-
Open VSCode, click the “Extensions” icon on the left, and install these 2 Windows-side extensions first:
Extension Publisher Install on Purpose Chinese (Simplified) Language Pack Microsoft Windows side Simplified Chinese UI (restart VSCode after installing) WSL Microsoft Windows side The bridge to WSL — required 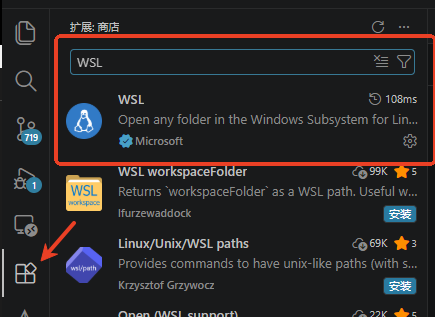
-
Click the green Remote Window button in the lower-left corner → Connect to WSL. Once connected, the lower-left corner shows
WSL: Ubuntu(you are now inside the WSL environment).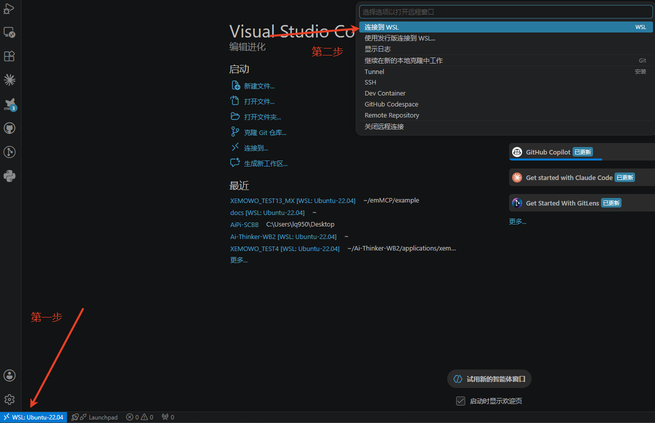
-
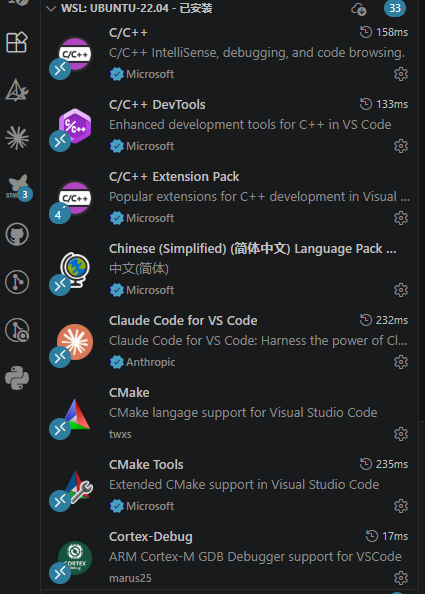
While connected to WSL, continue installing the development extensions below (the Extensions panel shows “Install in WSL: Ubuntu”; just click install on each one and it is installed on the WSL side):
Extension Publisher Install on Purpose C/C++ Microsoft WSL side Code highlighting and IntelliSense (reads compile_commands.json) CMake Tools Microsoft WSL side Graphical button-based building Cortex-Debug marus25 WSL side On-chip STM32 debugging (with OpenOCD + ST-Link)
Configuration is a one-time job. To verify: the lower-left corner shows WSL: Ubuntu, and the Extensions panel shows C/C++ and CMake Tools installed in WSL: Ubuntu.
Tip: if
sudo apt updateis slow or fails, follow the mirror-switching guide in step ② before installing the toolchain.
Go to ST’s official download page: https://www.st.com/en/development-tools/stm32cubemx.html
-
Click Download (register a free ST account first if you don’t have one) and download the Windows version (
en.stm32cubemx-win64-v6.x.x.zip). -
Unzip it, double-click the installer, and accept the defaults all the way through.
-
On first launch, install the F1 firmware package: menu Help → Manage embedded software packages → find STM32Cube MCU Package for STM32F1 Series → click Install (version V1.8.7) and wait for it to turn green.
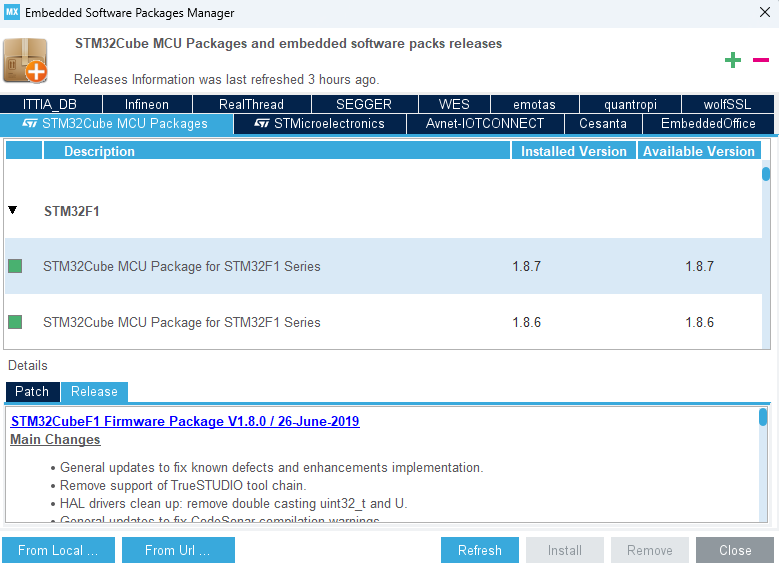
The “9Mod” MCP Verification Board’s .ioc file was generated with CubeMX 6.18.0 and FW_F1 V1.8.7; using the same or a newer version is recommended.
Seahi-Serial is a Windows tool that combines a serial assistant with WSL serial/USB mapping: it lets you view debug logs and send MCP commands manually, and it can mount Windows COM ports / USB devices into WSL (solving the problem that WSL2 cannot access serial ports directly).
Download and install directly: https://github.com/SeaHi-Mo/Seahi-Serial/releases (grab the latest Windows .exe installer and double-click it).
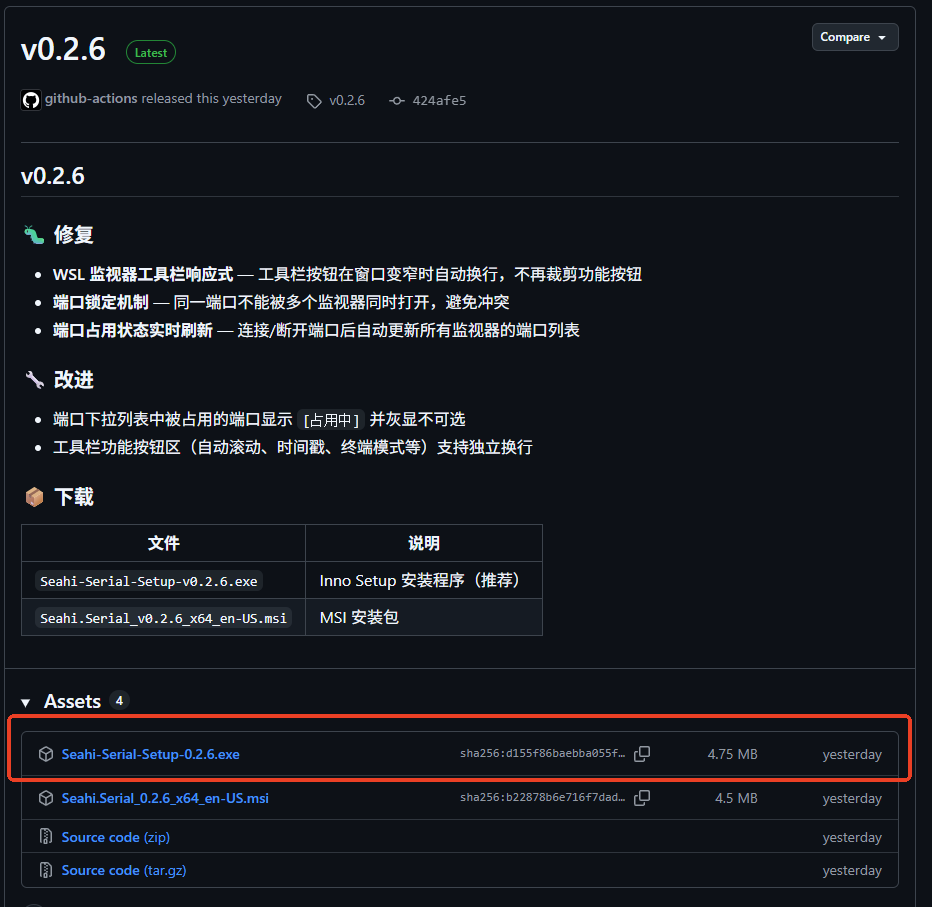
How to use it: for serial usage see the “Serial Manual Test” section in each chapter; the debug serial baud rate is 1500000 and the AI module serial is 115200; the WSL mapping feature is used for serial debugging and ST-Link flashing.
FAQ & Troubleshooting
🔧 wsl --install says no distribution was found
Cause: The WSL kernel / components are not updated
Fix: Run wsl --update first, then retry; or use wsl --install -d Ubuntu (the latest version by default)
🔧 You didn't reboot after installing WSL
Cause: The installer requires a restart
Fix: Ubuntu only appears after you reboot the PC
🔧 Opening the Ubuntu terminal says it is not installed
Cause: The installation process was not completed
Fix: Run wsl --install -d Ubuntu-22.04 again and reboot
🔧 No WSL option in the VSCode lower-left corner / connection fails
Cause: The WSL extension is not installed, or your WSL version is old
Fix: Install Microsoft's WSL extension; confirm wsl --version reports WSL2; on older Windows 10 builds you must enable the WSL2 components manually
🔧 sudo apt update is very slow or fails
Cause: The default software source is overseas
Fix: Switch to a China-based mirror (Tsinghua / Aliyun), then run the install commands again
🔧 arm-none-eabi-gcc --version reports 9.x
Cause: Older systems such as Ubuntu 20.04 ship an outdated default version
Fix: This tutorial uses Ubuntu 22.04 (default 10.3+); on older systems you can install the xpack toolchain instead
🔧 ST-Link is not detected when flashing
Cause: WSL2 cannot access Windows USB devices directly by default
Fix: Use the Seahi-Serial installed in step ⑤ to map the ST-Link into WSL, then you can flash from inside WSL (via the Cortex-Debug GUI or the OpenOCD command line; see Build and Flash the Project)
Self-Check
In the WSL terminal, run git --version && arm-none-eabi-gcc --version && cmake --version && ninja --version && openocd --version; if all five commands print a version, the toolchain is ready. And if the lower-left corner of VSCode shows WSL: Ubuntu, the environment is connected.