

⚠️ 产品声明 / Product Disclaimer
非量产产品,仅供工程验证,不承诺符合 RoHS。 Non-mass-production product; for engineering verification only. RoHS compliance is not guaranteed.
Overview
Every piece of software in this tutorial is installed and used directly on Windows (no WSL needed). Build and flash commands run in PowerShell or CMD, and serial ports use Windows COM ports directly — the friendliest setup for beginners.
Once you have installed all the software on this page, you can start STM32 Project Creation.
-
Open your browser and go to: https://git-scm.com/download/win, then click 64-bit Git for Windows Setup to download.
-
Double-click the installer and click Next all the way through (the default install path is fine). At the “Adjusting your PATH” step, keep the default Git from the command line and also from 3rd-party software, then continue with Next to Finish.
-
Verify: press the
Winkey, typePowerShell, press Enter to open it, and run:git --versionSeeing
git version 2.x.xmeans the installation succeeded.
Beginner tip: after installing Git, Git Bash (a Linux-style command line) appears in the Start menu. This tutorial uses PowerShell for all commands — either one works.
The xpack build is recommended (it ships its own installer and configures PATH automatically — the least hassle for beginners):
-
Go to: https://github.com/xpack-dev-tools/arm-none-eabi-gcc-xpack/releases
-
In the latest release, download the package named like
xpack-arm-none-eabi-gcc-13.x.x-win32-x64.zip(choose win32-x64). -
Unzip it to any directory (e.g.
C:\arm-gcc), open the extracted folder, and right-click → Run as administrator oninstall.bat(it adds the compiler to PATH automatically). -
Reopen PowerShell (PATH changes only take effect in a new window), then verify:
arm-none-eabi-gcc --versionSeeing
arm-none-eabi-gcc (xpack GNU Arm Embedded Toolchain) 13.x.xmeans the installation succeeded.
Alternative: you can also use the official ARM GNU Arm Embedded Toolchain Windows installer (.exe) — just tick “Add path to environment variable” during installation.
1️⃣ CMake (the .msi installer is recommended — it configures PATH automatically):
- Go to: https://cmake.org/download/
- Download the Windows x64 Installer (
cmake-3.x.x-windows-x86_64.msi) and double-click to install. - During installation, tick “Add CMake to the system PATH for all users” (important!).
2️⃣ Ninja (zip build — add it to PATH manually):
-
Download
ninja-win.zip, unzip it to getninja.exe, and put it in theC:\ninjadirectory. -
Add it to PATH: press the
Winkey and search for “environment variables” → open “Edit the system environment variables” → Environment Variables → select Path → Edit → New → enterC:\ninja→ OK. -
Reopen PowerShell and verify:
cmake --version ninja --versionBoth printing a version means success.
Beginner tip: PATH is the “search path” Windows uses to find commands; once you add a tool’s directory to it, you can run that command from any directory.
The xpack build is recommended here too (it configures PATH automatically):
-
Go to: https://github.com/xpack-dev-tools/openocd-xpack/releases
-
Download
xpack-openocd-0.12.x-win32-x64.zipand unzip it to any directory (e.g.C:\openocd). -
Open the extracted folder and right-click → Run as administrator on
install.bat. -
Reopen PowerShell and verify:
openocd --versionSeeing
Open On-Chip Debugger 0.12.xmeans the installation succeeded.
-
Download and install VSCode: https://code.visualstudio.com/ (Windows version, accept the defaults throughout).
-
Open VSCode, click the “Extensions” icon (four squares) on the left, and install the following 4 extensions in turn (all on the Windows side — no remote environment to connect to):
Extension Publisher Purpose Chinese (Simplified) Language Pack Microsoft Simplified Chinese UI (restart VSCode after installing) C/C++ Microsoft Code highlighting and IntelliSense CMake Tools Microsoft Graphical button-based building Cortex-Debug marus25 On-chip STM32 debugging (with OpenOCD + ST-Link) 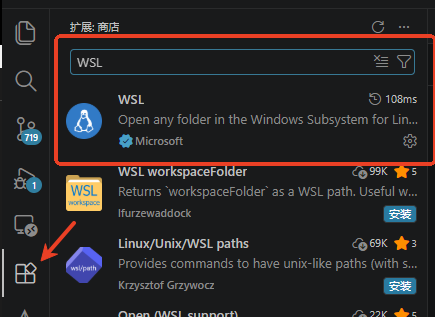
The Windows setup is simpler than the WSL version: install extensions straight on your own machine — there is no “which side to install on” question.
Go to ST’s official download page: https://www.st.com/en/development-tools/stm32cubemx.html
-
Click Download (register a free ST account first if you don’t have one) and download the Windows version (
en.stm32cubemx-win64-v6.x.x.zip). -
Unzip it, double-click the installer, and accept the defaults all the way through.
-
On first launch, install the F1 firmware package: menu Help → Manage embedded software packages → find STM32Cube MCU Package for STM32F1 Series → click Install (version V1.8.7) and wait for it to turn green.
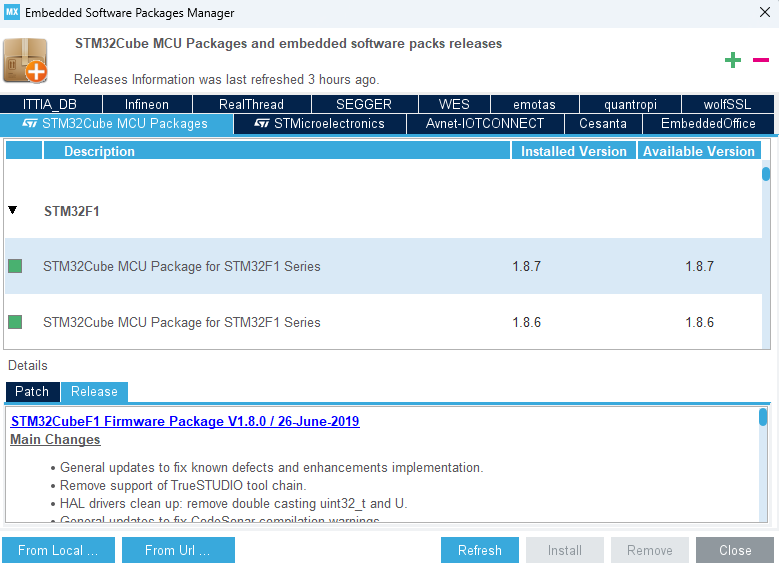
The “9Mod” MCP Verification Board’s .ioc file was generated with CubeMX 6.18.0 and FW_F1 V1.8.7; using the same or a newer version is recommended.
There are plenty of serial assistants to choose from on Windows; SSCOM or XCOM is recommended (free, no installation needed):
- SSCOM: search for “SSCOM serial assistant” to download it, or get it from the Ai-Thinker group files / community.
- XCOM: the serial assistant from ALIENTEK — also free.
Both are portable apps: just unzip and double-click. How to use: select the COM port → enter the matching baud rate (debug logs 1500000, AI module 115200) → open the port.
For debug logs, plug the USB cable into the “9Mod” MCP Verification Board’s log port (the CH340C creates the COM port automatically); for the AI module serial, use the module’s Type-C port. See the “Serial Manual Test” section in each chapter for details.
FAQ & Troubleshooting
🔧 The command reports "is not recognized as an internal or external command" (command not found)
Cause: The software is not on PATH (common with CMake/Ninja)
Fix: Check whether "Add to PATH" was ticked during installation; for the Ninja zip build, add the directory to the system Path variable manually; you must reopen PowerShell after the change for it to take effect
🔧 Running xpack's install.bat reports "Access is denied"
Cause: It was not run with administrator privileges
Fix: Right-click install.bat → Run as administrator
🔧 The serial assistant cannot open the COM port
Cause: ① The USB cable is not plugged in ② The driver is not installed ③ The port is occupied
Fix: ① Plug in the USB cable ② Install the CH340C driver (the COM port should then show up in Device Manager) ③ Close other software occupying that serial port; and make sure the baud rate is correct before opening the port
🔧 arm-none-eabi-gcc cannot be found when building
Cause: The compiler is not on PATH, or the terminal was not reopened
Fix: Confirm arm-none-eabi-gcc --version prints a version; if not, run install.bat again and reopen PowerShell
🔧 ST-Link is not detected when flashing
Cause: The ST-Link driver is not installed, or there is a USB cable problem
Fix: Install the ST-Link driver (bundled with STM32 ST-LINK Utility); try another data cable (some cables only charge and cannot transfer data); confirm an STLink device appears in Device Manager
🔧 The Windows project reports build errors that differ from the WSL version
Cause: Differences in path separators / line endings
Fix: The project's bundled CMakePresets and toolchain files are portable; once the tools are installed as described in this tutorial, it should build normally. If you hit individual errors, post the message in the community for help
Self-Check
In PowerShell, run git --version && arm-none-eabi-gcc --version && cmake --version && ninja --version && openocd --version; if all five commands print a version, the toolchain is ready. And if the VSCode Extensions panel shows the 4 extensions, the environment is connected.