

由 黎明将至! 贡献,Ai-Thinker 进行整理
Ai-WB2-32S gpio驱动RGB灯
前言
本期文档介绍使用库编写gpio驱动RGB灯。 如果想要使用下面流程,请先查看Linux Ubuntu下烧录固件的过程,点击此链接进行查看
一、具体流程
第1步 进入目录
cd ~/Ai-Thinker-WB2/applications/get-started 创建目录gpio

第2步 进入gpio目录并创建如下文件/目录

第3步 编写Makefile文件(代码如下)
📜 点击展开:#
bash
#

## This is a project Makefile. It is assumed the directory this Makefile resides in is a

## project subdirectory.

#

PROJECT_NAME := gpio
PROJECT_PATH := $(abspath .)
PROJECT_BOARD := evb

export
 PROJECT_PATH PROJECT_BOARD

#CONFIG_TOOLPREFIX :=

-include ./proj_config.mk

ifeq ($(origin BL60X_SDK_PATH), undefined)
BL60X_SDK_PATH_GUESS ?= $(shell
pwd
)
BL60X_SDK_PATH ?= $(BL60X_SDK_PATH_GUESS)/../../..
$(info ****** Please SET BL60X_SDK_PATH ******)
$(info ****** Trying SDK PATH [$(BL60X_SDK_PATH)])
endif

COMPONENTS_BLSYS   := bltime blfdt blmtd bloop loopadc looprt loopset
COMPONENTS_VFS     := romfs

INCLUDE_COMPONENTS += freertos_riscv_ram bl602 bl602_std newlibc hosal mbedtls_lts lwip vfs yloop utils cli blog blog_testc coredump
INCLUDE_COMPONENTS += $(COMPONENTS_NETWORK)
INCLUDE_COMPONENTS += $(COMPONENTS_BLSYS)
INCLUDE_COMPONENTS += $(COMPONENTS_VFS)
INCLUDE_COMPONENTS += $(PROJECT_NAME)

include $(BL60X_SDK_PATH)/make_scripts_riscv/project.mk
第4步编写proj_config.mk文件(代码如下)
📜 点击展开:#
bash
#

#compiler flag config domain

#

#CONFIG_TOOLPREFIX :=

#CONFIG_OPTIMIZATION_LEVEL_RELEASE := 1

#CONFIG_M4_SOFTFP := 1

#

#board config domain

#

CONFIG_BOARD_FLASH_SIZE := 2

#firmware config domain

#

#set CONFIG_ENABLE_ACP to 1 to enable ACP, set to 0 or comment this line to disable

#CONFIG_ENABLE_ACP:=1

CONFIG_BL_IOT_FW_AP:=1
CONFIG_BL_IOT_FW_AMPDU:=0
CONFIG_BL_IOT_FW_AMSDU:=0
CONFIG_BL_IOT_FW_P2P:=0
CONFIG_ENABLE_PSM_RAM:=1

#CONFIG_ENABLE_CAMERA:=1

#CONFIG_ENABLE_BLSYNC:=1

#CONFIG_ENABLE_VFS_SPI:=1

CONFIG_ENABLE_VFS_ROMFS:=1
CONFIG_EASYFLASH_ENABLE:=0

CONFIG_SYS_APP_TASK_STACK_SIZE:=4096
CONFIG_SYS_APP_TASK_PRIORITY:=15

CONFIG_FREERTOS_TICKLESS_MODE:=0
CONFIG_SYS_VFS_ENABLE:=1
CONFIG_SYS_VFS_UART_ENABLE:=1
CONFIG_SYS_AOS_CLI_ENABLE:=0
CONFIG_SYS_AOS_LOOP_ENABLE:=1
CONFIG_SYS_BLOG_ENABLE:=1
CONFIG_SYS_DMA_ENABLE:=0
CONFIG_SYS_USER_VFS_ROMFS_ENABLE:=0
CONFIG_BL602_USE_ROM_DRIVER:=1
CONFIG_BT_CENTRAL:=1
CONFIG_BT_OBSERVER:=1
CONFIG_BT_PERIPHERAL:=1
CONFIG_BT_STACK_CLI:=1
CONFIG_BT_WIFIPROV_SERVER:=1
CONFIG_WIFI:=0

CONF_ENABLE_COREDUMP:=1

LOG_ENABLED_COMPONENTS:=blog_testc hosal loopset looprt bloop gpio
第5步 编写README.md文件(代码如下,该文件不参与执行)
📜 点击展开:## Blink Example
bash
## Blink Example

## Example Output

As you run the example, you will see the
log
 :

Booting Ai-WB2 Modules...
RISC-V Core Feature:RV32-ACFIMX
Build Version: release_bl_iot_sdk_1.6.38
Build Date: Oct  8 2022
Build Time: 15:42:26

blog init
set
 power on level 2, 2, 2.
[IRQ] Clearing and Disable all the pending IRQ...
[         0][INFO: hal_boot2.c: 282] [HAL] [BOOT2] Active Partition[0] consumed 596 Bytes
[         0][INFO: hal_boot2.c:  82] ======= PtTable_Config @0x4200d158=======
[         0][INFO: hal_boot2.c:  83] magicCode 0x54504642; version 0x0000; entryCnt 7; age 0; crc32 0x12DF9A26
[         0][INFO: hal_boot2.c:  89] idx
type
 device activeIndex     name   Address[0]  Address[1]  Length[0]   Length[1]   age
[         0][INFO: hal_boot2.c:  91] [00]  00     0         0            FW  0x00010000  0x000e8000  0x000d8000  0x00088000  0
[         0][INFO: hal_boot2.c:  91] [01]  02     0         0           mfg  0x00170000  0x00000000  0x00032000  0x00000000  0
[         0][INFO: hal_boot2.c:  91] [02]  03     0         0         media  0x001a2000  0x00000000  0x00047000  0x00000000  0
[         0][INFO: hal_boot2.c:  91] [03]  04     0         0           PSM  0x001e9000  0x00000000  0x00008000  0x00000000  0
[         0][INFO: hal_boot2.c:  91] [04]  05     0         0           KEY  0x001f1000  0x00000000  0x00002000  0x00000000  0
[         0][INFO: hal_boot2.c:  91] [05]  06     0         0          DATA  0x001f3000  0x00000000  0x00005000  0x00000000  0
[         0][INFO: hal_boot2.c:  91] [06]  07     0         0       factory  0x001f8000  0x00000000  0x00007000  0x00000000  0
[         0][INFO: bl_flash.c: 391] ======= FlashCfg magiccode @0x42049c18=======
[         0][INFO: bl_flash.c: 392] mid 		0x5E
[         0][INFO: bl_flash.c: 393] clkDelay 	0x1
[         0][INFO: bl_flash.c: 394] clkInvert 	0x1
[         0][INFO: bl_flash.c: 395] sector size	4KBytes
[         0][INFO: bl_flash.c: 396] page size	256Bytes
[         0][INFO: bl_flash.c: 397] ---------------------------------------------------------------
[         0][INFO: hal_board.c:1249] [MAIN] [BOARD] [FLASH] addr from partition is 001f8000, ret is 0
[         0][INFO: hal_board.c:1257] [MAIN] [BOARD] [XIP] addr from partition is 231e7000, ret is 0

Note: The color order could be different according to the LED model.

## Troubleshooting

For any technical queries, please open an [issue](https://github.com/Ai-Thinker-AIoT/Ai-Thinker-WB2/issues) on GitHub. We will get back to you soon.
第6步 进入gpio目录并创建如下文件

第7步 根据原理图编写main.c文件(代码如下)

📜 点击展开完整代码
c
#
include

<stdio.h>

#
include

<string.h>

#
include

<FreeRTOS.h>

#
include

<task.h>

#
include

<bl_gpio.h>

#
define
 GPIO_B_PIN 3

#
define
 GPIO_R_PIN 14

#
define
 GPIO_G_PIN 17

void

blink_test
(
void
 *param)

{
    bl_gpio_enable_output(GPIO_B_PIN,
0
,
0
);
    bl_gpio_enable_output(GPIO_R_PIN,
0
,
0
);
    bl_gpio_enable_output(GPIO_G_PIN,
0
,
0
);

while
 (
1
)
    {
        bl_gpio_output_set(GPIO_B_PIN,
1
);
        vTaskDelay(
1000
);
        bl_gpio_output_set(GPIO_B_PIN,
0
);
        bl_gpio_output_set(GPIO_R_PIN,
1
);
        vTaskDelay(
1000
);
        bl_gpio_output_set(GPIO_R_PIN,
0
);
        bl_gpio_output_set(GPIO_G_PIN,
1
);
        vTaskDelay(
1000
);
        bl_gpio_output_set(GPIO_G_PIN,
0
);
    }
}

void

main
(
void
)

{
    xTaskCreate(blink_test,
"blink"
,
1024
,
NULL
,
15
,
NULL
);
}
第8步 编写bouffalo.mk文件(代码如下)
📜 点击展开:#
bash
#

## "main" pseudo-component makefile.

#

## (Uses default behaviour of compiling all source files in directory, adding 'include' to include path.)

include $(BL60X_SDK_PATH)/components/network/ble/ble_common.mk

ifeq ($(CONFIG_ENABLE_PSM_RAM),1)
CPPFLAGS += -DCONF_USER_ENABLE_PSRAM
endif

ifeq ($(CONFIG_ENABLE_CAMERA),1)
CPPFLAGS += -DCONF_USER_ENABLE_CAMERA
endif

ifeq ($(CONFIG_ENABLE_BLSYNC),1)
CPPFLAGS += -DCONF_USER_ENABLE_BLSYNC
endif

ifeq ($(CONFIG_ENABLE_VFS_SPI),1)
CPPFLAGS += -DCONF_USER_ENABLE_VFS_SPI
endif

ifeq ($(CONFIG_ENABLE_VFS_ROMFS),1)
CPPFLAGS += -DCONF_USER_ENABLE_VFS_ROMFS
endif
二、编译并烧录
第1步 进入~/Ai-Thinker-WB2/applications/get-started/gpio目录
cd ~/Ai-Thinker-WB2/applications/get-started/gpio

第2步 执行make -j8

第3步 执行make flash p=/dev/ttyUSB0 b=115200(此时模组需要连接到虚拟机)

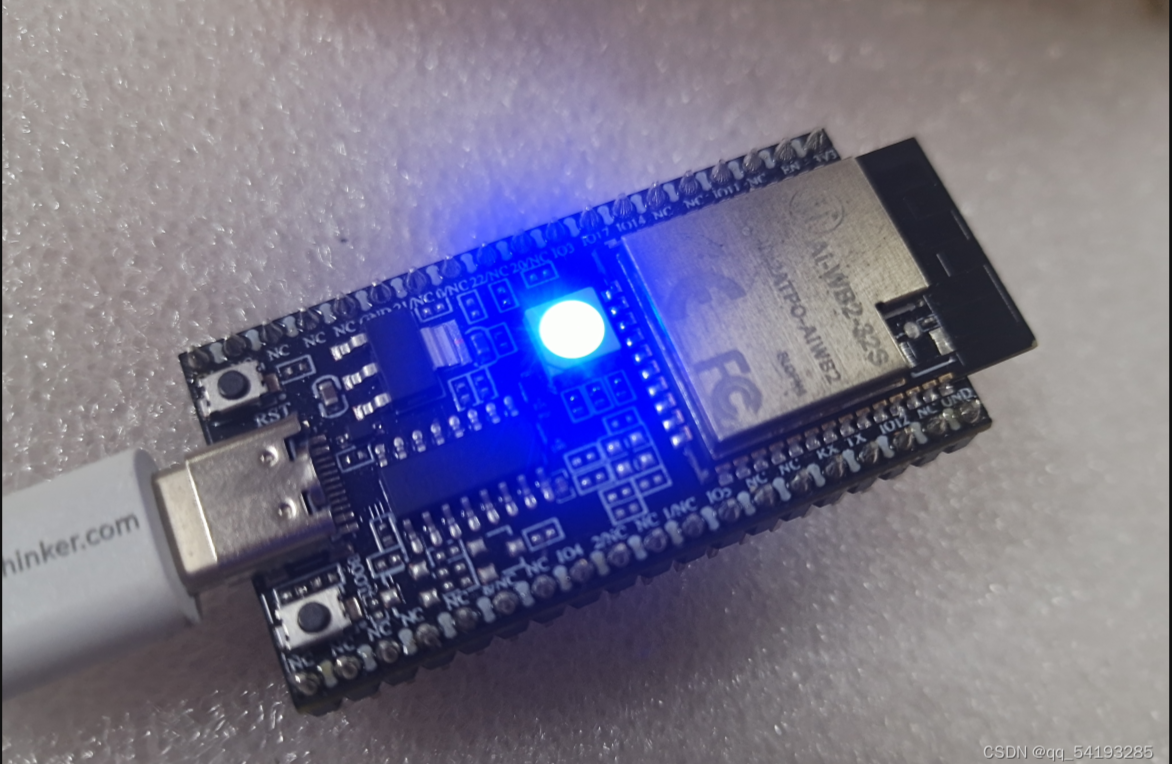
三 执行结果图


原链接:<https://blog.csdn.net/qq_54193285/article/details/135907812?spm=1001.2014.3001.5501>