

Contributed by 黎明将至!, organized by Ai-Thinker
Ai-WB2-32S GPIO Driving an RGB LED
Preface
This article introduces how to use the library to write a GPIO driver for an RGB LED. If you want to follow the procedure below, please first check the firmware flashing process under Linux Ubuntu by clicking this link.
1. Detailed Procedure
Step 1. Enter the directory
cd ~/Ai-Thinker-WB2/applications/get-started Create the directory gpio

Step 2. Enter the gpio directory and create the following files/directories

Step 3. Write the Makefile file (code below)
Click to expand: #
bash
#

## This is a project Makefile. It is assumed the directory this Makefile resides in is a

## project subdirectory.

#

PROJECT_NAME := gpio
PROJECT_PATH := $(abspath .)
PROJECT_BOARD := evb

export
 PROJECT_PATH PROJECT_BOARD

#CONFIG_TOOLPREFIX :=

-include ./proj_config.mk

ifeq ($(origin BL60X_SDK_PATH), undefined)
BL60X_SDK_PATH_GUESS ?= $(shell
pwd
)
BL60X_SDK_PATH ?= $(BL60X_SDK_PATH_GUESS)/../../..
$(info ****** Please SET BL60X_SDK_PATH ******)
$(info ****** Trying SDK PATH [$(BL60X_SDK_PATH)])
endif

COMPONENTS_BLSYS   := bltime blfdt blmtd bloop loopadc looprt loopset
COMPONENTS_VFS     := romfs

INCLUDE_COMPONENTS += freertos_riscv_ram bl602 bl602_std newlibc hosal mbedtls_lts lwip vfs yloop utils cli blog blog_testc coredump
INCLUDE_COMPONENTS += $(COMPONENTS_NETWORK)
INCLUDE_COMPONENTS += $(COMPONENTS_BLSYS)
INCLUDE_COMPONENTS += $(COMPONENTS_VFS)
INCLUDE_COMPONENTS += $(PROJECT_NAME)

include $(BL60X_SDK_PATH)/make_scripts_riscv/project.mk
Step 4. Write the proj_config.mk file (code below)
Click to expand: #
bash
#

#compiler flag config domain

#

#CONFIG_TOOLPREFIX :=

#CONFIG_OPTIMIZATION_LEVEL_RELEASE := 1

#CONFIG_M4_SOFTFP := 1

#

#board config domain

#

CONFIG_BOARD_FLASH_SIZE := 2

#firmware config domain

#

#set CONFIG_ENABLE_ACP to 1 to enable ACP, set to 0 or comment this line to disable

#CONFIG_ENABLE_ACP:=1

CONFIG_BL_IOT_FW_AP:=1
CONFIG_BL_IOT_FW_AMPDU:=0
CONFIG_BL_IOT_FW_AMSDU:=0
CONFIG_BL_IOT_FW_P2P:=0
CONFIG_ENABLE_PSM_RAM:=1

#CONFIG_ENABLE_CAMERA:=1

#CONFIG_ENABLE_BLSYNC:=1

#CONFIG_ENABLE_VFS_SPI:=1

CONFIG_ENABLE_VFS_ROMFS:=1
CONFIG_EASYFLASH_ENABLE:=0

CONFIG_SYS_APP_TASK_STACK_SIZE:=4096
CONFIG_SYS_APP_TASK_PRIORITY:=15

CONFIG_FREERTOS_TICKLESS_MODE:=0
CONFIG_SYS_VFS_ENABLE:=1
CONFIG_SYS_VFS_UART_ENABLE:=1
CONFIG_SYS_AOS_CLI_ENABLE:=0
CONFIG_SYS_AOS_LOOP_ENABLE:=1
CONFIG_SYS_BLOG_ENABLE:=1
CONFIG_SYS_DMA_ENABLE:=0
CONFIG_SYS_USER_VFS_ROMFS_ENABLE:=0
CONFIG_BL602_USE_ROM_DRIVER:=1
CONFIG_BT_CENTRAL:=1
CONFIG_BT_OBSERVER:=1
CONFIG_BT_PERIPHERAL:=1
CONFIG_BT_STACK_CLI:=1
CONFIG_BT_WIFIPROV_SERVER:=1
CONFIG_WIFI:=0

CONF_ENABLE_COREDUMP:=1

LOG_ENABLED_COMPONENTS:=blog_testc hosal loopset looprt bloop gpio
Step 5. Write the README.md file (code below; this file is not involved in execution)
Click to expand: ## Blink Example
bash
## Blink Example

## Example Output

As you run the example, you will see the
log
 :

Booting Ai-WB2 Modules...
RISC-V Core Feature:RV32-ACFIMX
Build Version: release_bl_iot_sdk_1.6.38
Build Date: Oct  8 2022
Build Time: 15:42:26

blog init
set
 power on level 2, 2, 2.
[IRQ] Clearing and Disable all the pending IRQ...
[         0][INFO: hal_boot2.c: 282] [HAL] [BOOT2] Active Partition[0] consumed 596 Bytes
[         0][INFO: hal_boot2.c:  82] ======= PtTable_Config @0x4200d158=======
[         0][INFO: hal_boot2.c:  83] magicCode 0x54504642; version 0x0000; entryCnt 7; age 0; crc32 0x12DF9A26
[         0][INFO: hal_boot2.c:  89] idx
type
 device activeIndex     name   Address[0]  Address[1]  Length[0]   Length[1]   age
[         0][INFO: hal_boot2.c:  91] [00]  00     0         0            FW  0x00010000  0x000e8000  0x000d8000  0x00088000  0
[         0][INFO: hal_boot2.c:  91] [01]  02     0         0           mfg  0x00170000  0x00000000  0x00032000  0x00000000  0
[         0][INFO: hal_boot2.c:  91] [02]  03     0         0         media  0x001a2000  0x00000000  0x00047000  0x00000000  0
[         0][INFO: hal_boot2.c:  91] [03]  04     0         0           PSM  0x001e9000  0x00000000  0x00008000  0x00000000  0
[         0][INFO: hal_boot2.c:  91] [04]  05     0         0           KEY  0x001f1000  0x00000000  0x00002000  0x00000000  0
[         0][INFO: hal_boot2.c:  91] [05]  06     0         0          DATA  0x001f3000  0x00000000  0x00005000  0x00000000  0
[         0][INFO: hal_boot2.c:  91] [06]  07     0         0       factory  0x001f8000  0x00000000  0x00007000  0x00000000  0
[         0][INFO: bl_flash.c: 391] ======= FlashCfg magiccode @0x42049c18=======
[         0][INFO: bl_flash.c: 392] mid 		0x5E
[         0][INFO: bl_flash.c: 393] clkDelay 	0x1
[         0][INFO: bl_flash.c: 394] clkInvert 	0x1
[         0][INFO: bl_flash.c: 395] sector size	4KBytes
[         0][INFO: bl_flash.c: 396] page size	256Bytes
[         0][INFO: bl_flash.c: 397] ---------------------------------------------------------------
[         0][INFO: hal_board.c:1249] [MAIN] [BOARD] [FLASH] addr from partition is 001f8000, ret is 0
[         0][INFO: hal_board.c:1257] [MAIN] [BOARD] [XIP] addr from partition is 231e7000, ret is 0

Note: The color order could be different according to the LED model.

## Troubleshooting

For any technical queries, please open an [issue](https://github.com/Ai-Thinker-AIoT/Ai-Thinker-WB2/issues) on GitHub. We will get back to you soon.
Step 6. Enter the gpio directory and create the following file

Step 7. Write the main.c file according to the schematic (code below)

Click to expand full code
c
#
include

<stdio.h>

#
include

<string.h>

#
include

<FreeRTOS.h>

#
include

<task.h>

#
include

<bl_gpio.h>

#
define
 GPIO_B_PIN 3

#
define
 GPIO_R_PIN 14

#
define
 GPIO_G_PIN 17

void

blink_test
(
void
 *param)

{
    bl_gpio_enable_output(GPIO_B_PIN,
0
,
0
);
    bl_gpio_enable_output(GPIO_R_PIN,
0
,
0
);
    bl_gpio_enable_output(GPIO_G_PIN,
0
,
0
);

while
 (
1
)
    {
        bl_gpio_output_set(GPIO_B_PIN,
1
);
        vTaskDelay(
1000
);
        bl_gpio_output_set(GPIO_B_PIN,
0
);
        bl_gpio_output_set(GPIO_R_PIN,
1
);
        vTaskDelay(
1000
);
        bl_gpio_output_set(GPIO_R_PIN,
0
);
        bl_gpio_output_set(GPIO_G_PIN,
1
);
        vTaskDelay(
1000
);
        bl_gpio_output_set(GPIO_G_PIN,
0
);
    }
}

void

main
(
void
)

{
    xTaskCreate(blink_test,
"blink"
,
1024
,
NULL
,
15
,
NULL
);
}
Step 8. Write the bouffalo.mk file (code below)
Click to expand: #
bash
#

## "main" pseudo-component makefile.

#

## (Uses default behaviour of compiling all source files in directory, adding 'include' to include path.)

include $(BL60X_SDK_PATH)/components/network/ble/ble_common.mk

ifeq ($(CONFIG_ENABLE_PSM_RAM),1)
CPPFLAGS += -DCONF_USER_ENABLE_PSRAM
endif

ifeq ($(CONFIG_ENABLE_CAMERA),1)
CPPFLAGS += -DCONF_USER_ENABLE_CAMERA
endif

ifeq ($(CONFIG_ENABLE_BLSYNC),1)
CPPFLAGS += -DCONF_USER_ENABLE_BLSYNC
endif

ifeq ($(CONFIG_ENABLE_VFS_SPI),1)
CPPFLAGS += -DCONF_USER_ENABLE_VFS_SPI
endif

ifeq ($(CONFIG_ENABLE_VFS_ROMFS),1)
CPPFLAGS += -DCONF_USER_ENABLE_VFS_ROMFS
endif
2. Compile and Flash
Step 1. Enter the ~/Ai-Thinker-WB2/applications/get-started/gpio directory
cd ~/Ai-Thinker-WB2/applications/get-started/gpio

Step 2. Run make -j8

Step 3. Run make flash p=/dev/ttyUSB0 b=115200 (the module needs to be connected to the virtual machine at this point)

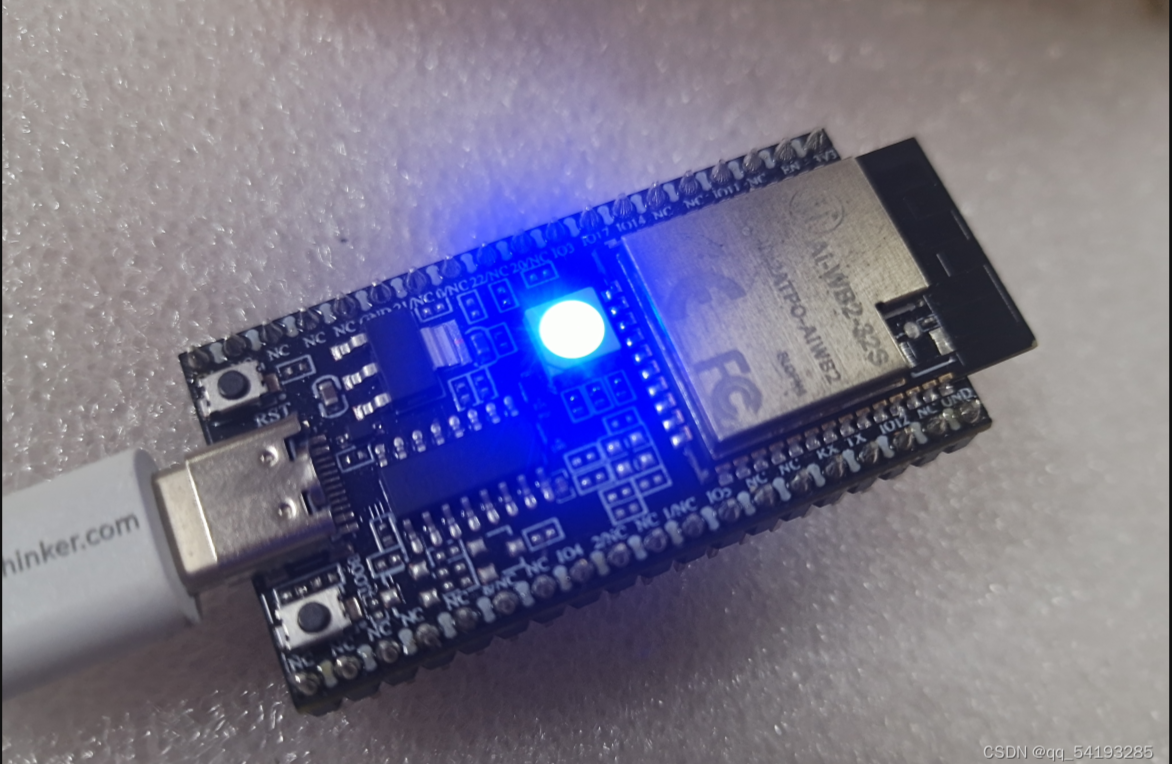
3. Execution Result Screenshots


Original link: <https://blog.csdn.net/qq_54193285/article/details/135907812?spm=1001.2014.3001.5501>