
BW60-12F Web Flashing Guide
This guide uses BW60-12F AT Middleware Standard Firmware V4.18_P1.0.23 (Firmware ID 3739) to demonstrate how to flash a merged firmware image with the Ai-Thinker Documentation Center's online flashing tool and check the boot log over a serial connection. The serial port, flash manufacturer, and device addresses shown in the screenshots are examples from this session. Your device may report different values.
The tool and screenshots use Chinese interface labels. English descriptions below include the Chinese labels to help you find each control.
Prerequisites
- Download and extract BW60-12F AT Middleware Standard Firmware V4.18_P1.0.23 (Firmware ID 3739). Locate the merged firmware image:
(3739)rtl8711fx_V4.18_P1.0.23_ota1.3_at_demo_2026072801.bin. - Connect the BW60-12F development board to your computer. For a bare module, connect a 3.3 V power supply and a USB-to-serial adapter as described below. Open the online flashing tool in a desktop browser that supports Web Serial.
| Example parameter | Value |
|---|---|
| Firmware ID | 3739 |
| Firmware version | V4.18_P1.0.23 |
| Start address | 0x08000000 |
| File size | 1,736,128 bytes |
Select the correct image
Use the merged BIN image listed above for web flashing. The Boot, App, and ota_all.bin files in the firmware package's original-files directory (原始文件) are intended for other flashing or upgrade methods. For other firmware releases, use the filename and file size specified in the corresponding package.
Flashing Procedure
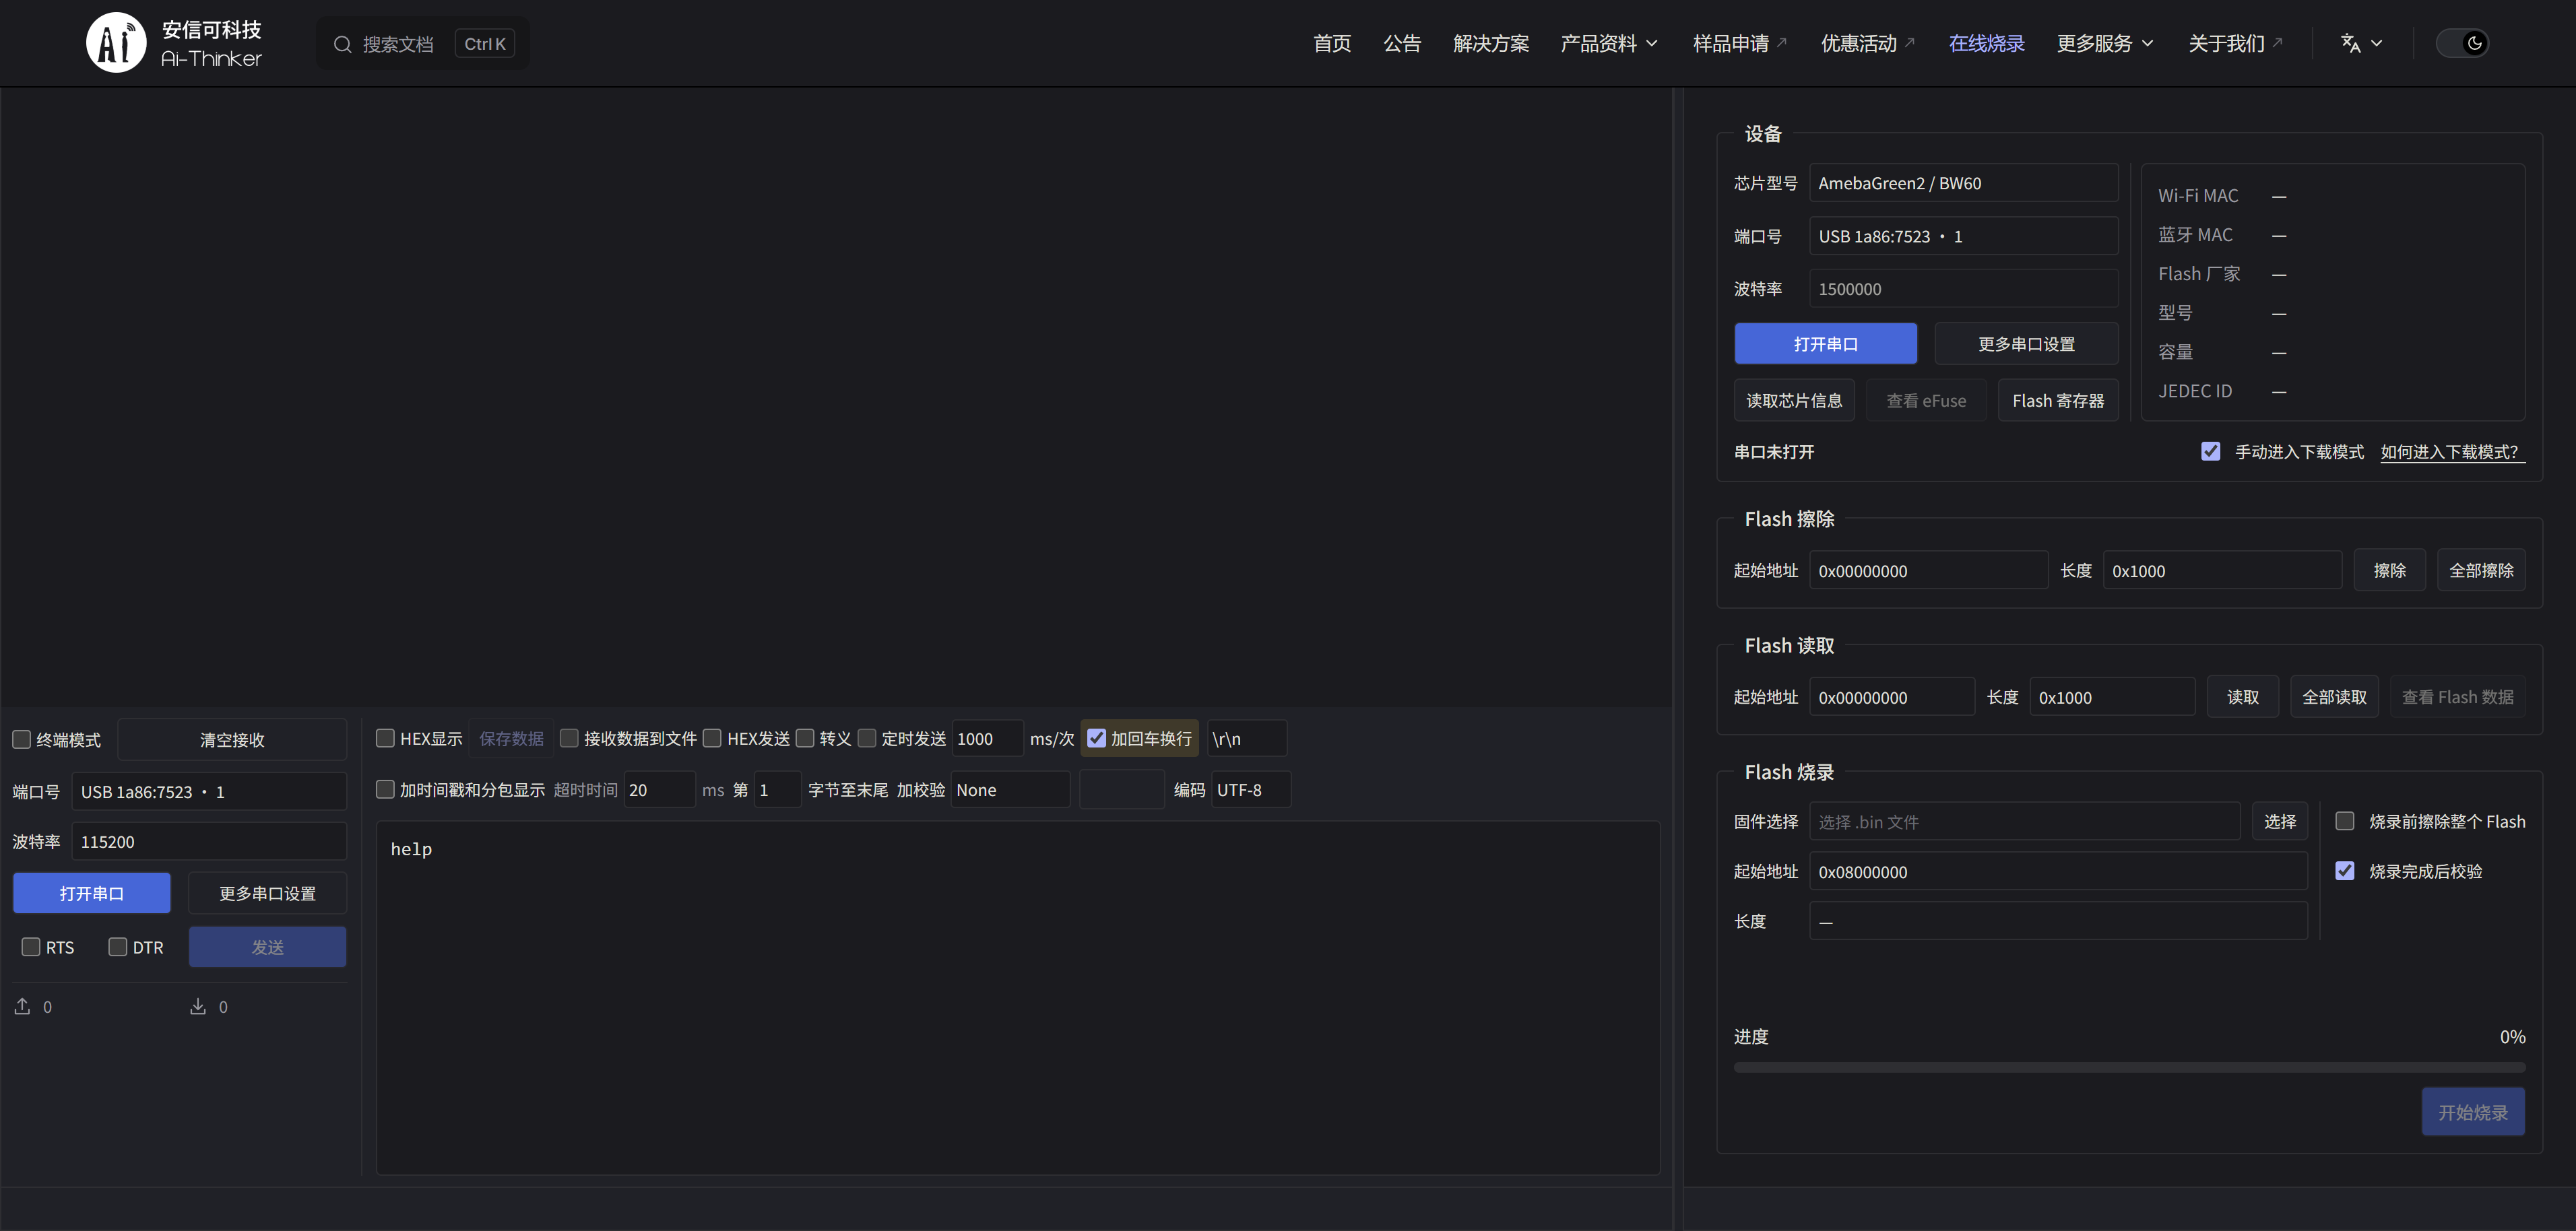
1. Open the tool and select the chip
Click Online Flashing (在线烧录) in the documentation site's top navigation bar. In the Device (设备) area on the right, select AmebaGreen2 / BW60 as the chip model.
2. Authorize and open the flashing port
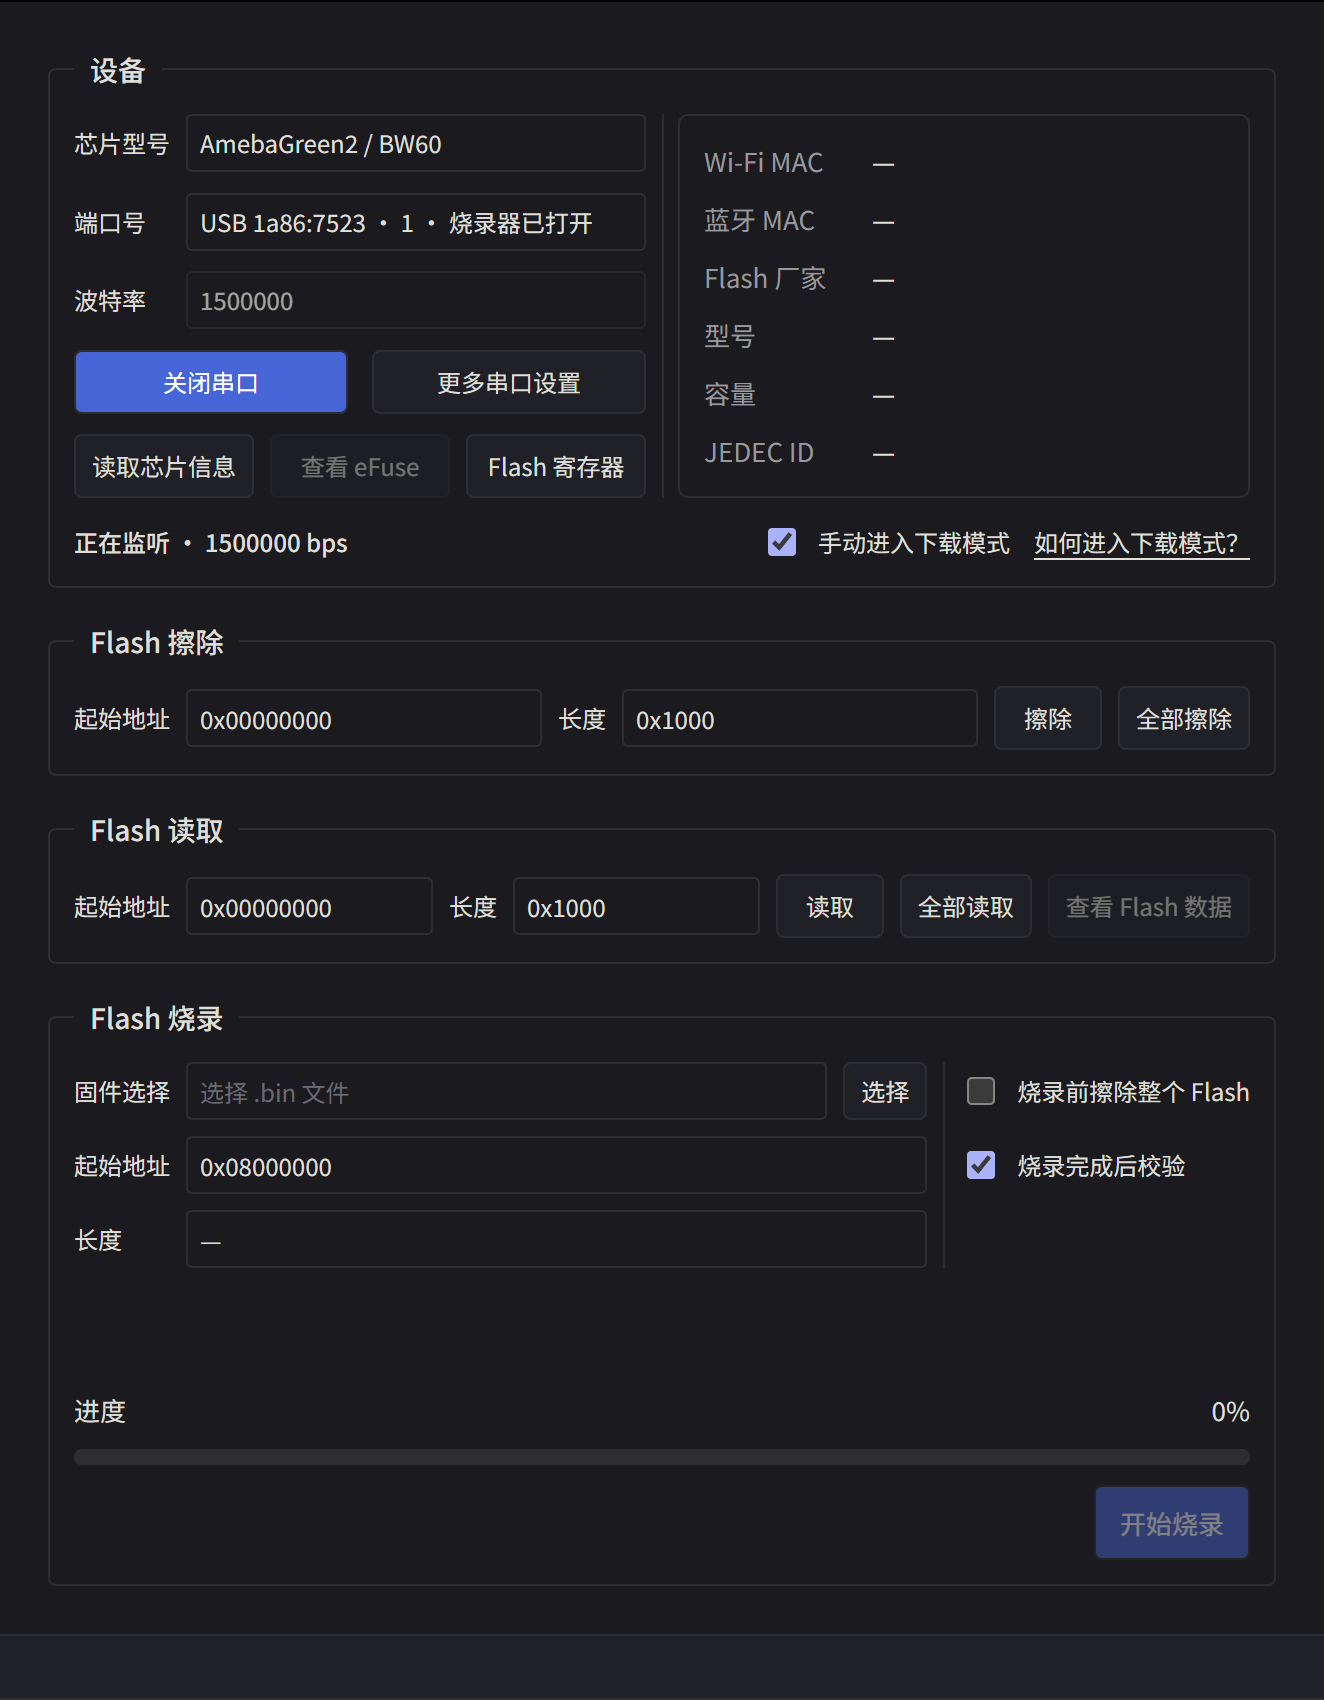
Select the appropriate serial port in the flasher on the right, grant access when prompted by your browser, and click Open serial port (打开串口). The BW60 web flasher uses a fixed baud rate of 1500000 bps.
3. Enter download mode
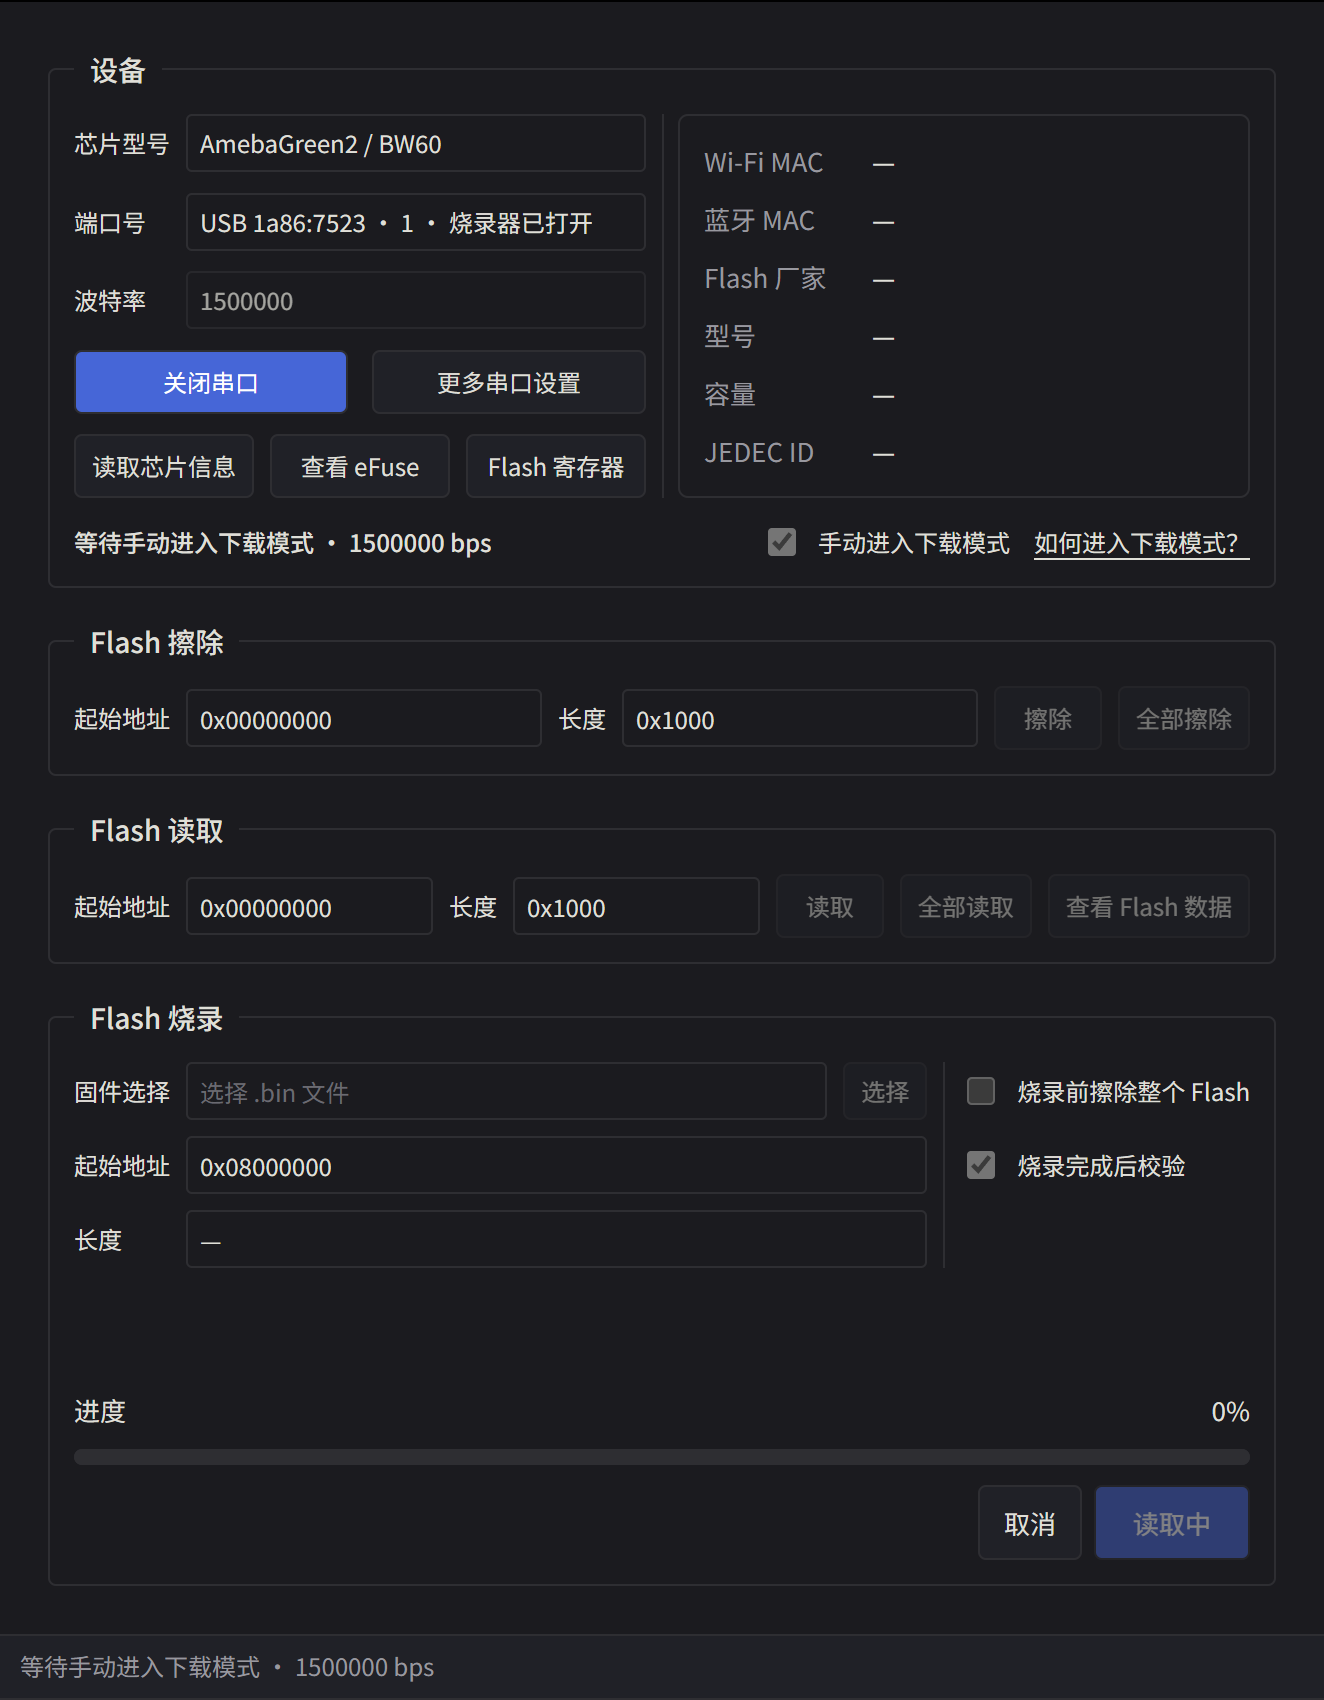
Select Enter download mode manually (手动进入下载模式), then follow the instructions for your hardware:
- BW60-12F development board: Hold BURN, press and release EN, then release BURN.
- BW60-12F bare module: Connect the USB-to-serial adapter's TXD to the module's
LOG_RXand RXD toLOG_TX. Connect both grounds and power the module with 3.3 V. With power disconnected, shortLOG_TXto GND. Apply power, then remove the short. For wiring and pin locations, click How do I enter download mode? (如何进入下载模式?) in the tool.
Wait until the tool reports that the device has entered download mode. Keep the flashing port connected.
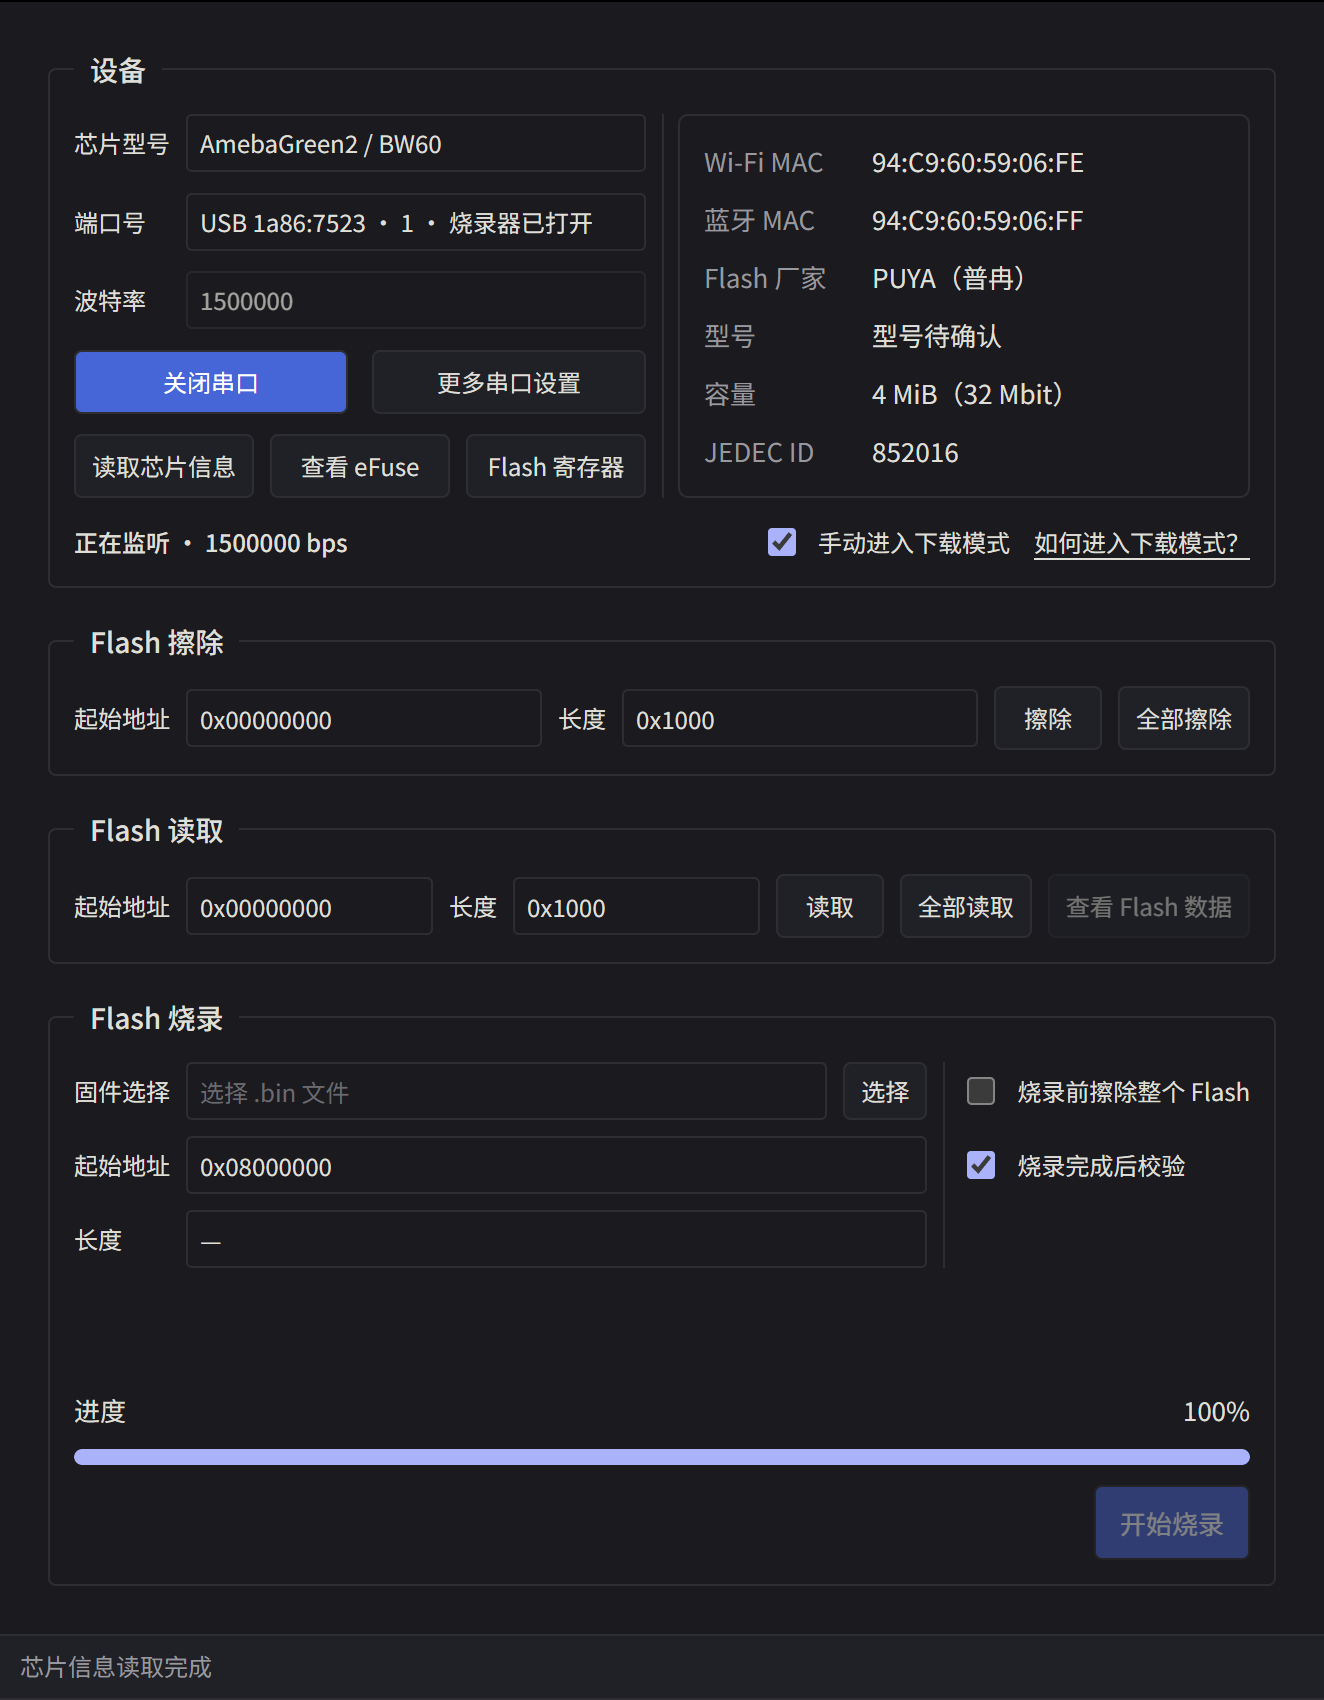
4. Read the chip information
Click Read chip information (读取芯片信息) and confirm that the tool can read the flash manufacturer, capacity, and JEDEC ID. The device in the screenshot has 4 MiB of PUYA flash with JEDEC ID 852016. These values may differ on your device.
5. Open the firmware picker
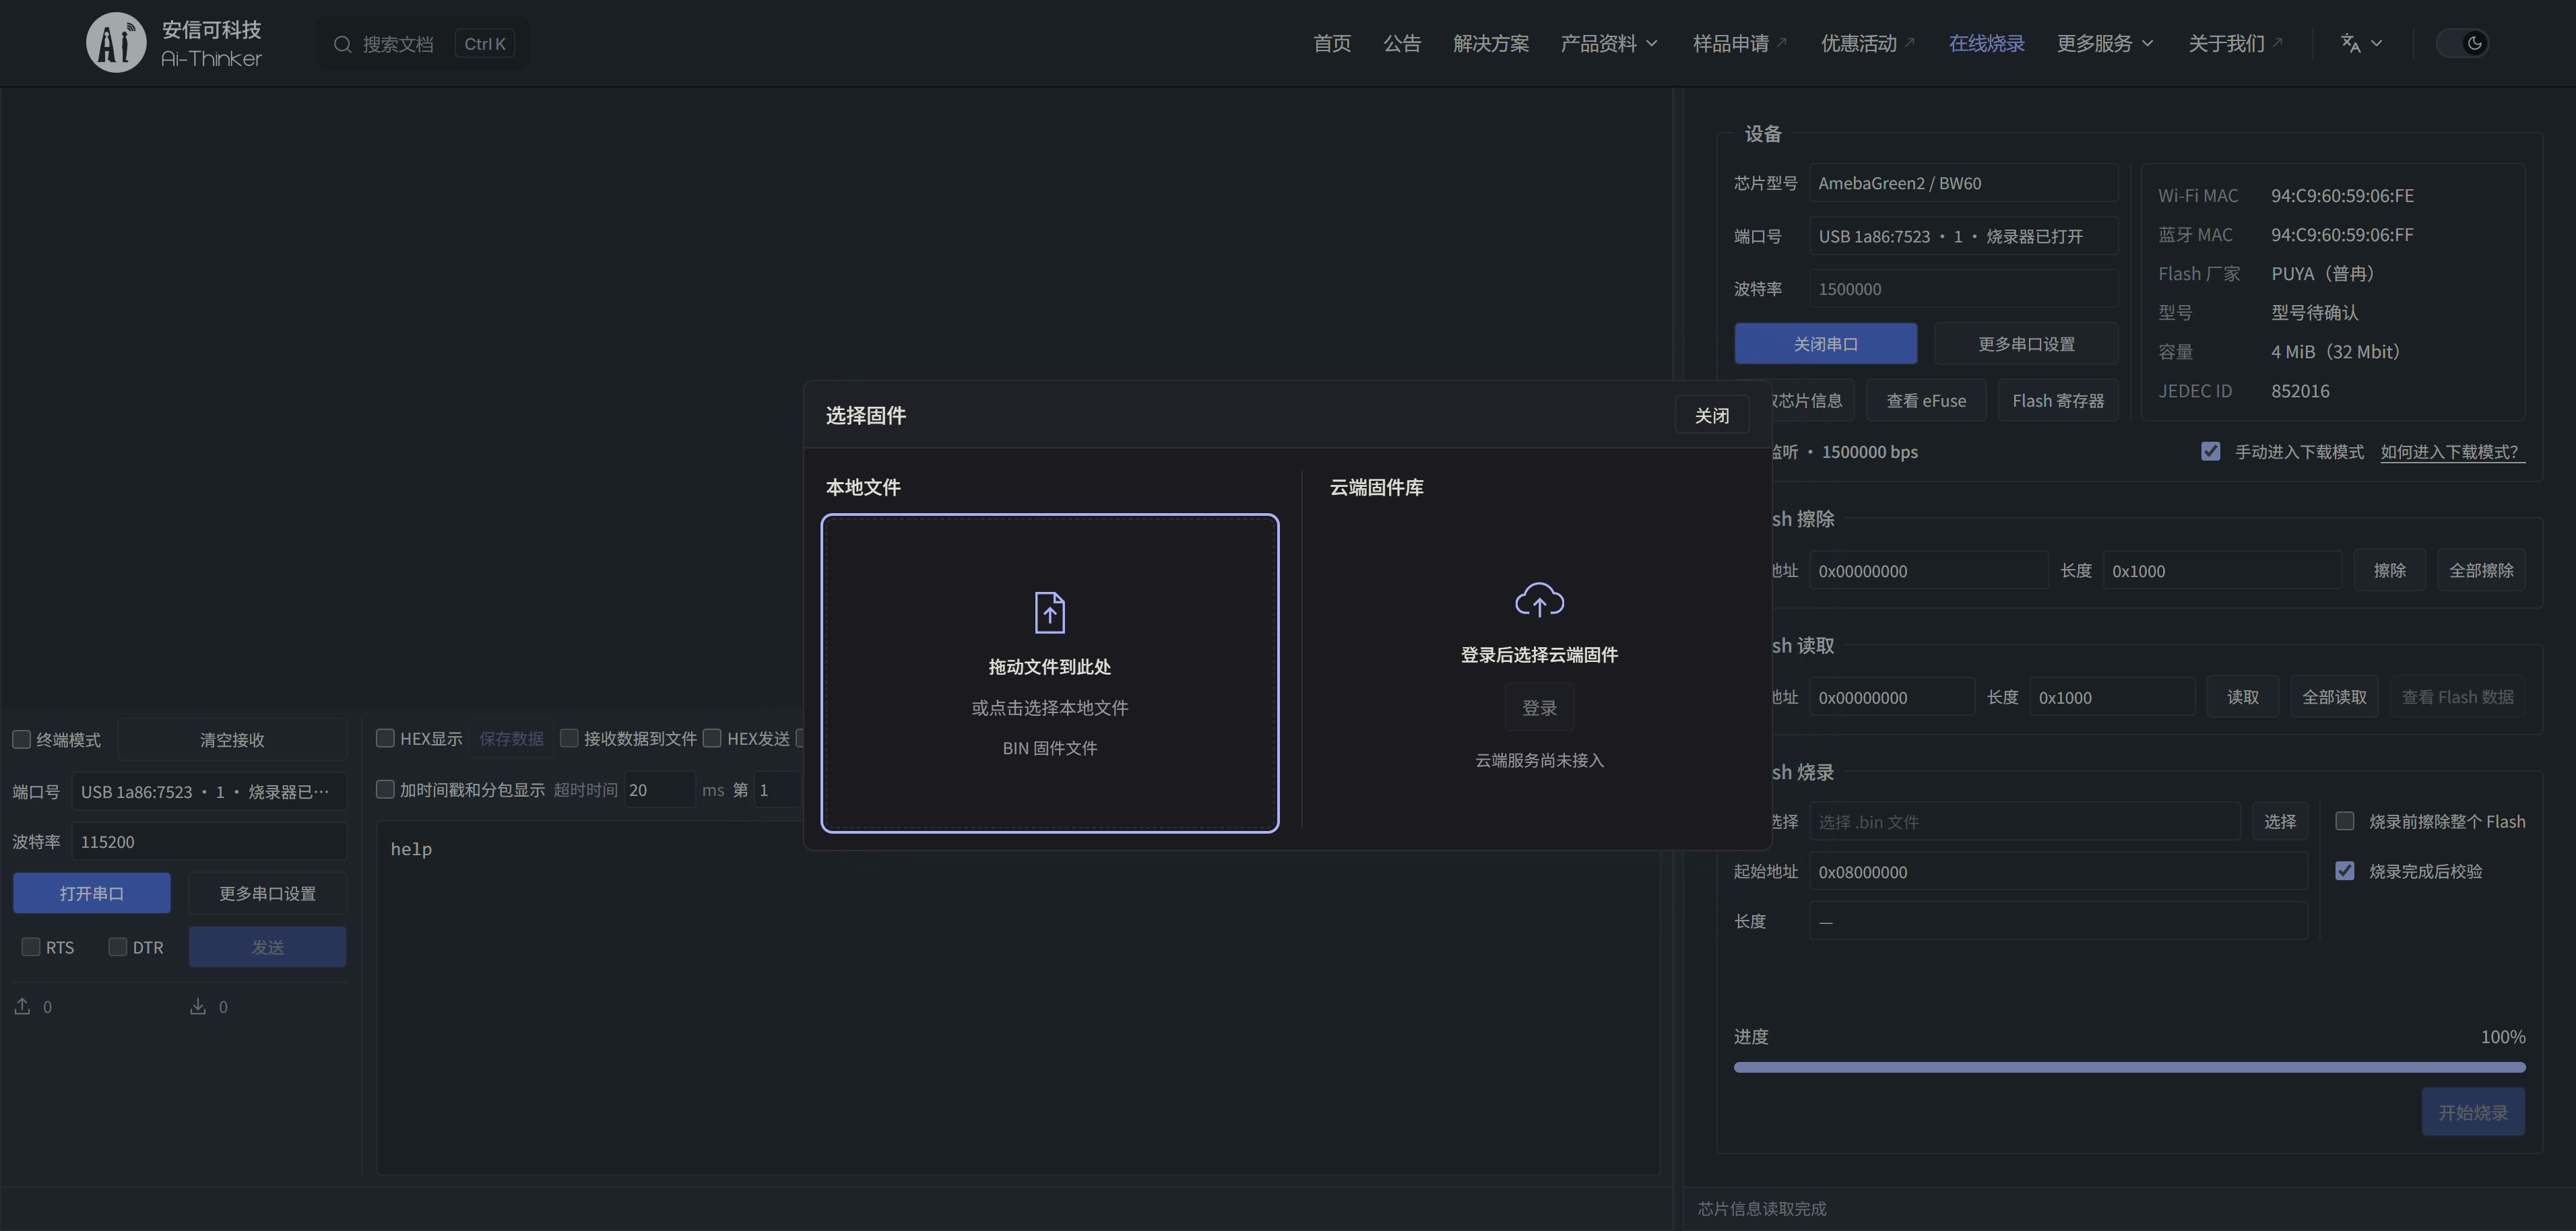
In the Flash programming (Flash 烧录) area, click Select (选择). Click the local-file area or drag the BIN file into the window.
6. Check the firmware and settings
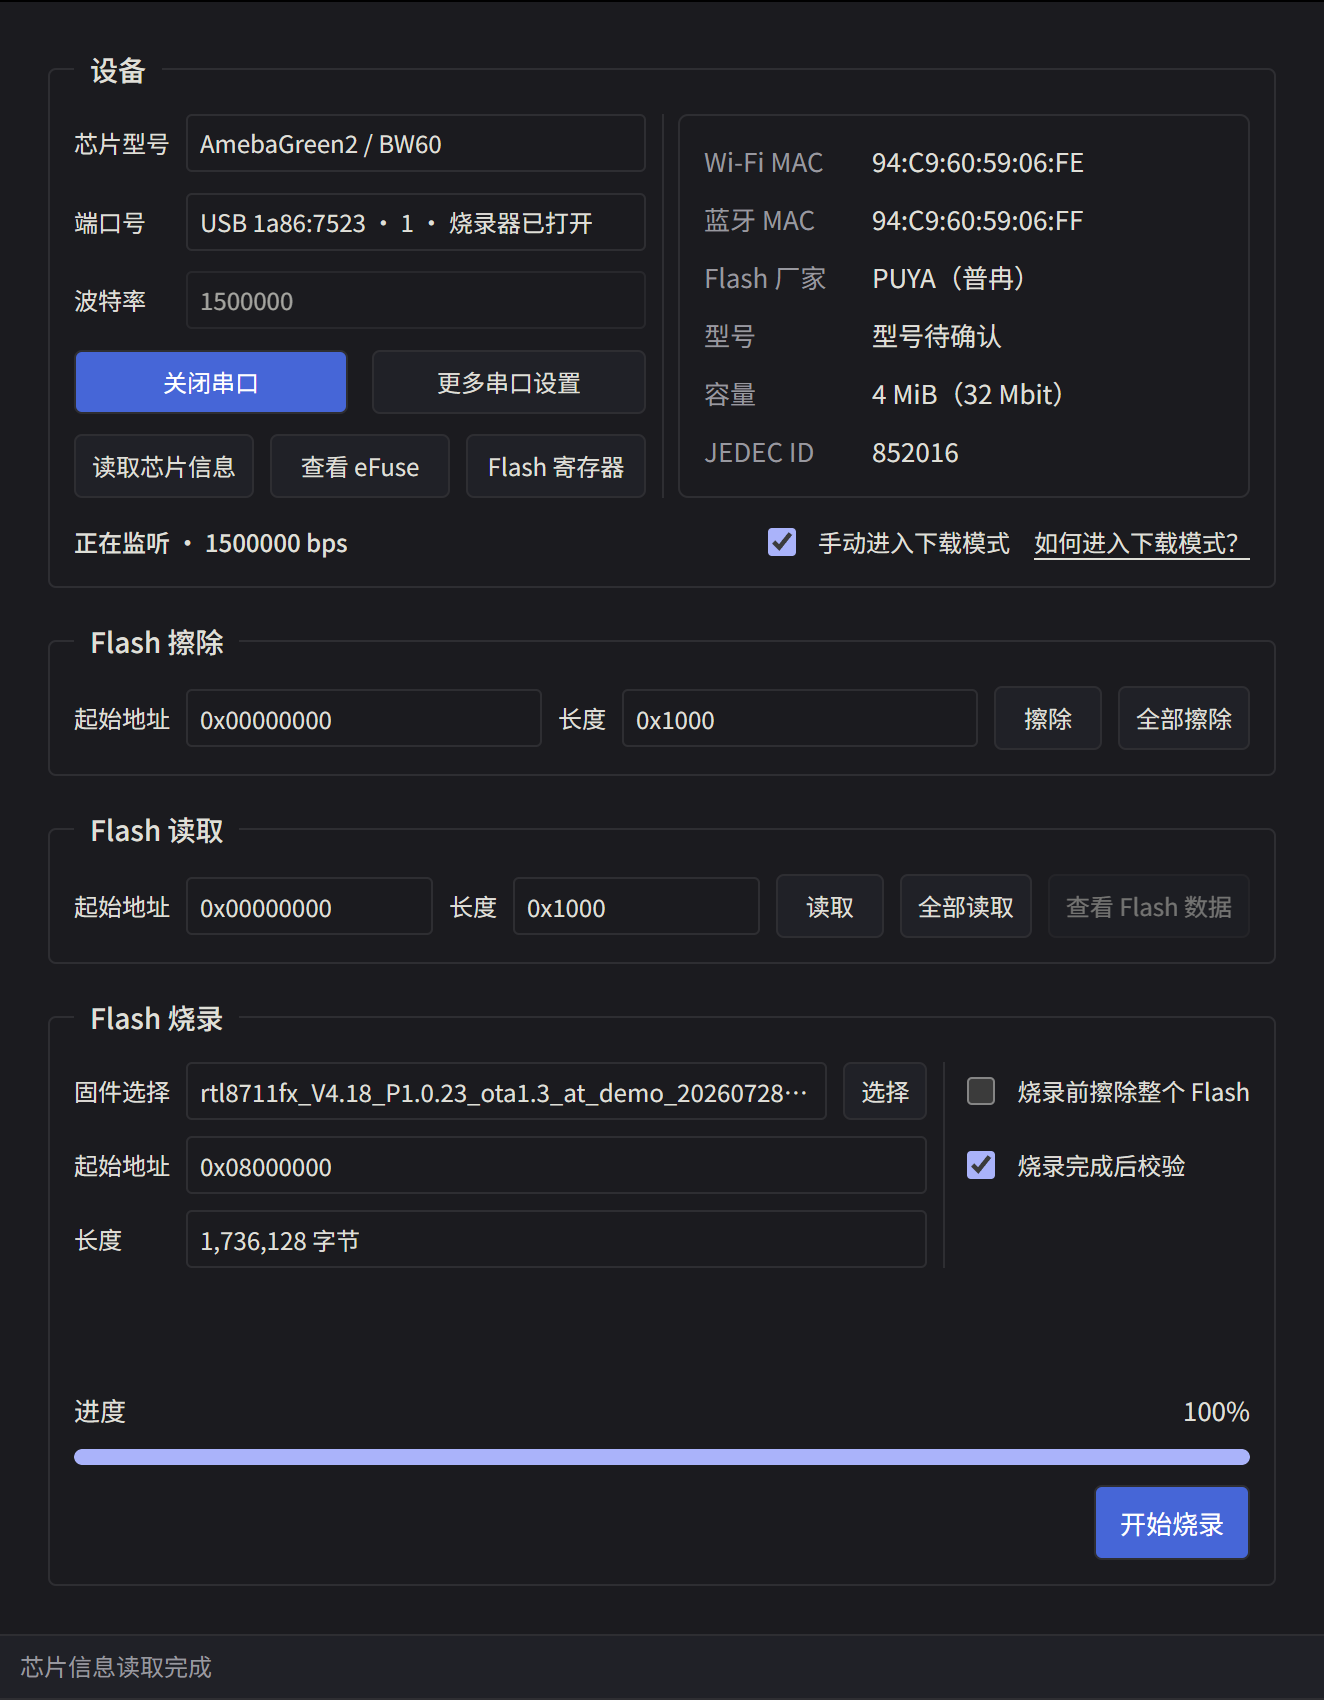
Select (3739)rtl8711fx_V4.18_P1.0.23_ota1.3_at_demo_2026072801.bin. Confirm that the file size is 1,736,128 bytes and the start address is 0x08000000. Keep Verify after flashing (烧录完成后校验) selected. In this example, leave Erase the entire flash before programming (烧录前擦除整个 Flash) unchecked; the tool erases the range it will write to.
7. Start flashing and wait for erasure
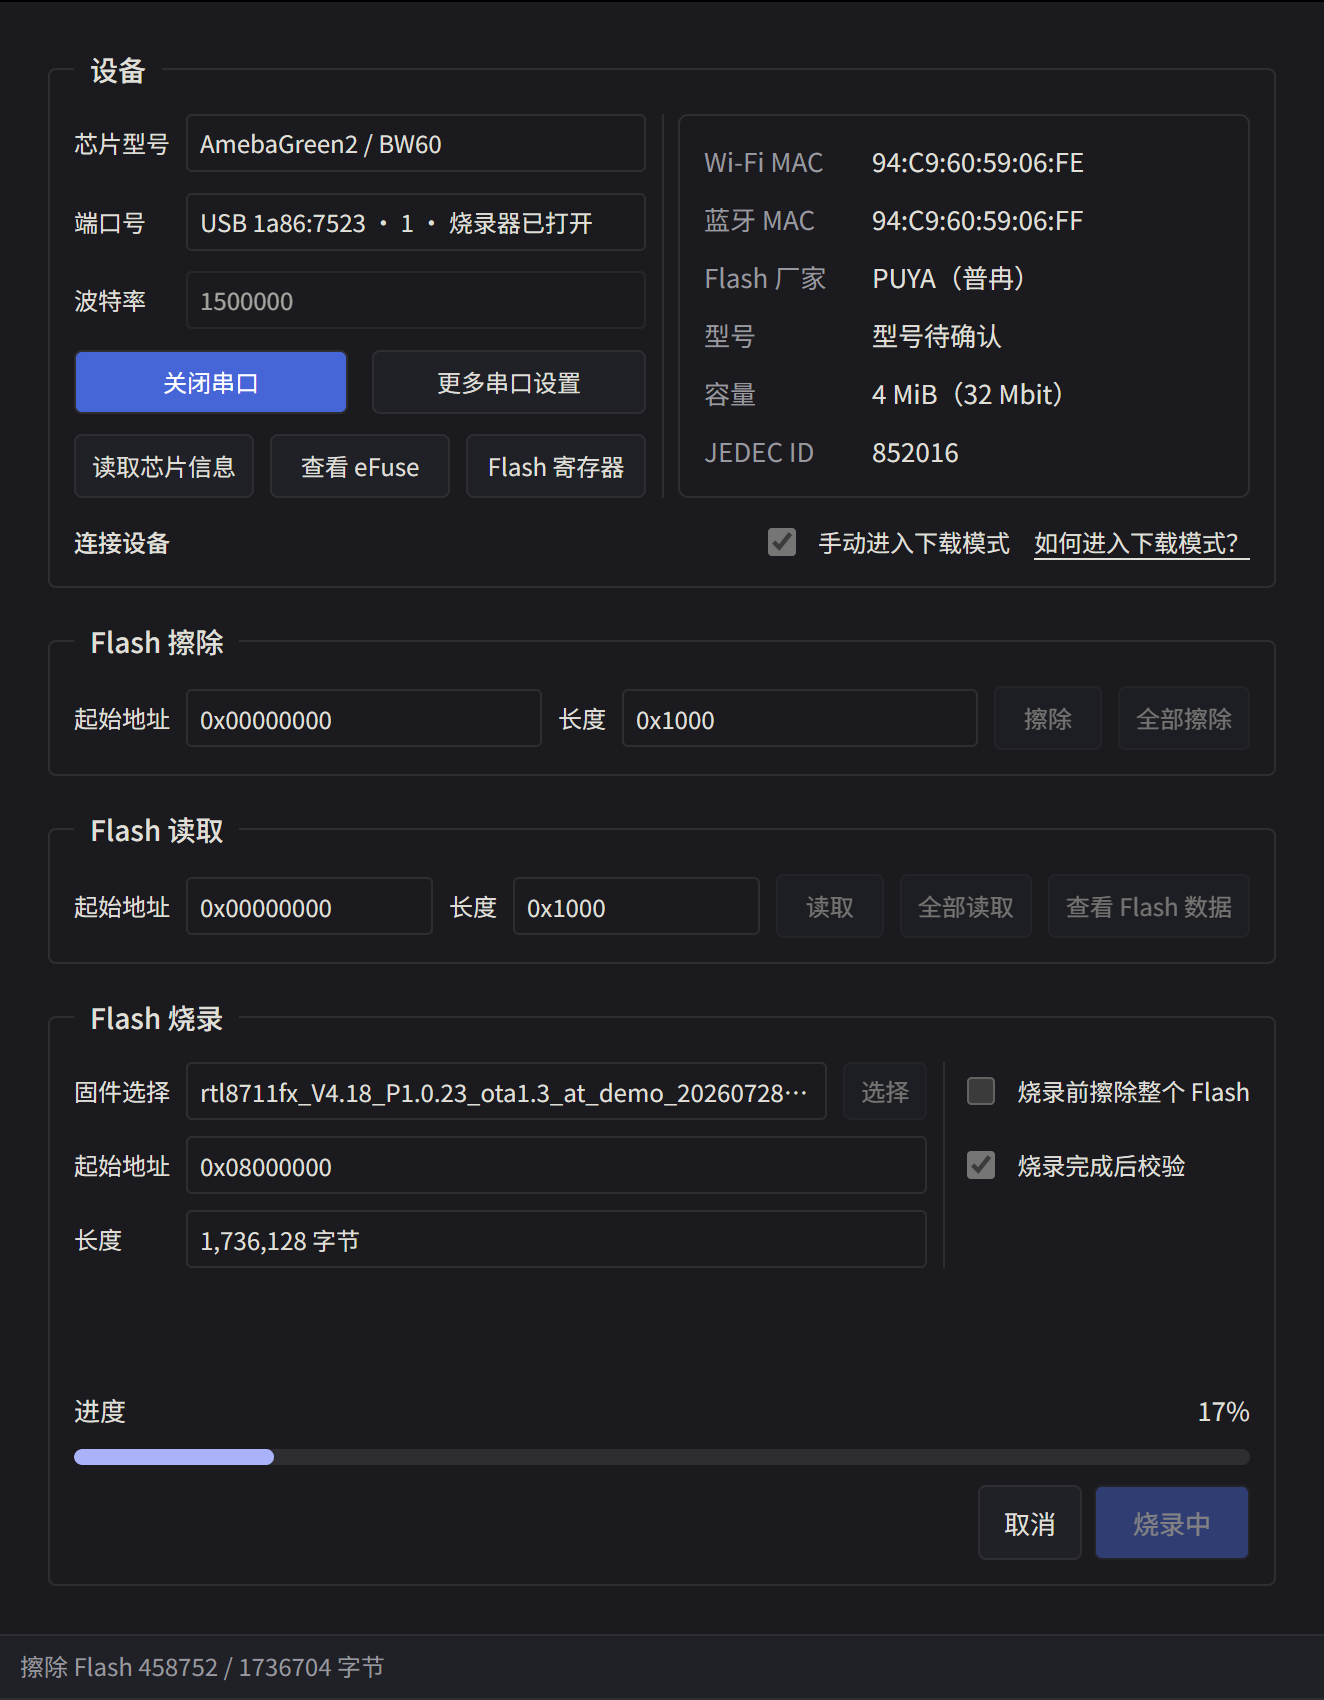
Click Start flashing (开始烧录). The button changes to Flashing (烧录中), and the status bar displays the current stage. Keep the device powered and the serial port connected throughout the process. Do not reset the device.
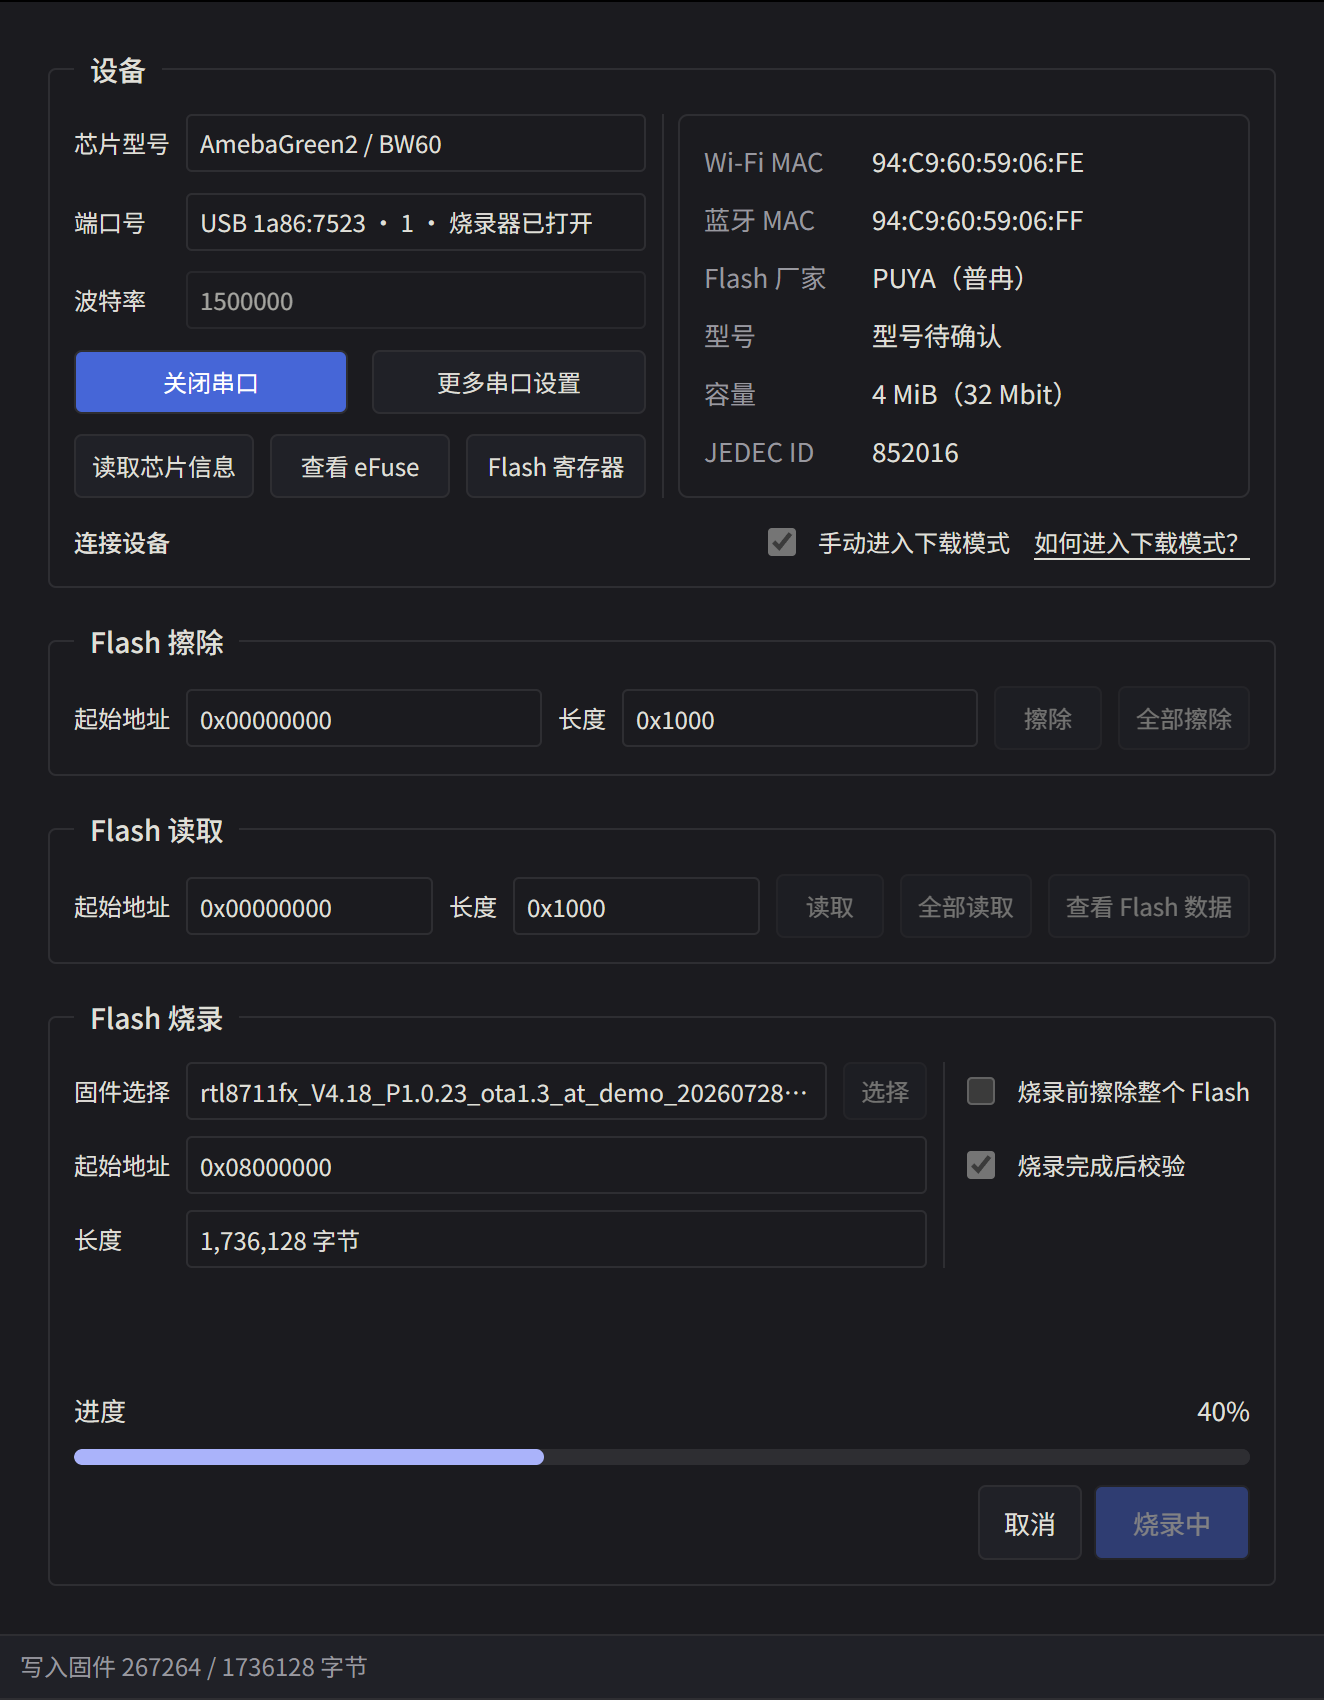
8. Wait for the firmware to be written
Monitor the progress bar and the number of bytes written in the status bar. Wait until writing finishes. Do not close the page or disconnect the serial adapter.
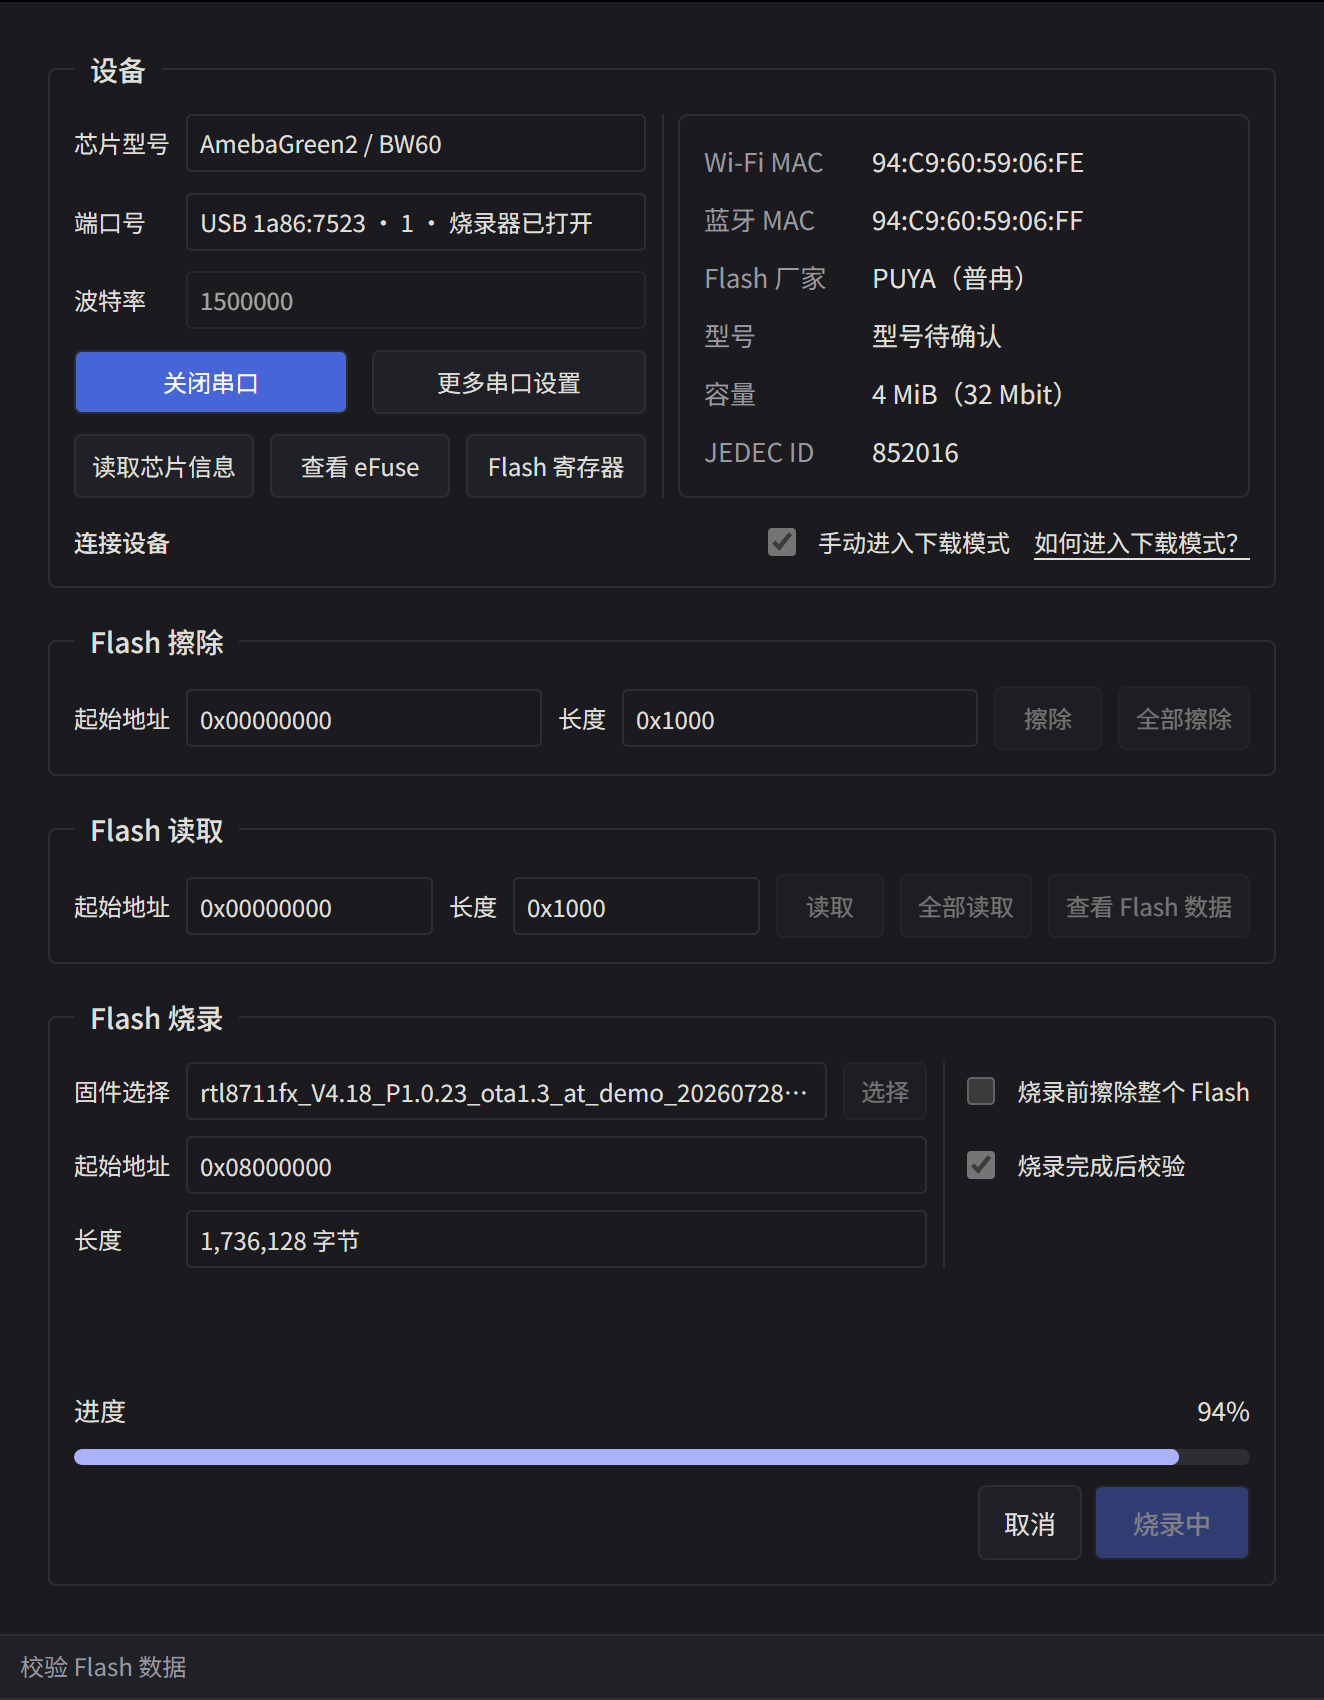
9. Wait for verification
After writing finishes, the tool automatically verifies the data in flash. Wait for verification to complete.
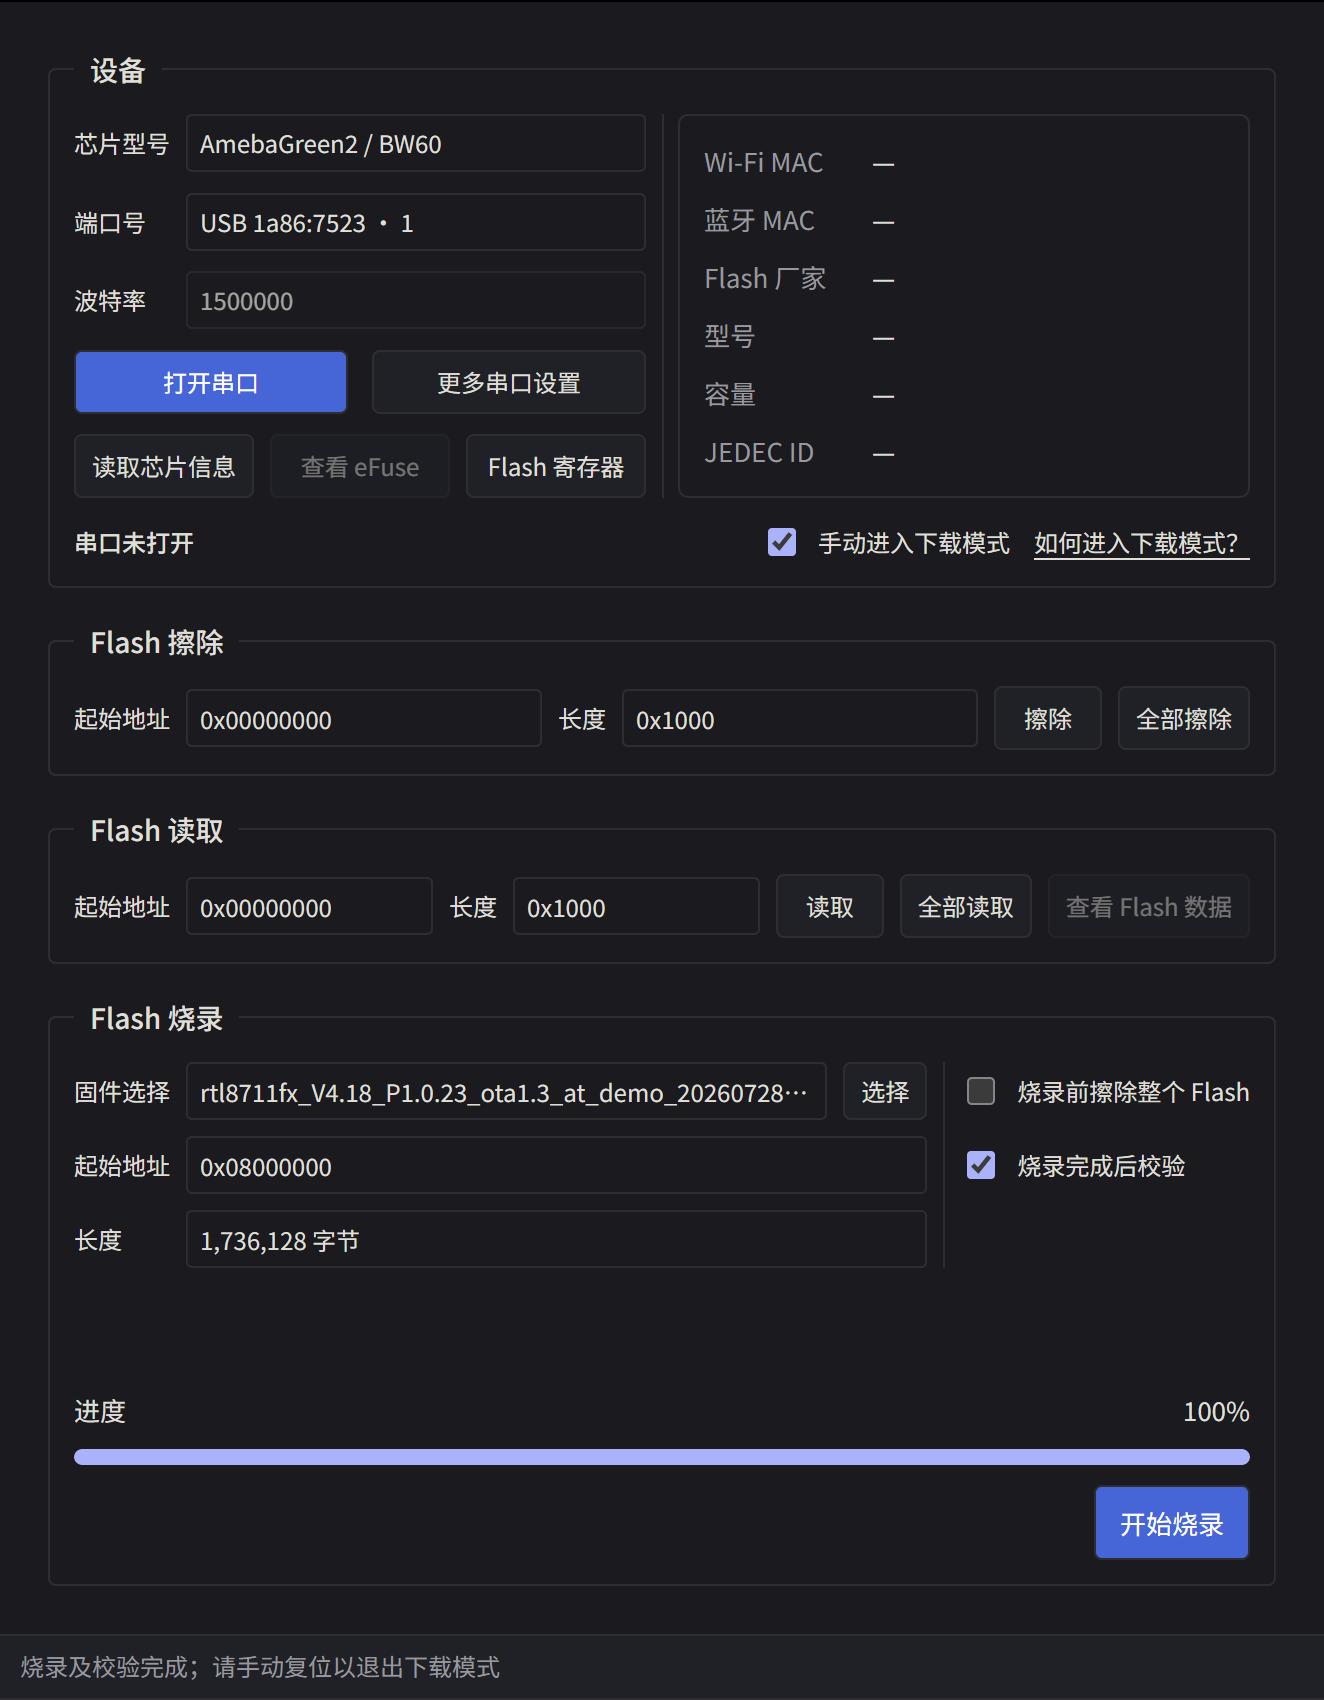
10. Confirm completion
Flashing is complete when progress reaches 100% and the tool displays Flashing and verification complete (烧录及校验完成). Follow the on-screen prompt to reset the device manually and exit download mode.
Check the Boot Log
11. Open the serial debugger
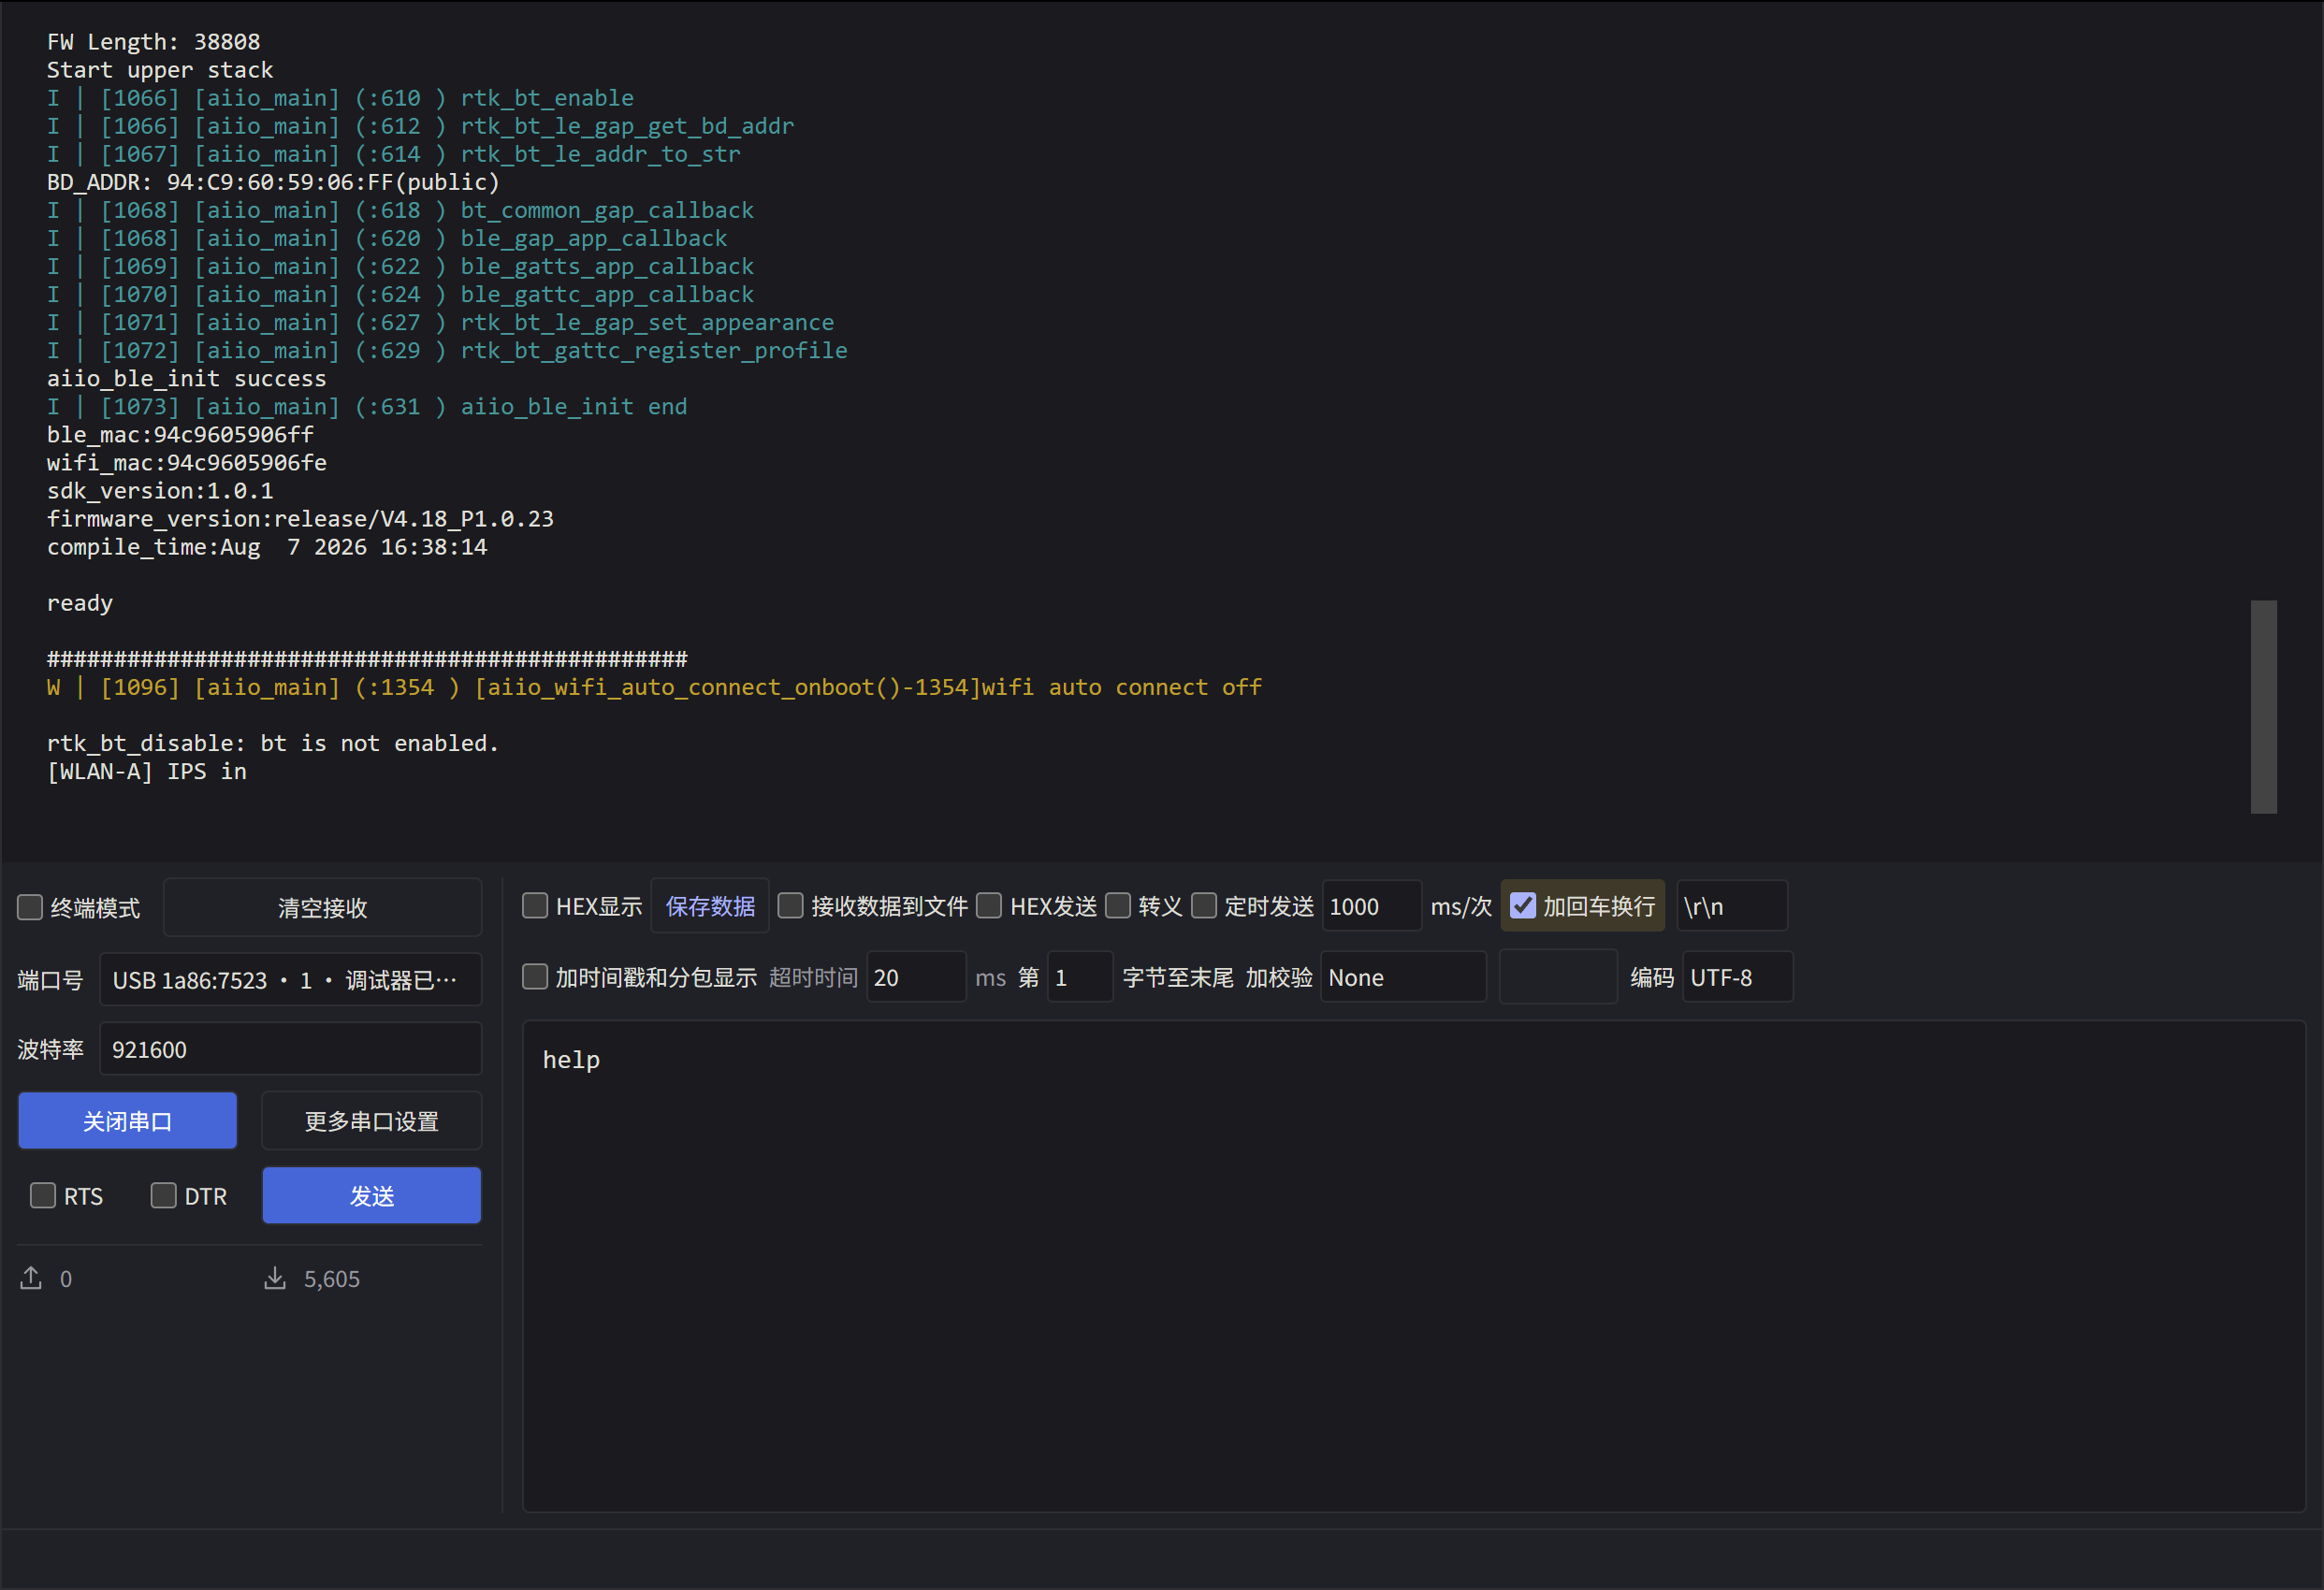
Make sure LOG_TX is no longer shorted to GND. In the serial debugger on the left, select the same serial port and set the baud rate to 921600 bps. If the flasher still has the port open, close it there first. Click Open serial port (打开串口), then press EN to reset the device without pressing BURN. 1500000 bps is the web flasher's baud rate; 921600 bps is the application log baud rate for the firmware used in this example. The screenshot below shows a reference boot log from the same firmware version.
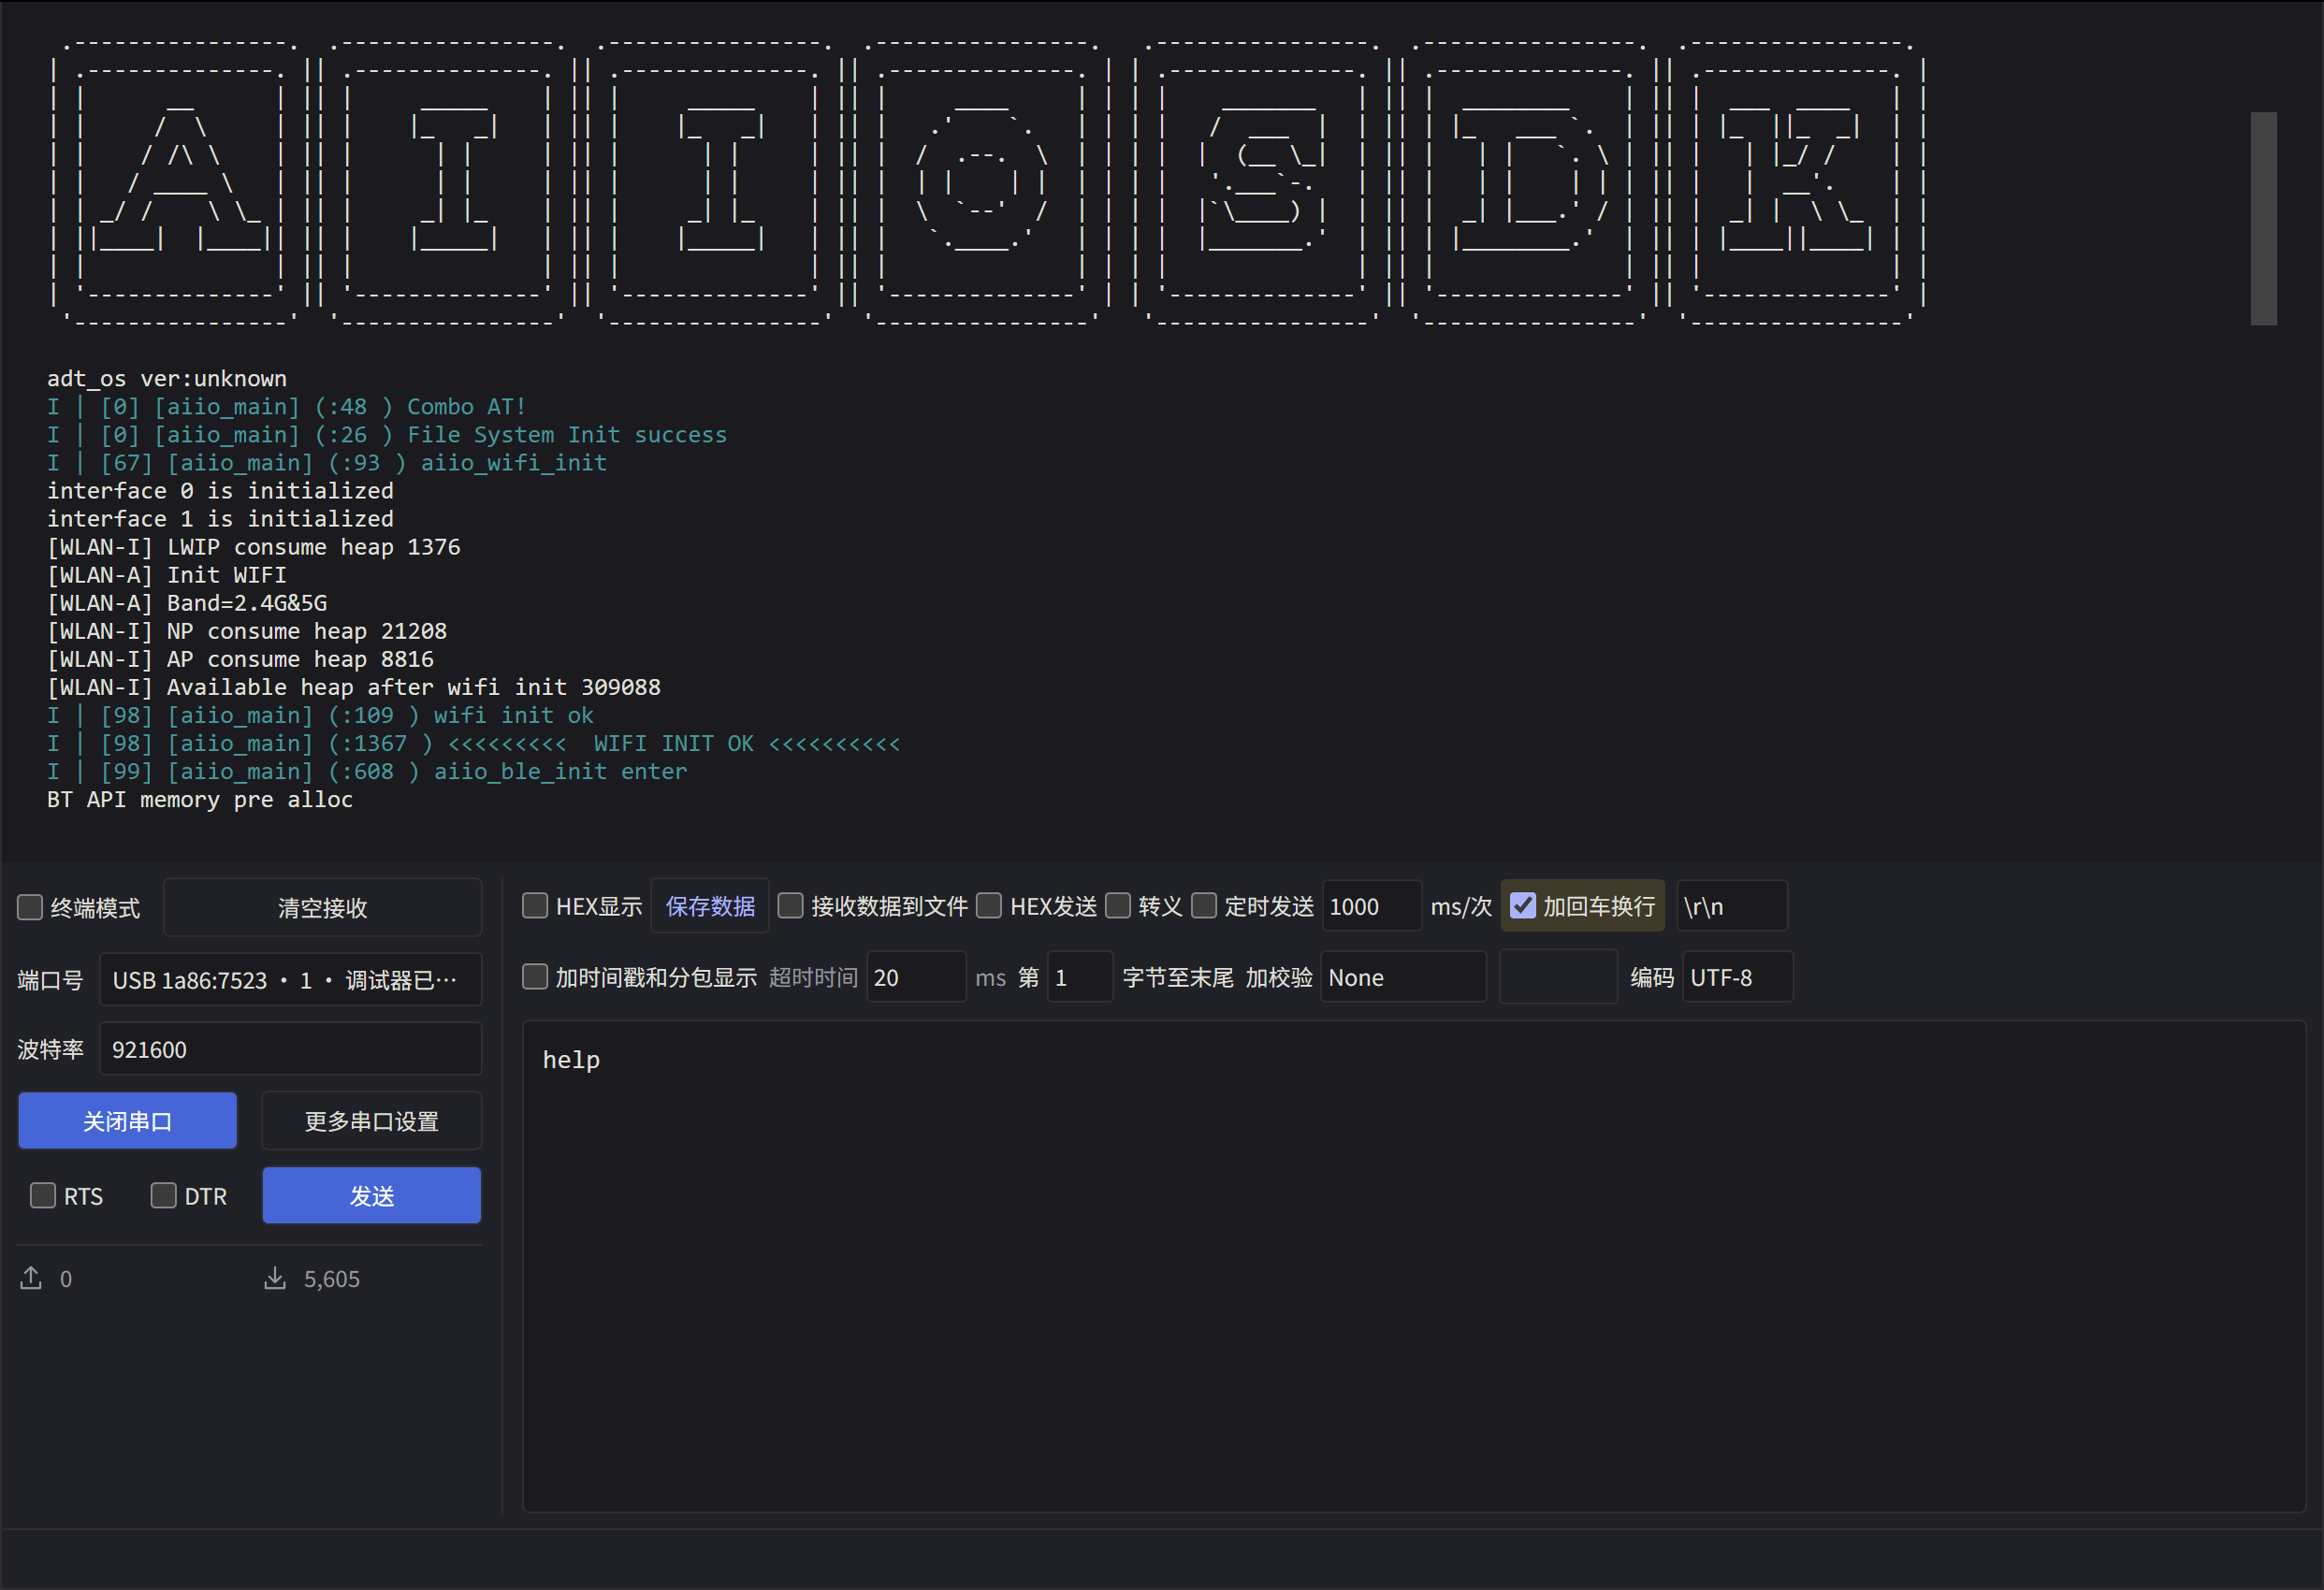
12. Confirm that the firmware is ready
After a normal boot, the serial log shows firmware version V4.18_P1.0.23 and ready. The screenshot below is reference output from the same firmware version. The exact log may differ on your device.