ESP32-A1S environment construction and use
Environmental configuration
Development environment: ubuntu64 bit
Development framework: esp-adf
Run the image in VMware, then open the virtual machine terminal, and switch to the appropriate path, here is the ~/esp path, open the virtual machine terminal (shortcut key: Ctrl+Alt+T), enter:
cd ~/esp


git clone --recursive https://github.com/donny681/esp-adf.git
The download process may take a long time. After the download is complete, configure the ADF_PATH path:
``sudo vim ~/.bashrc
Add the path at the end of the file:
source ~/.bashrc
The specific path parameters are configured according to your actual situation. After the configuration is completed, enter:
echo $ADF_PATH
Then check whether the path configuration takes effect, enter:
cd ai-example/play_mp3
If the path configuration is successful, the corresponding configuration path will be output, and the environment configuration is now complete.


====Program compilation ====
Then enter the program routine folder to configure routine options:
make menuconfig ls /dev/ttyUSB*''
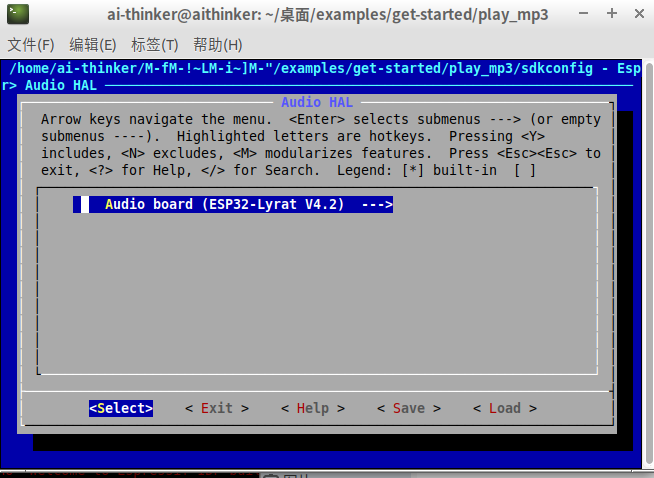
Then the following configuration page will pop up:


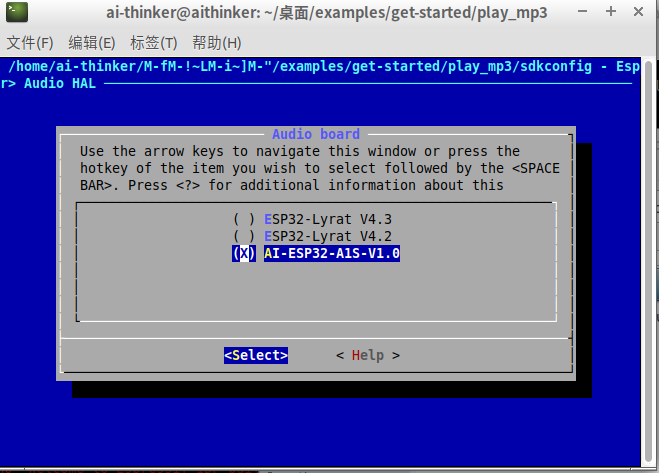
Select Audio_HAL with the cursor and click the enter key, the following options for the audio board will appear:


Then continue to click enter to select the corresponding development board, here is the ESP32-A1S model


Then execute the make command to compile the program after saving, and the corresponding firmware will be generated after compiling.

====Download and run====
Connect the serial port of ESP32-A1S to the computer. If you are using a module, pay attention to download some of the circuit and pin configuration. If it is an ESP-A1S development board, directly supply power to the development board and connect the USRT socket to the computer, and then connect the serial port Connect to the virtual machine, check whether the serial port is connected to the virtual machine, you can run it in the terminal:
If the device is connected, all USB serial devices will be listed in the terminal. If ESP32-A1S is not connected to ttyUSB0, you need to configure the menuconfig serial port according to the actual situation and re-execute make to compile, make menuconfig → Serial flasher config → Default serial port click enter and fill in the corresponding serial port number.
 After connecting, execute make flash in the terminal to burn the program into the flash, and execute make monitor to start the program and view the log. You can also directly execute make flash monitor. Some routines need to insert an SD card to run normally.
Common commands
make menuconfig: enter the configuration menu
make: Compile the program (you can use the -j parameter for multi-core compilation, for example: make -j5)
make flash: burning program
make monitor: monitor serial port data
make help: view help information